
I think there’s been enough rant about the new MBP. For me personally, I’ve been waiting patiently, and am always open to be convinced. I’m not this time, and have hence explored, and implemented, some alternatives. They may not be useful for you, but if you use a 2013 MacBook Air, and if you’re running out of disk space, and look moreover for a solution to have versioned backups all the time – this post may be for you.
So in my situation, I was constantly running low on disk space. Hence, I need more of that. I’m already not putting any media files on the internal disk. But still, I was strongly looking forward to the option of having a bigger SSD than the 500 GB that I have.
How to add 1 TB to your MBA
When researching, I found this product from OWC. It comes, optionally, with an external housing for your existing SSD. I’ve bought it, and put it in. Here’s the ups and downs.
Pros:
- Yes, 960 GB space now!
- One more 500 GB external SSD now, at USB 3.0 speed.
Cons:
- Performance: They are really slow if you have anything newer than a 2013 MBA. This is discussed, e.g., on this German site. Essentially, they use only 2 PCIe lanes, which is the same for the 2013 MBA, so the effect is not as noticeable there, but still they are slower – the read speed stayed the same as with the original SSD, but write speed dropped from 700 MB/s down to like 400 MB/s. This is not affected by whether I’m talking to a directory that has HFS+ compression on or not, and neither is it affected by whether I’m talking to a partition that has FileVault encryption on or not. Performance seems to be a lot better since I’ve manually deleted my spotlight index, even while the re-index is running. Since I also have a LaCie little big disk, I’ve the perfect scratch space for video editing (not for video compression, see here), so when it comes to having to deal with a lot of IO, I can easily revert to an option I already have.
- Energy usage: My power consumption just skyrocketed, and I’m not yet sure whether I’ll actually revert the whole thing only because of that. I can live with the performance impact, and also with the boot issues (see below), but having my battery life cut in half is no option for me. It may be, though, due to spotlight index being recreated, so I’ve no definitive answer. I’ll update that post in some days when spotlight is back to normal – right now I’m constantly at about 50% CPU usage, which is not normal for me.
- Heat: This thing really gets warm. So besides heating your lap, it seems to be just an indicator for the increased energy usage. See above.
- Hassle-Free – oh rly? This warrants its own discussion, so see below.
Hassle-Free?
Look I’m not afraid of editing partition tables. And since I’m a backup maniac, I don’t care about messing up my partitions. There’s mostly always a copy. Also, I’m quite amazed by the many boot options that Apple provides for if you’re running into some issues. So for example, on and until El Capitan, if your system had problems, you’d just hold down the Alt key until the startup chime (it’s the Cmd key now for Sierra), and be shown the available disks – including your emergency partition. If you hold down like Alt+R, you’ll have the option of doing a recovery from the internet.
So about the change procedure that is supposed to be hassle free, here are my experiences. Basically, what you do is this:
- Create a full backup, preferably with some software like Carbon Copy Cloner, to some external disk. TimeMachine might also be an option, and the system recovery boot might be a third option – I tried neither, since Carbon Copy Cloner (CCC) is just awesome.
- Use the screw drivers provided with the OWC kit and replace the internal SSD by the new one. 10 minutes, really. Very simple.
- Boot from your external disk (your backup) and restore to the now so much bigger internal SSD.
Sounds easy? Yes, it is. Until, well, I somehow crash landed my system just after activating FileVault on the external disk. I call it “external” since what OWC does is to create a RAID-0 of two SSDs, which the Mac will recognize as an external disk – requiring you to do something extra for Bootcamp if you use it (I don’t). So nevertheless, having seen that, let’s call it the internal disk, from now on. When I rebooted, it took a long time, and then I saw a folder icon with a question mark – as Google revealed, a sign that it did not find an internal disk.
Yes, you read that right. I am not saying it did not find a boot partition on the internal disk. It just didn’t even see the disk. That was scary.
What was more scary was that when I plugged in my external CCC backup disk, and used the “hold Cmd key down to chose start volume”, it suddenly found the internal disk again This very much went back and forth, and I could not really make sense of what was going on. Sometimes it would just boot, sometimes, well, I had to put in my external disk again just to make it see my internal disk.
So that’s what you don’t want to have if you’re in front of a customer. I needed a better control over my partitions at boot time, so I bought Paragon’s Hard Disk Manager for Mac. One great thing it does (besides running at full functionality during trial), it allows you to create a more functional recovery partition, that contains Paragon’s disk manager. That disk manager is just so much better at partitioning than DiskUtility, that it sounds like a cool tool to have.
Since I also had installed an SD Card (see below) for my versioning backups, I decided to partition that SD Card so as to also contain Paragon’s disk manager – reasoning that while I don’t want to have to rely on carrying around an external disk for rebooting at a customer site (only to “see” my internal disk again), I might just as well do that with the mostly external backup disk that lives in the SD Card slot.
Well, that didn’t work. Paragon would likewise not see that disk, if booted from the SD Card drive.
Next, I ended up replacing the internal recovery partition by copying over it the SD Card (Paragon) version of it, reasoning that if it’s messed up, I can also mess it up some more and have some more functionality in the internal recovery partition. This required having the Paragon recovery partition on three drives at a time, as you cannot copy it from the partition you’ve booted from. I installed it on a USB stick, booted from that, then copied it over from the SD Card to the internal disk.
And lo and behold, the Mac did boot into the now internal recovery partition – and had full functionality (Paragon) of that.
Only, that also didn’t help with booting from my internal disk – it still didn’t see that disk.
It actually made things worse since now I could even no longer boot from the internal disk when I had attached my external CCC backup… – which is maybe why Paragon itself does not support copying its recovery partition to a drive without first erasing it – which you wouldn’t really do on an existing drive with data…
So what I learned then was that FileVault really relies on the recovery partition to be there, and if it is not, it just won’t work. I did not specifically waste time finding out what’s the difference between the FileVault enabled (Apple) version of the recovery partition, and the Paragon one (besides the Paragon software) – at that point I was just pulling the last straw before restoring the whole thing from backup, and copied the still existing Apple version of the recovery partition – which I had on my original SSD, over the internal, Paragon version, using Paragon disk manager that I had booted from the external drive.
So there I was where I had been before, only that now, I still had the erratic behavior of sometimes needing the external CCC backup disk for the machine to even see its internal disk.
Finally it occurred to me to try a PRAM reset: Pressing Alt-Option-P-R (with “Alt” by some understood as “Command”), until the startup chime, then waiting for the second time it chimes, and, well, the disk is back.
So, after wasting some hours on that, the simple learning is this:
- If you use FileVault, leave the recovery partition as it is.
- If you don’t see your disk, try a PRAM reset.
This consistently fixed it for me, and so far, I had no more problems in that space.
Summary on the OWC SSD
So with regards to the SSD, it appears to be mostly ok. If you do it, you get 960 GB instead of 500 GB, and if you can live with the performance impact (seems to be acceptable on the 2013 MBA, and probably not on anything more recent), and with perhaps having to do a PRAM reset should you hard reset your MBA occasionally, then it would be ok – if the battery drain returns to acceptable levels, which I can’t say for the moment.
How to have better TimeMachine like Backups
I’ve some control over how TimeMachine works. And I’m running regular backups, using TimeMachine, to my Server (using an AFP share), where it then runs into my tape backups, onto an external disk (Samsung T3), and onto a TimeCapsule. So basically, I’ve at least three backup locations (my other Samsung T1 seems to behave erratically as of recently). I’ve scheduled TM to run every 30 minutes, using TimeMachine editor. Plus, I’ve nightly backups set up using CCC.
What I never liked with TimeMachine:
- Its graphical user interface – that consumes a whole lot of CPU power for the presentation, and plus it takes like forever to find out which snapshots I do have for a given file.
- The fact that you cannot specify what you want to backup per backup location. It’s always all the same stuff for all backup locations.
So now, when I investigated how to bridge the gap for at least a year until Apple regains reasonable thinking and re-adds ports and the MagSafe connector (just dreaming, I know), I also wanted to find a solution for my versioning backups that I do when on the road.
So far, I had to connect my external disk – like, my Samsung T1 – and then my TM backups would run. But for that, I had to remember to actually put that disk there – which is also inconvenient if you’re sitting some place. Plus, when on my VPN using OpenVPN, I might end up running a TM backup using my mobile connection… I just need some more control of what goes where, I need a seamless local backup drive that I don’t have to remember to plug in, and since I’m getting older, I’d like to have some great UI on top of it.
So then I found that there is a really awesome option: TarDisk. TarDisk comes as a very tiny drive that goes into the MBA’s SD Card slot. It is completely flush with the body, so there’s nothing sticking out. It comes up to 256 GB, and as it happened to me, I just have typically about 200 GB of user data.
Next, I needed a versioning backup that would run, just on a selection of the data, to that disk. TimeMachine, again, is not an option, since I cannot tell it to back up only some user data to that mostly internal disk, and “all of it” to the external locations I’ve on my network.
Now of course I had used rsync a lot in the past, but was kind of getting too lazy to really use it all the time. So back comes Carbon Copy Cloner. It allows me to do just what I want.
The downside of CCC is that it does not come with a nifty user interface to locating the backup versions you have of any file or directory. But notice, also, that this is in a sense an upside, since that specific restore workflow is slow with TimeMachine anyhow.
So I fixed this specific problem by writing a very simple shell script. Feel free to use it.
mnott:8.3 Dissertation mnott$ pwd
/Users/mnott/Cloud/06 - Studium/DBA/8. Research/8.3 Dissertation
mnott:8.3 Dissertation mnott$ cccrestore Dissertation.scriv/

Version found in /Users/mnott/Cloud/06 - Studium/DBA/8. Research/8.3 Dissertation/Dissertation.scriv:

[  0] 2016-11-13 10:59:32      238 /Users/mnott/Cloud/06 - Studium/DBA/8. Research/8.3 Dissertation/Dissertation.scriv

Versions found in /Volumes/Backup:

[  1] 2016-11-13 10:59:32      238 /Volumes/Backup/Users/mnott/Cloud/06 - Studium/DBA/8. Research/8.3 Dissertation/Dissertation.scriv
[  2] 2016-11-13 11:06:01      204 /Volumes/Backup/_CCC SafetyNet/2016-11-13 (November 13) 11-05-00/Users/mnott/Cloud/06 - Studium/DBA/8. Research/8.3 Dissertation/Dissertation.scriv
[  3] 2016-11-14 08:06:02      136 /Volumes/Backup/_CCC SafetyNet/2016-11-14 (November 14) 08-05-00/Users/mnott/Cloud/06 - Studium/DBA/8. Research/8.3 Dissertation/Dissertation.scriv

Versions found in /Volumes/T3 - Backup Matthias:

[  4] 2016-11-13 01:59:32      238 /Volumes/T3 - Backup Matthias/Users/mnott/Cloud/06 - Studium/DBA/8. Research/8.3 Dissertation/Dissertation.scriv

To restore a version, run the same command again and add the version number as last parameter.
In the above screen shot, you can see that I found a file (actually, a directory) that I’ve on my local disk, both on the hourly backups that I’ve mounted as /Volumes/Backup, using my SD Card, as well as my nightly backup that I do to my Samsung T3 disk. There are hence three general locations where I found the file: [0] is the internal SSD, where the file was last modified on 2016-11-13 10:59:32. The same version is on [1] which is the current version CCC holds on my SD Card, as well as on [4] which is the current version of the nightly backup that I did using CCC to my Samsung T3 disk. Those are all the same files, but in addition, I happen to see [2] and [3] which are different versions of that directory; and the reason that they have more recent timestamps is simply that while I was working on my Dissertation, I went down a wrong alley and at some point decided that I’d just revert to what I had before (reverting from [3] to [0]) – which took just a second to do, really, because of my little script.
With that, recovering a file is a matter of seconds – opening the terminal, which using e.g. BetterTouchTool I can do with a keyboard combination on the currently open Finder window – and then just typing cccrestore <whatever> I get a list of the available snapshots in less than a second. The only downside is that if you’ve moved away a file e.g. from the Desktop to some other folder, you’ll not easily see those (still available) versions of the file on the backups of the Desktop. I’ll probably update the script a bit so as to reflect that workflow, if I see that occurs to me more frequently.
In terms of speed, I was a bit cautious since of course how fast can an SD Card really be. The card takes about 70 MB / s writing, so is not totally bad, but again, how does it really work? The initial backup of those 200 GB took several hours of course, but the more important question was, how would CCC (hence, rsync) perform when creating the list of changes during the normal differential backup. I’ve about 5 Million files in my backup.
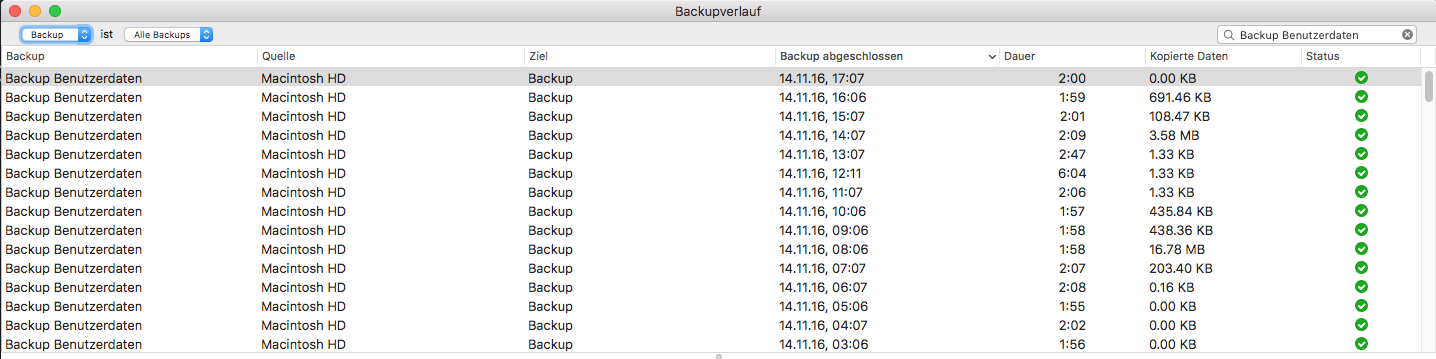
Turns out, the hourly backups there take an average of less than 2 minutes. Which actually is quite awesome – and much much faster than TimeMachine itself:
Summary on the TarDisk
I can unconditionally recommend the TarDisk. It is a perfect way to have versioned backups in the sense of “fire and forget” – particularly if combined with Carbon Copy Cloner for controlling the rsync backup, and probably with the script I’ve written for quick identification of the versions available for a restore. TarDisk also comes with an awesome tool called Pearing, which seamlessly allows you to shift out data to the SD Card that you don’t use so often. I don’t use it, because just before I installed a much larger SSD, and also, I really like to know where my files are. But this option alone may be one for you if you don’t want to fiddle with the replacement of the internal disk using the product from OWC.
Overall Summary
In total, I have invested about 1k$ to step up my internal SSD from 500 GB to about 1 TB (about 700$), and also for having a very cool internal versioning backup (about 300$). Performance wise, for my MacBook Air from 2013, it seems to be acceptable, with a possible caveat in terms of energy consumption – to be further observed.
But assuming that the energy consumption is acceptable, I’ve just added substantial lifetime to my existing MacBook Air, instead of spending a lot more (a fully equipped MBP 2016 will cost about 4,500 $) and losing a lot of port options / having to fiddle around with dongles to carry around.
From my point of view, that’s a very valuable – if intermediate – step, and hopefully, it will be too, for some of you.

Update: Performance is really ok now, as Spotlight is done. Also, having used HFS+ compression a lot (using “Clusters”), I have now uncompressed everything, and performance is actually better than it was before.
Big big downside: Battery. Really, it sucks. Yesterday I upgraded my system to 10.12.2, and had the MBA sitting there on battery, with the screen all darkened. So yes, an upgrade running, which should take about 30 mins, but then, not even the display on. Went out doing some Christmas decoration, returned after three hours (in German: drei Stunden, in French: trois heures!) Battery was empty, the MBA had just gone down.
This really sucks big time. Oh yes, and I had replaced my battery by a new original Apple battery this summer; I had gone down from 18 hours initially to 8 hours, and with the new battery, I was back at 18 hours. Now I’m at three hours apparently.
Since I wasn’t there, I don’t know. It was just blank. Before, I would just let the MBA on all the time, even while in the plane or something, because, hey, it just is (was) the first laptop that sustains more work hours than I do.
So what? I’ll still keep the SSD. Mostly I am stationary now, and if I’m not, I have workflows to do a lot of editing on my iPad Pro. So the space gain is more important for me, but really, it is not a long term solution.
Unfortunately, Apple in their endless wisdom which Steve Jobs took with him to his grave, have removed all those slots. Had there been an option for an SD card like I use it now, I’d actually consider switching.
Verdict: Battery Life: Baaaad.
Well. Speaking about Battery Life. Just went and tried battery life for the 2016 MBP, the 2016 MB, as well as the current MBA. Full screen brightness, otherwise sitting idle. So the MBA came out 12 hours, while all others were at 6 hours or less.
*Sigh*
Update: After the spotlight index went through (essentially, I deleted the index and had it recreate itself), the performance implications are – while measurable – apparently not relevant for my typical workflow, which involves programming in Java, written LaTeX documents, etc. Starting programs seems to be as fast as it was before. Will update as to batterie life, but will likely keep the SSD. The SD card backup has already saved my butt several times: While TimeMachine again was somehow lagging days behind because of the size of the backups it was supposed to do, Carbon Copy Cloner, together with my cccrestore script, were there to recover what I had messed up.