
Overview
We again had a failed disk on our QNApp. Here is what we did.
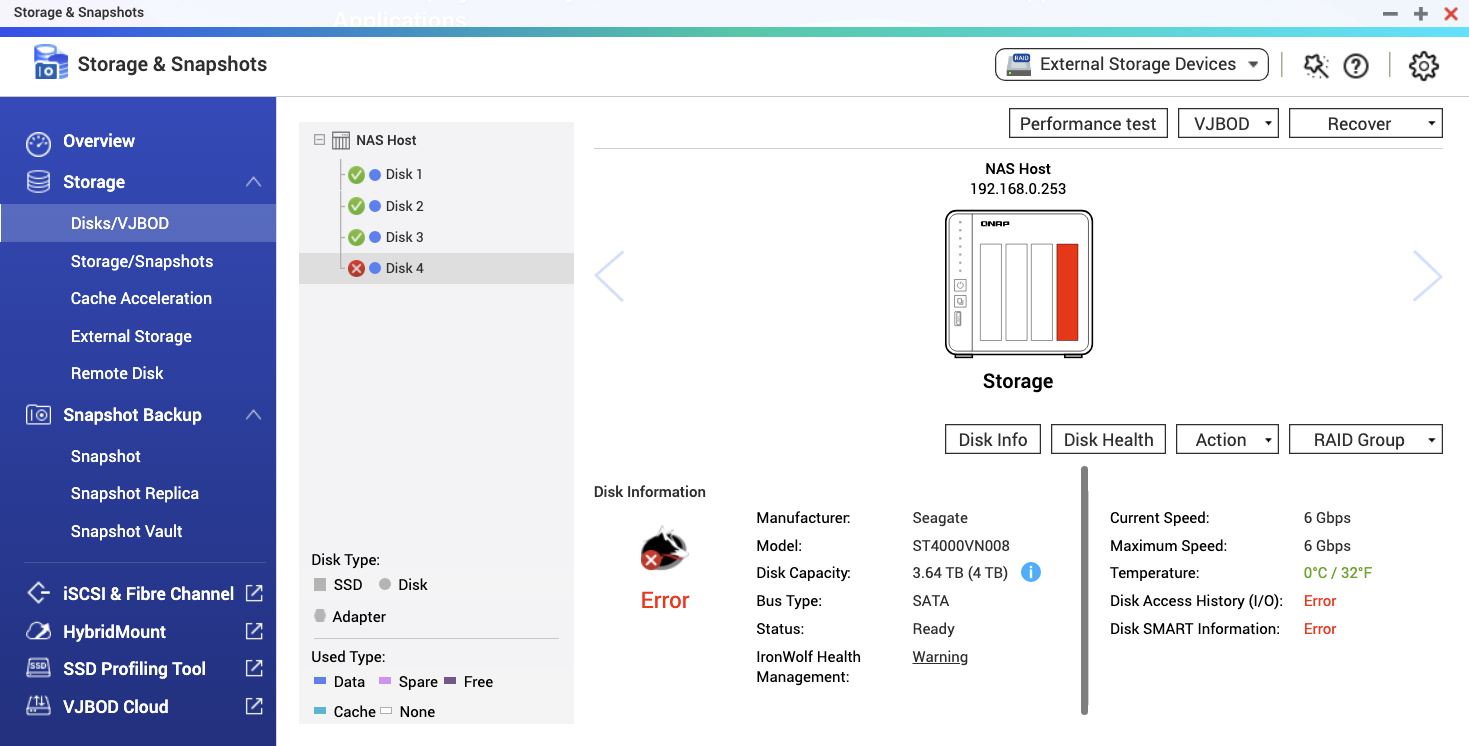
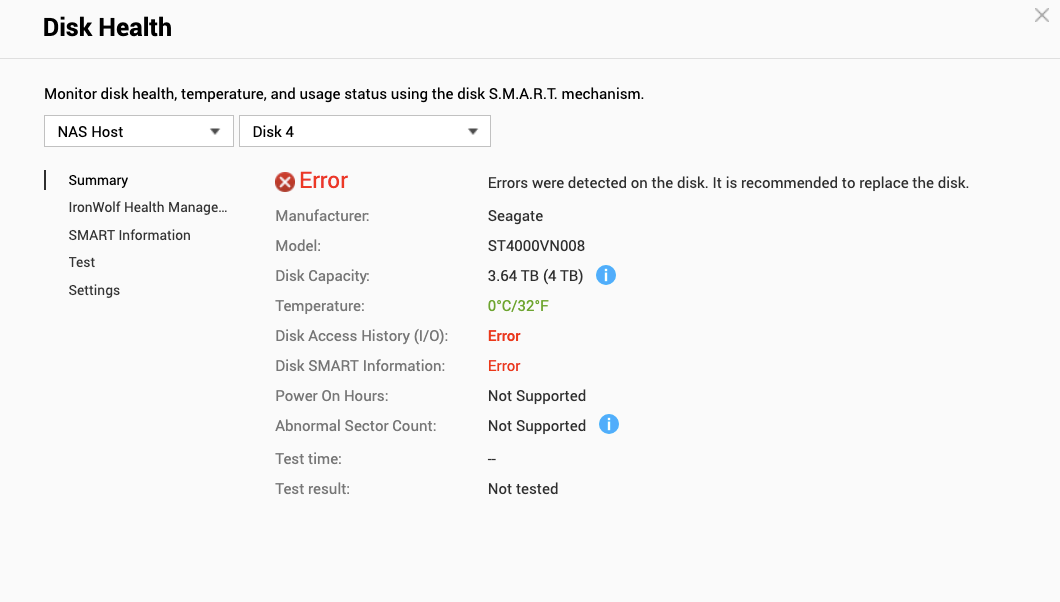
Identify the Disk
Logging onto, in our case, https://192.168.0.253, we were able to verify that we had a failed disk:
Replace the Disk
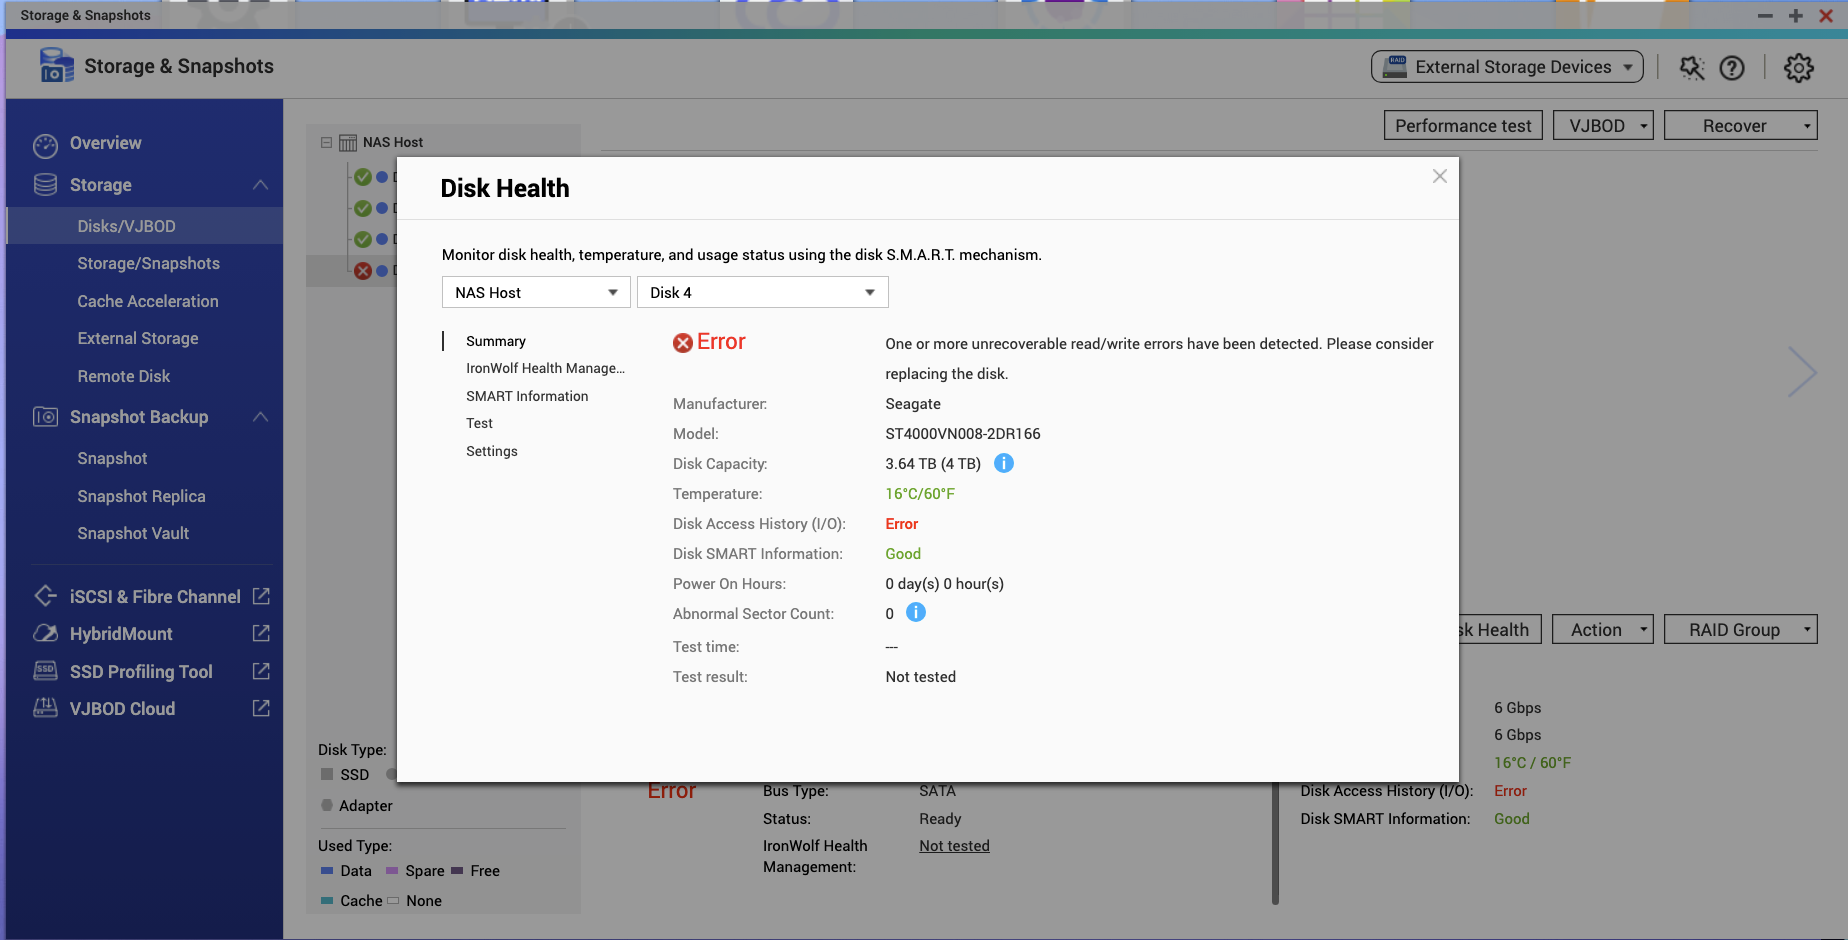
We basically just shut down the device and then swapped the faulty disk and restarted the device.
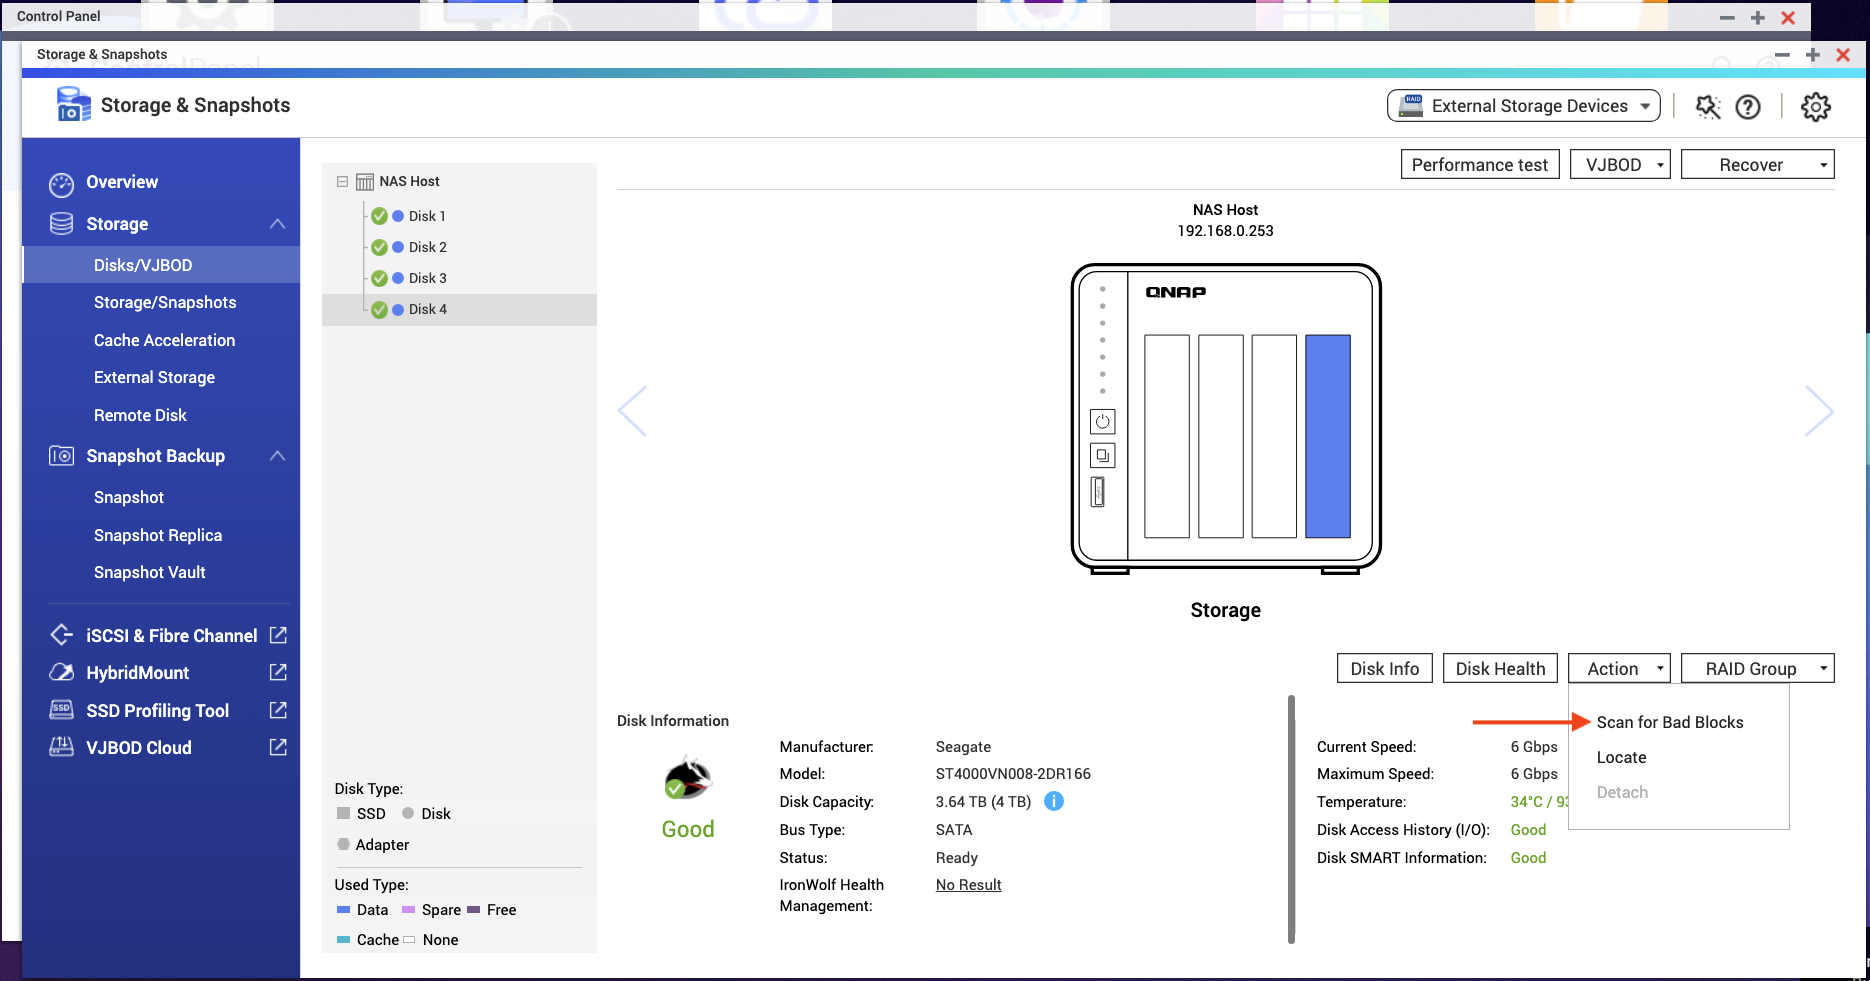
Scanning for Bad Blocks
After switching the device back on, the disk was showing bad blocks:
so we started scanning for bad blocks:
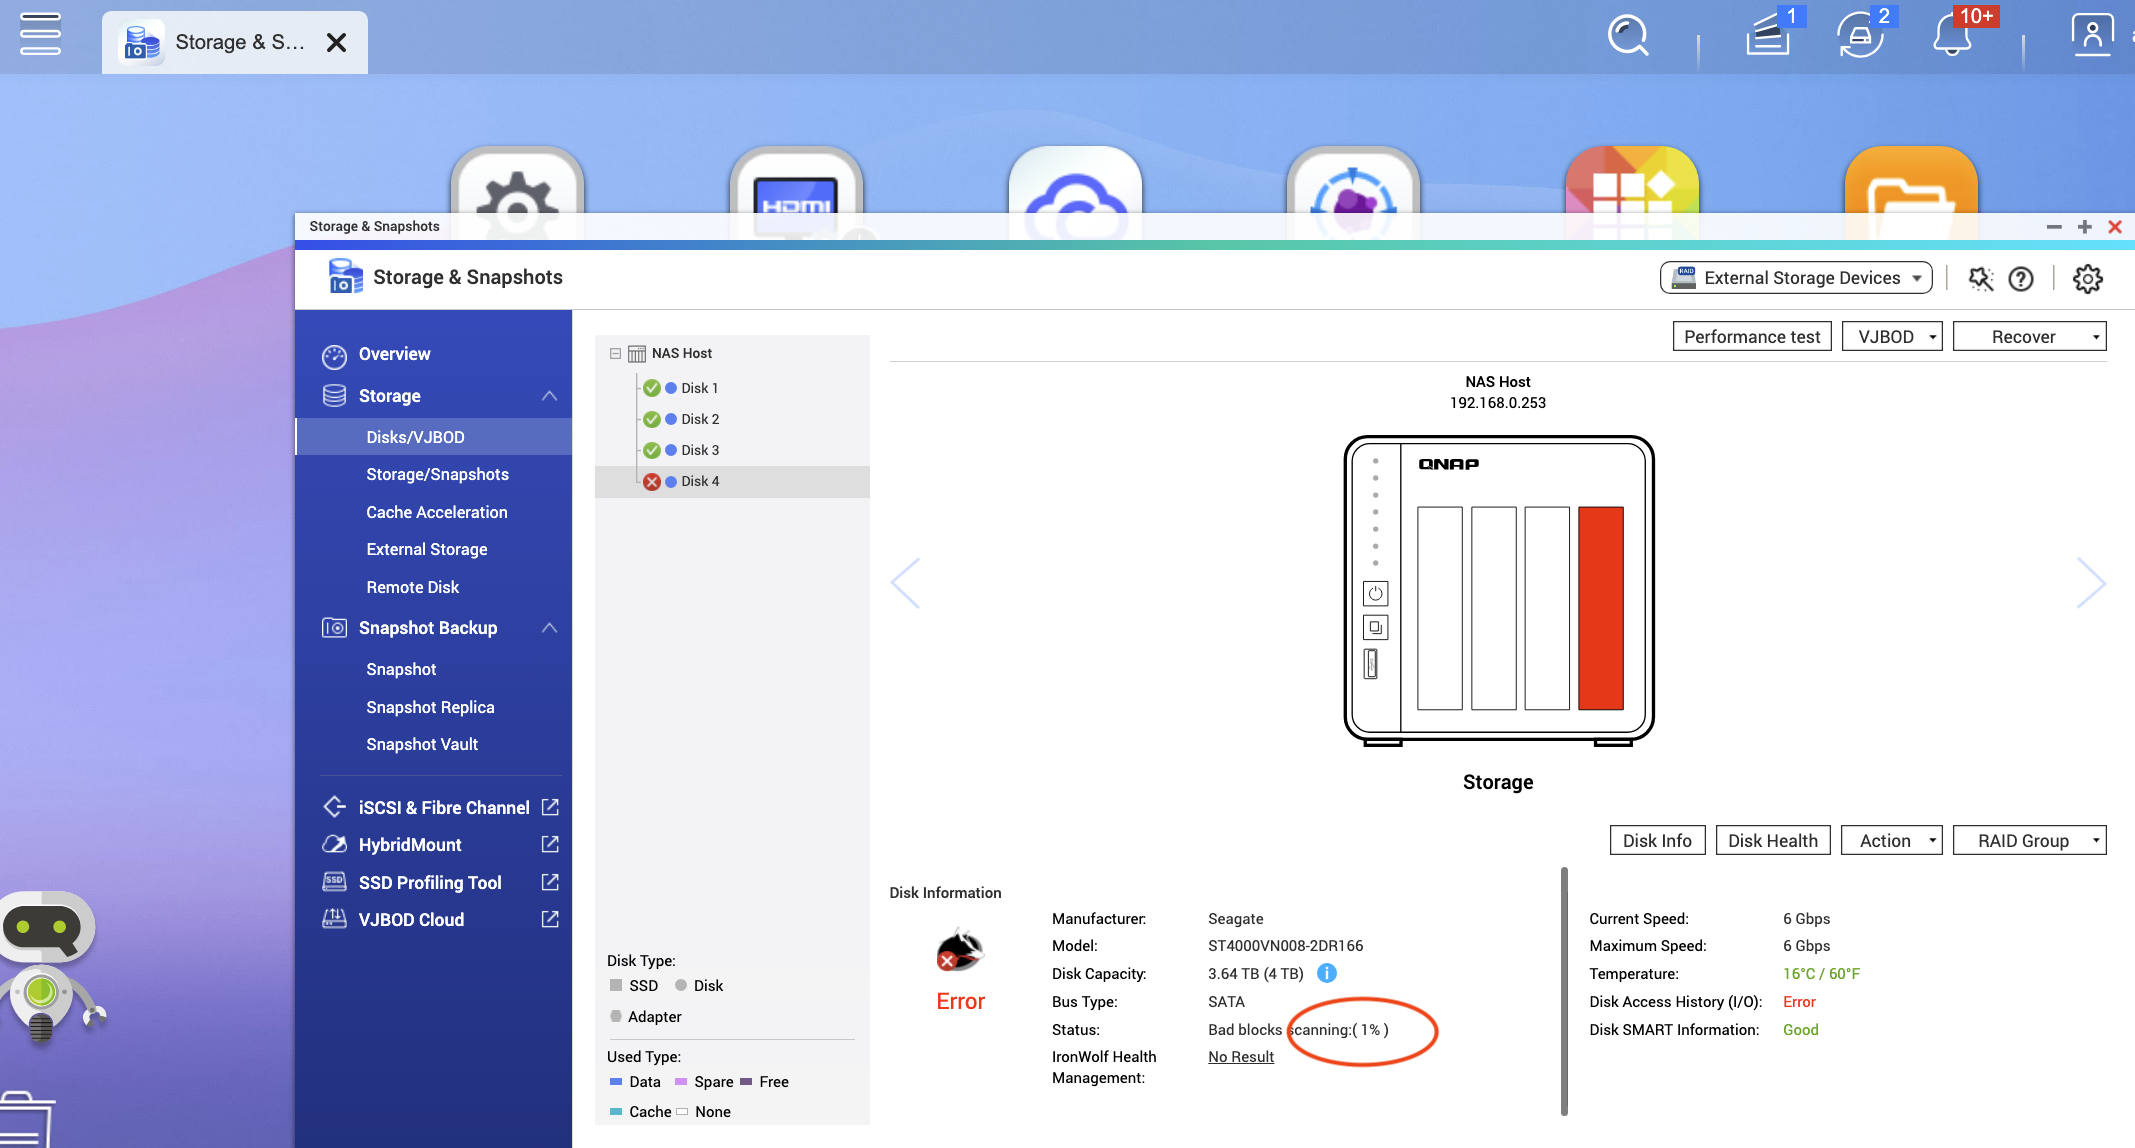
This process took several hours.
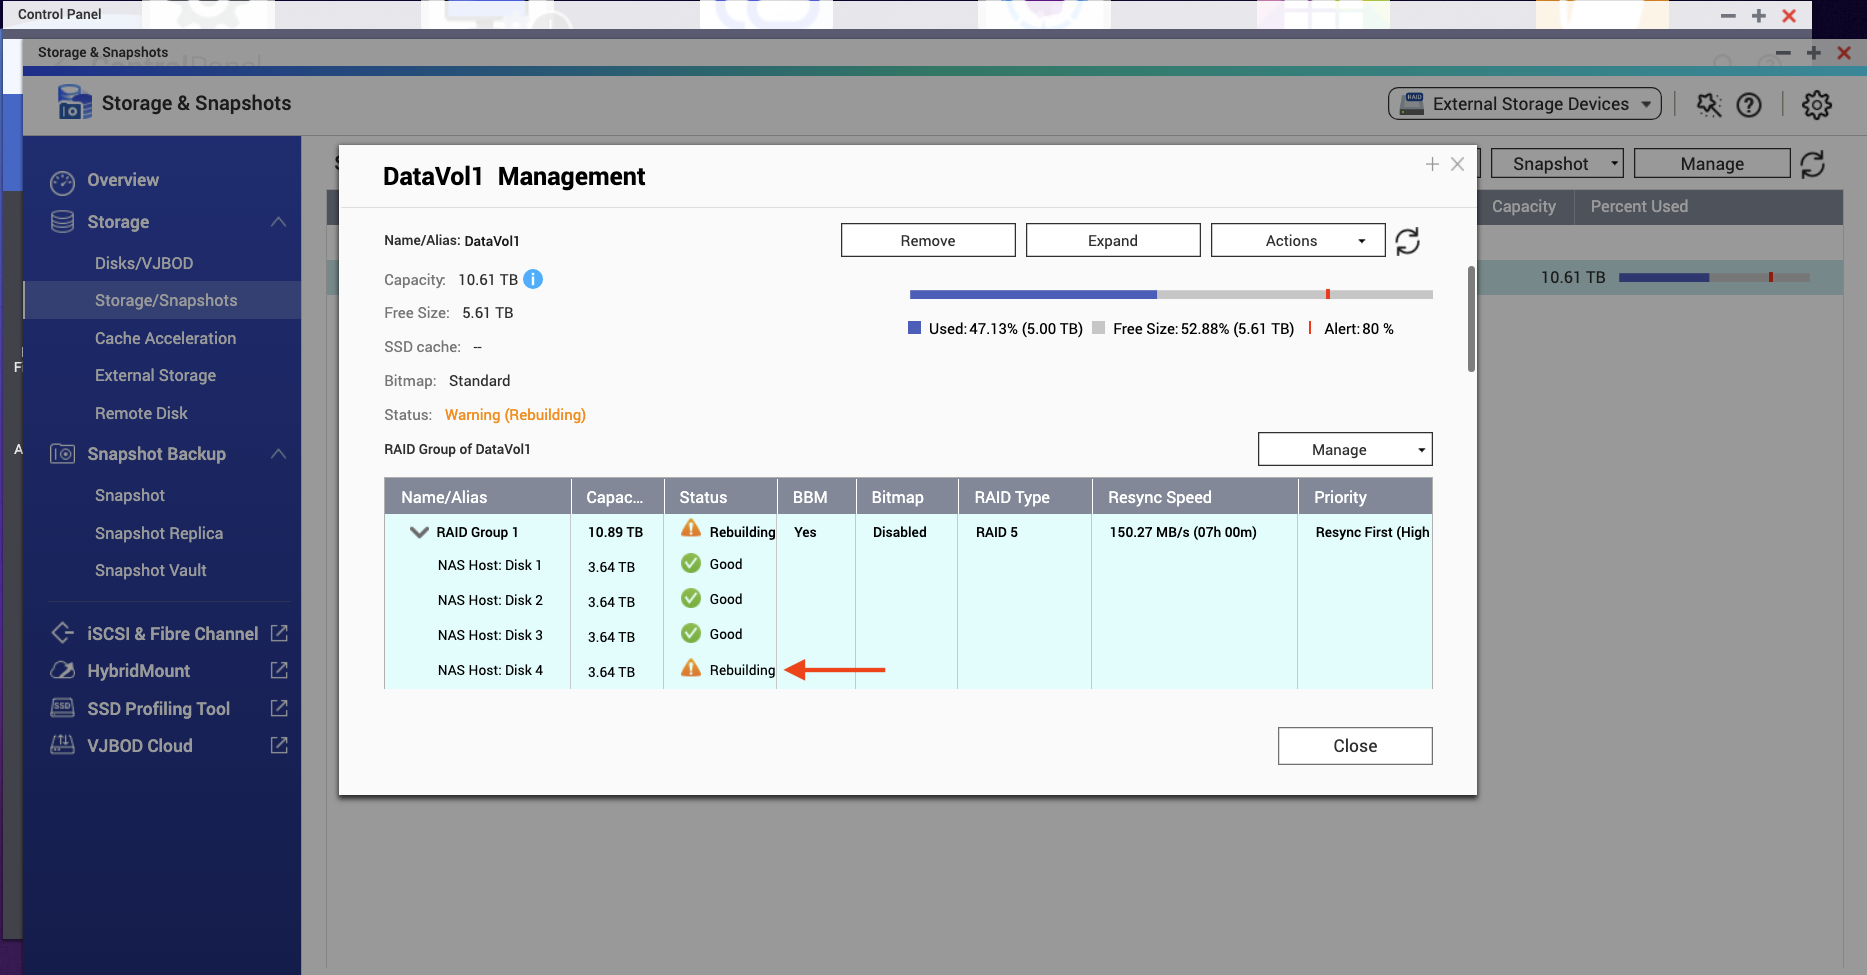
Adding the Disk to the RAID
After the disk check, the RAID showed being degraded, and the disk not being a member of the RAID. The screen shot below was taken after solving that problem; before, it showed not "Rebuilding", but "Degraded", for the RAID Group 1, and "Not Member" instead of "Rebuilding" for NAS Host: Disk 4:
Identifying that the new Disk was not member of the RAID
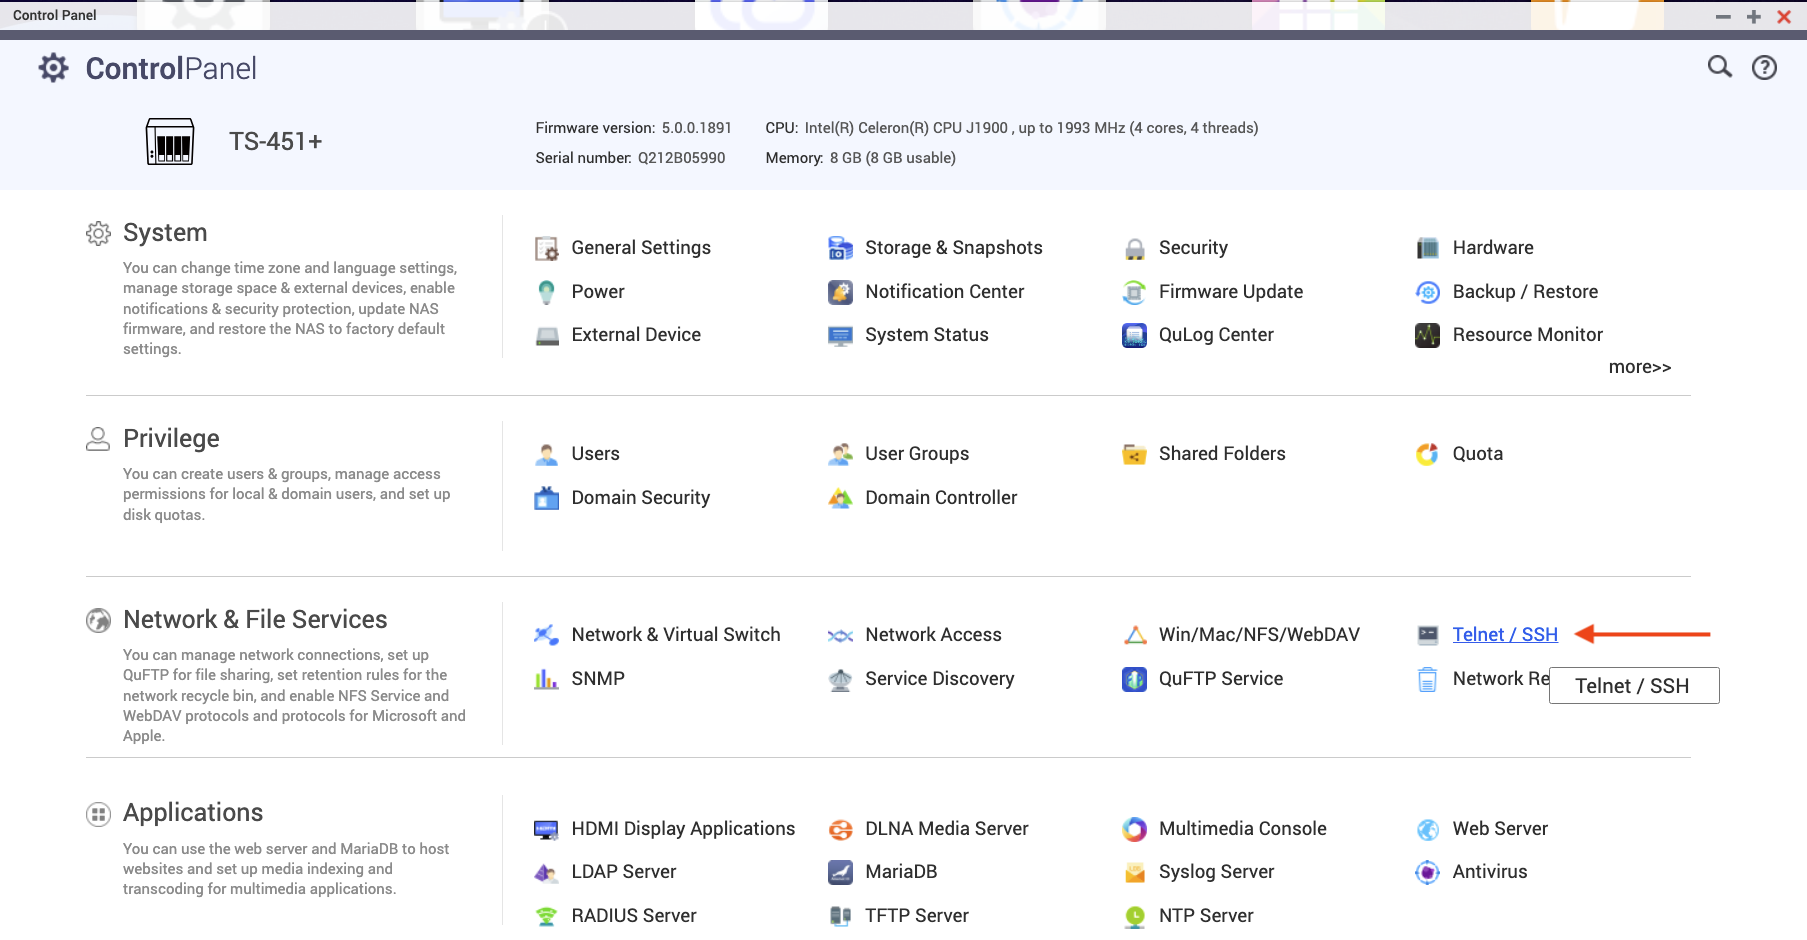
Activating Telnet
For some reason, we weren’t able to enable SSH, so we chose to activate telnet:
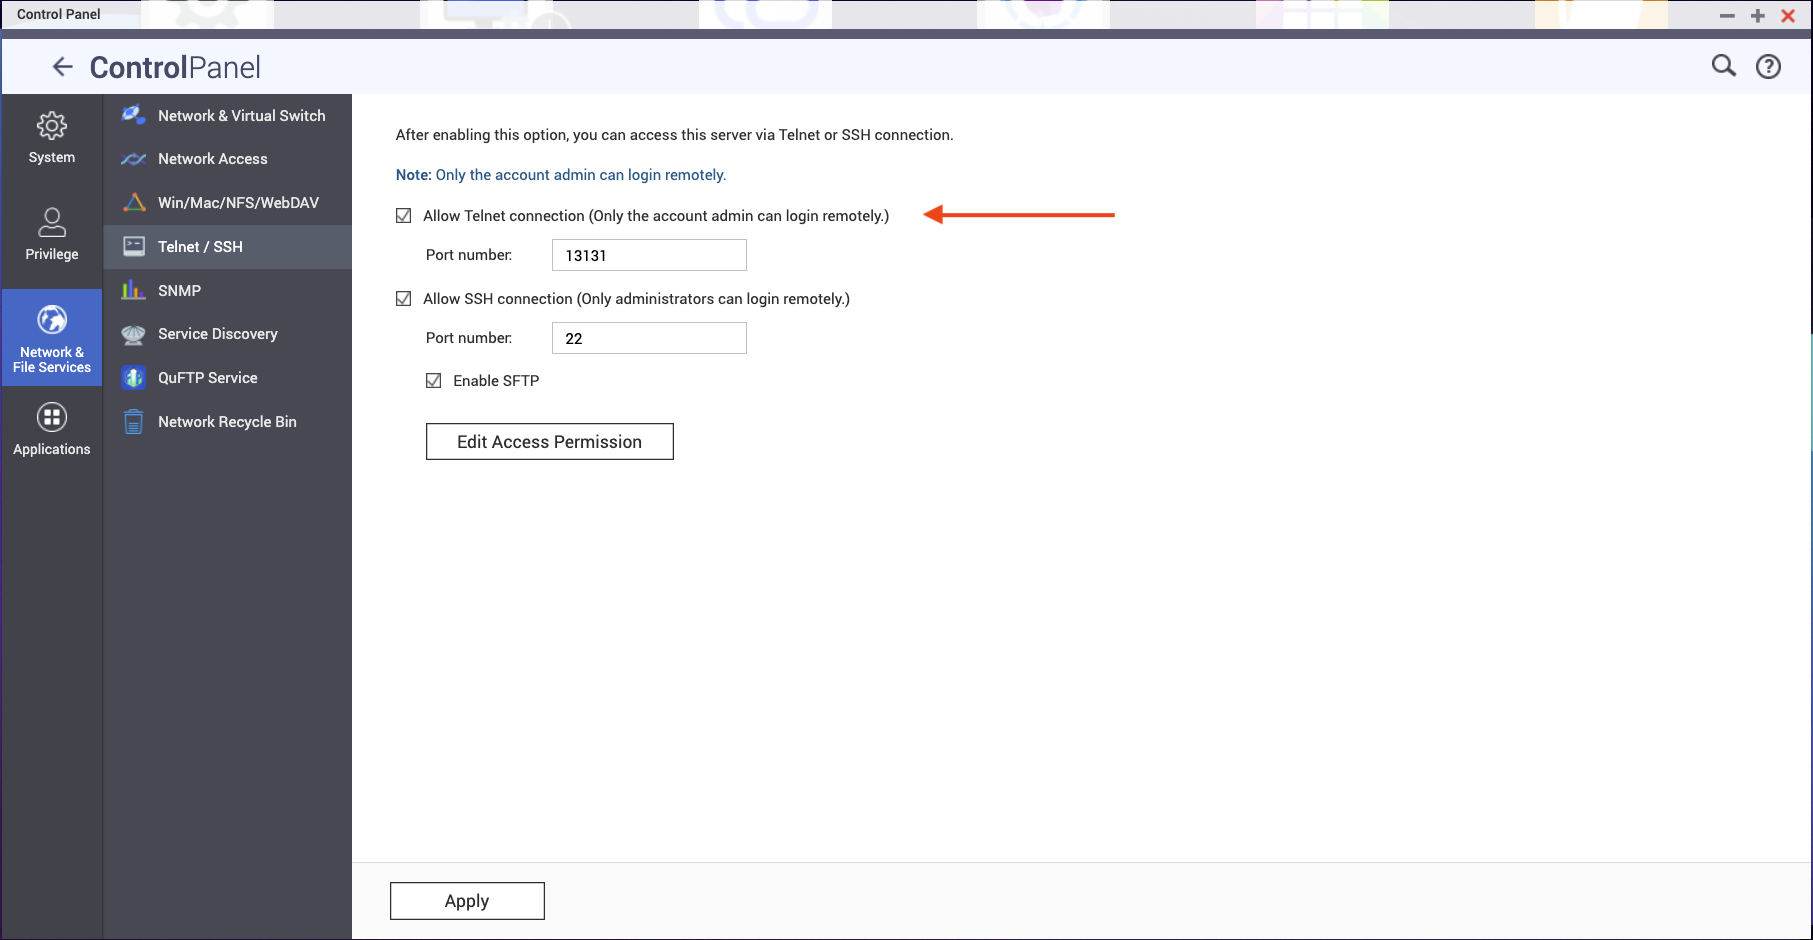
Log on to the RAID using Telnet
With that setting, we could connect to the device:

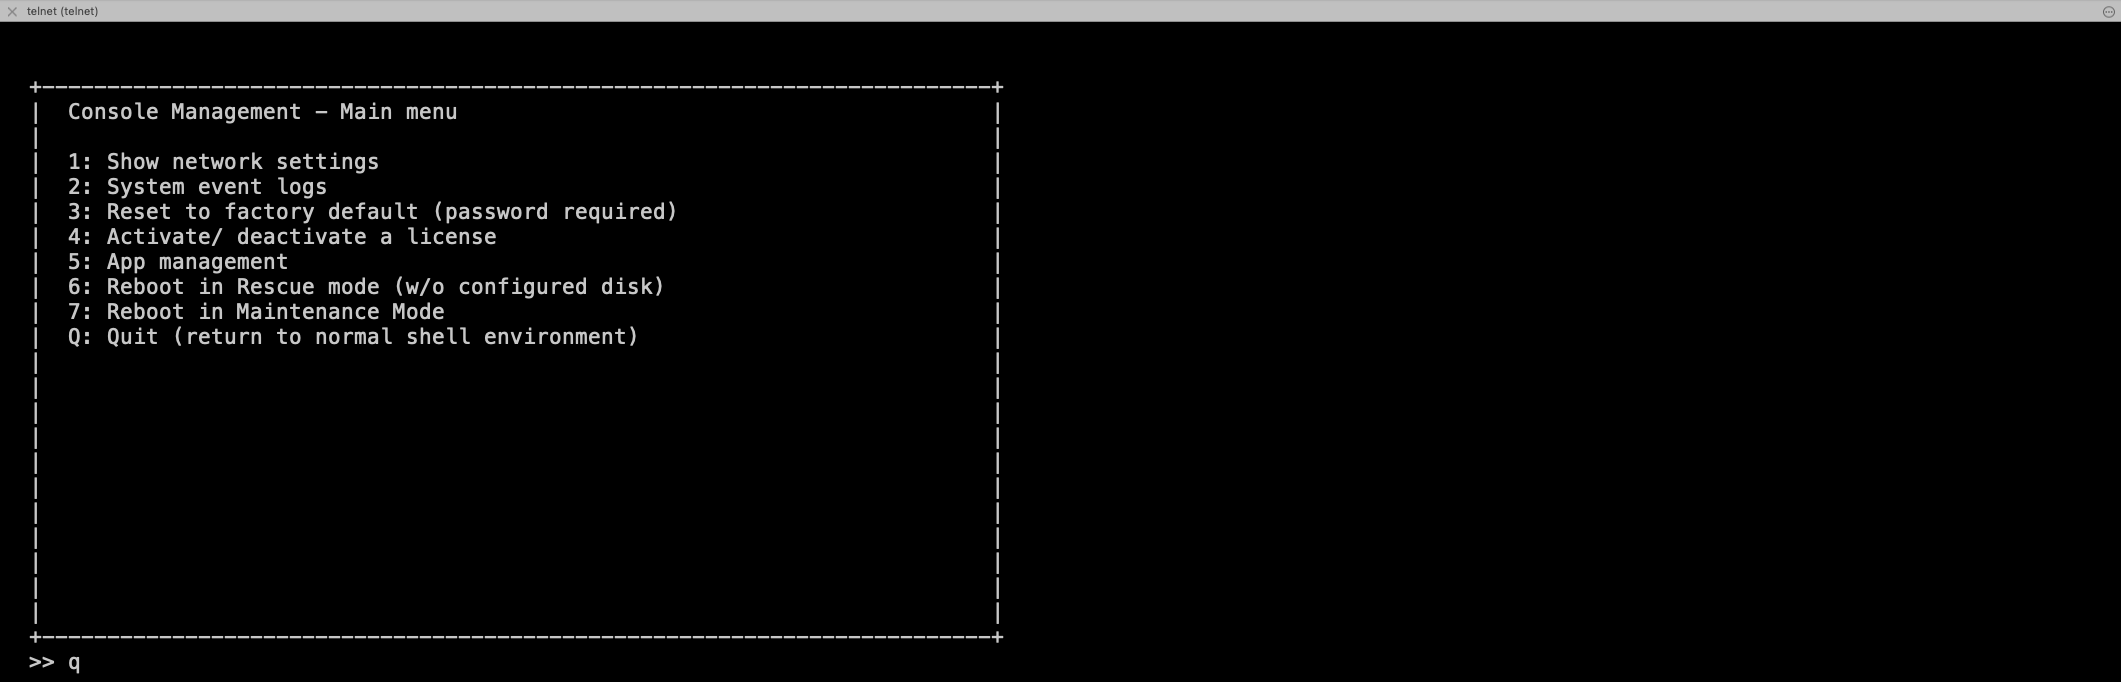
It showed us a nice menu, so we chose q to exit out of it:
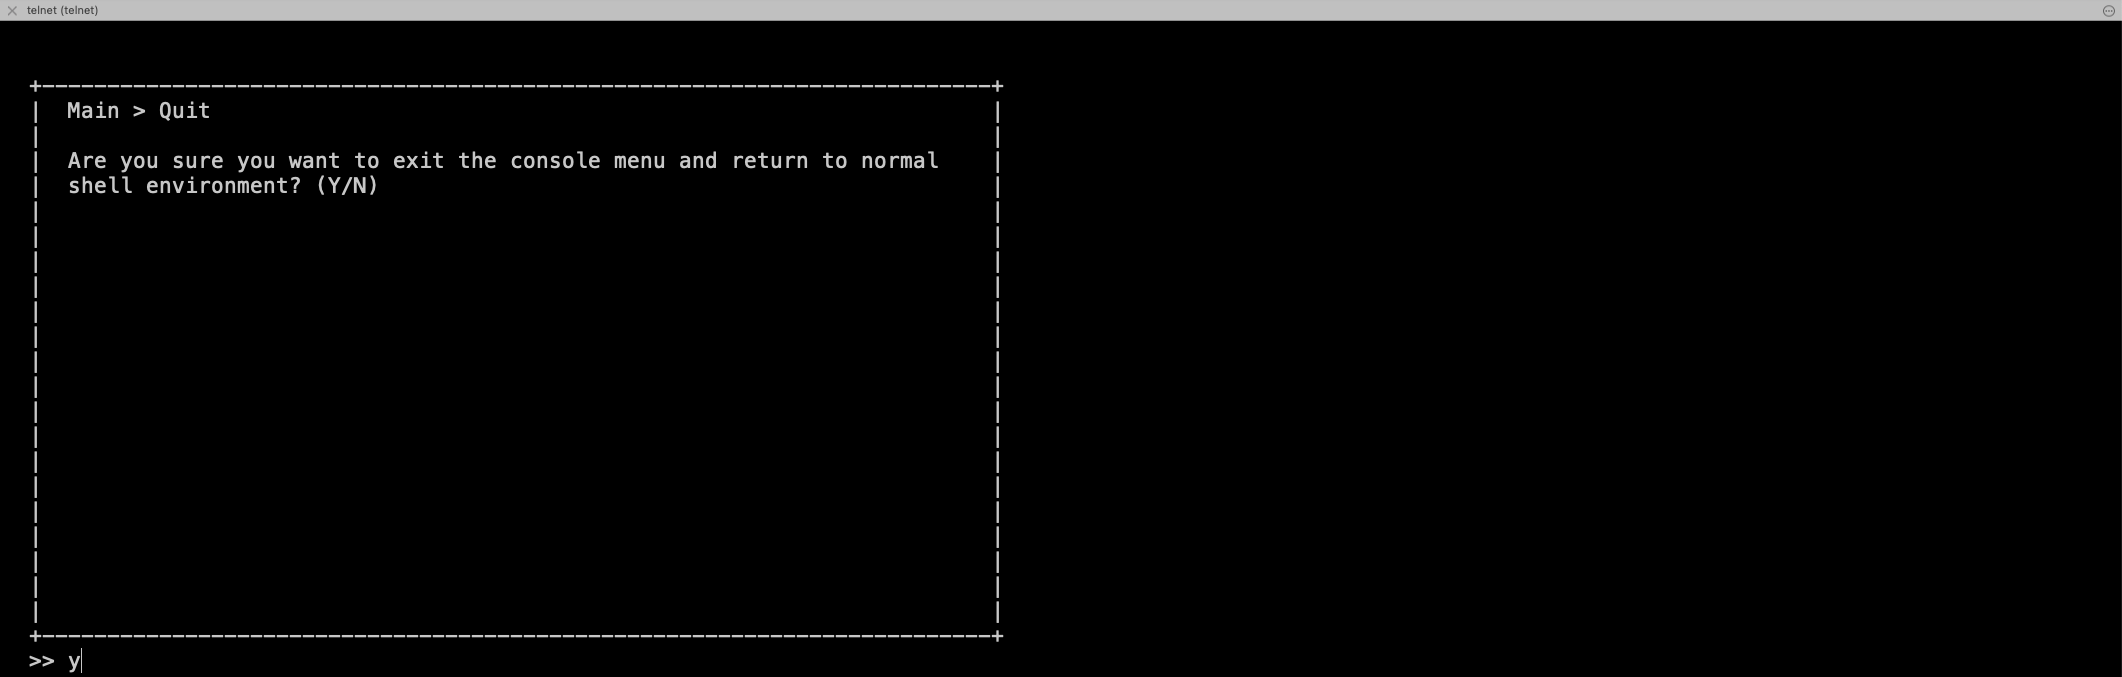
After that, we confirmed that we really wanted to get out of that:
This then dropped us to a prompt. We went back to the root directory, doing cd /:

Confirm the missing Disk
From the shell, we first ran
md_checker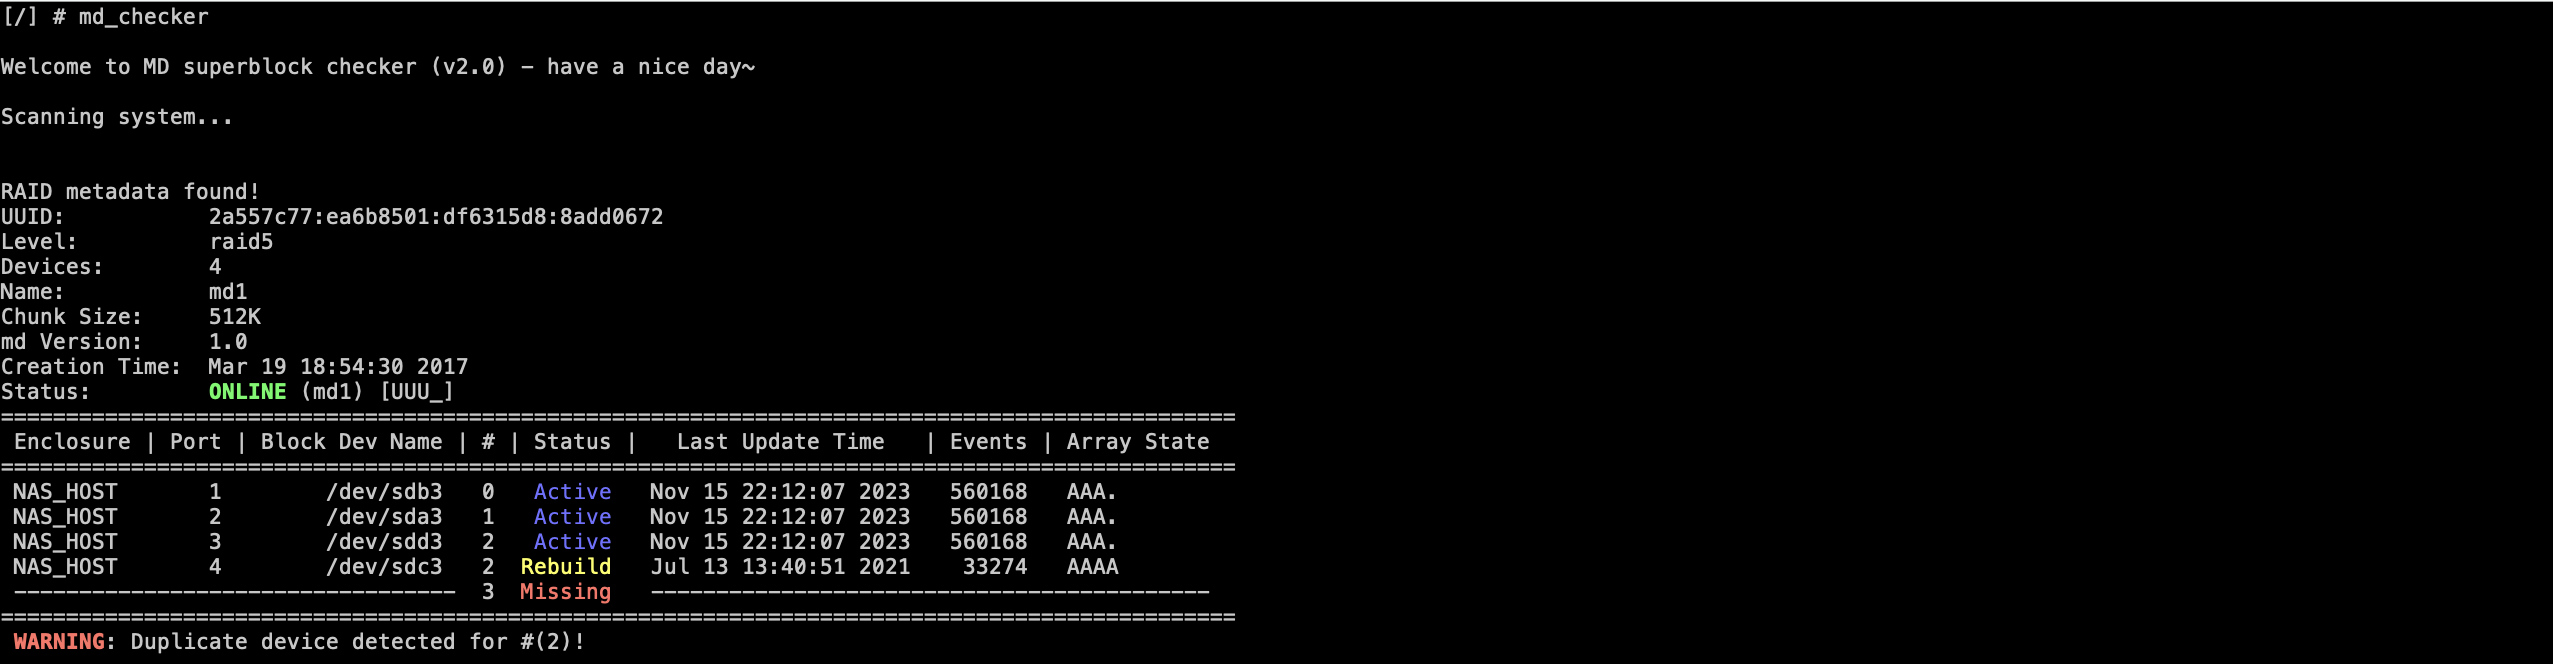
This showed that the disk 4 (/dev/sdc3) was still marked as missing. We next used
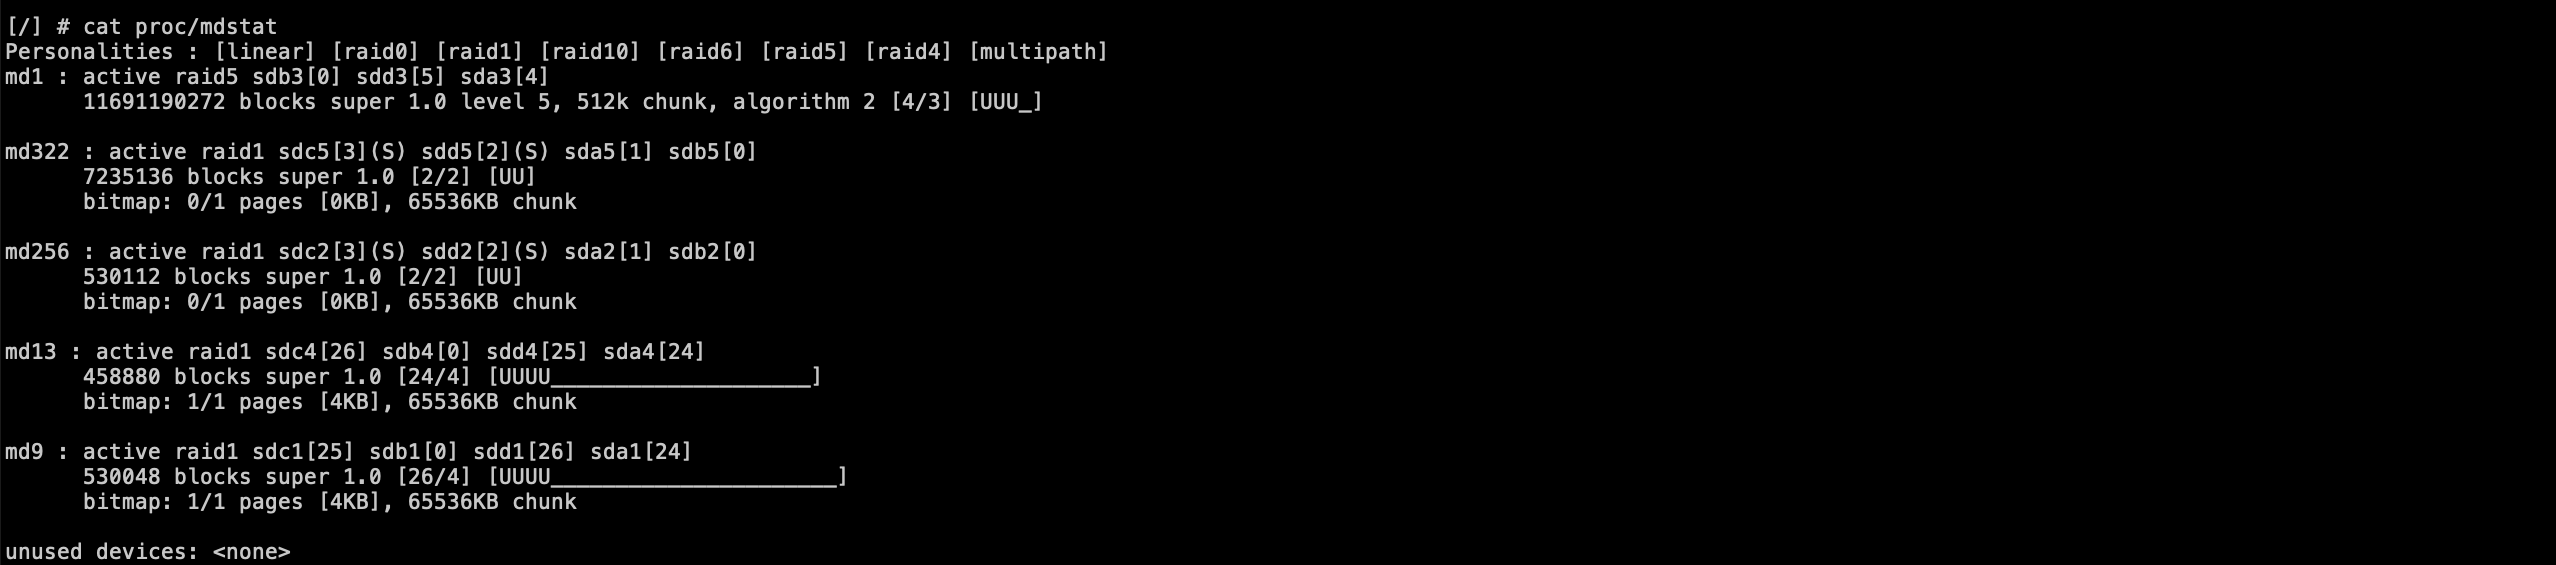
cat /proc/mdstatto identify the volume:
This allowed us to run mdadm to confirm the removed status:
mdadm --misc --detail /dev/md1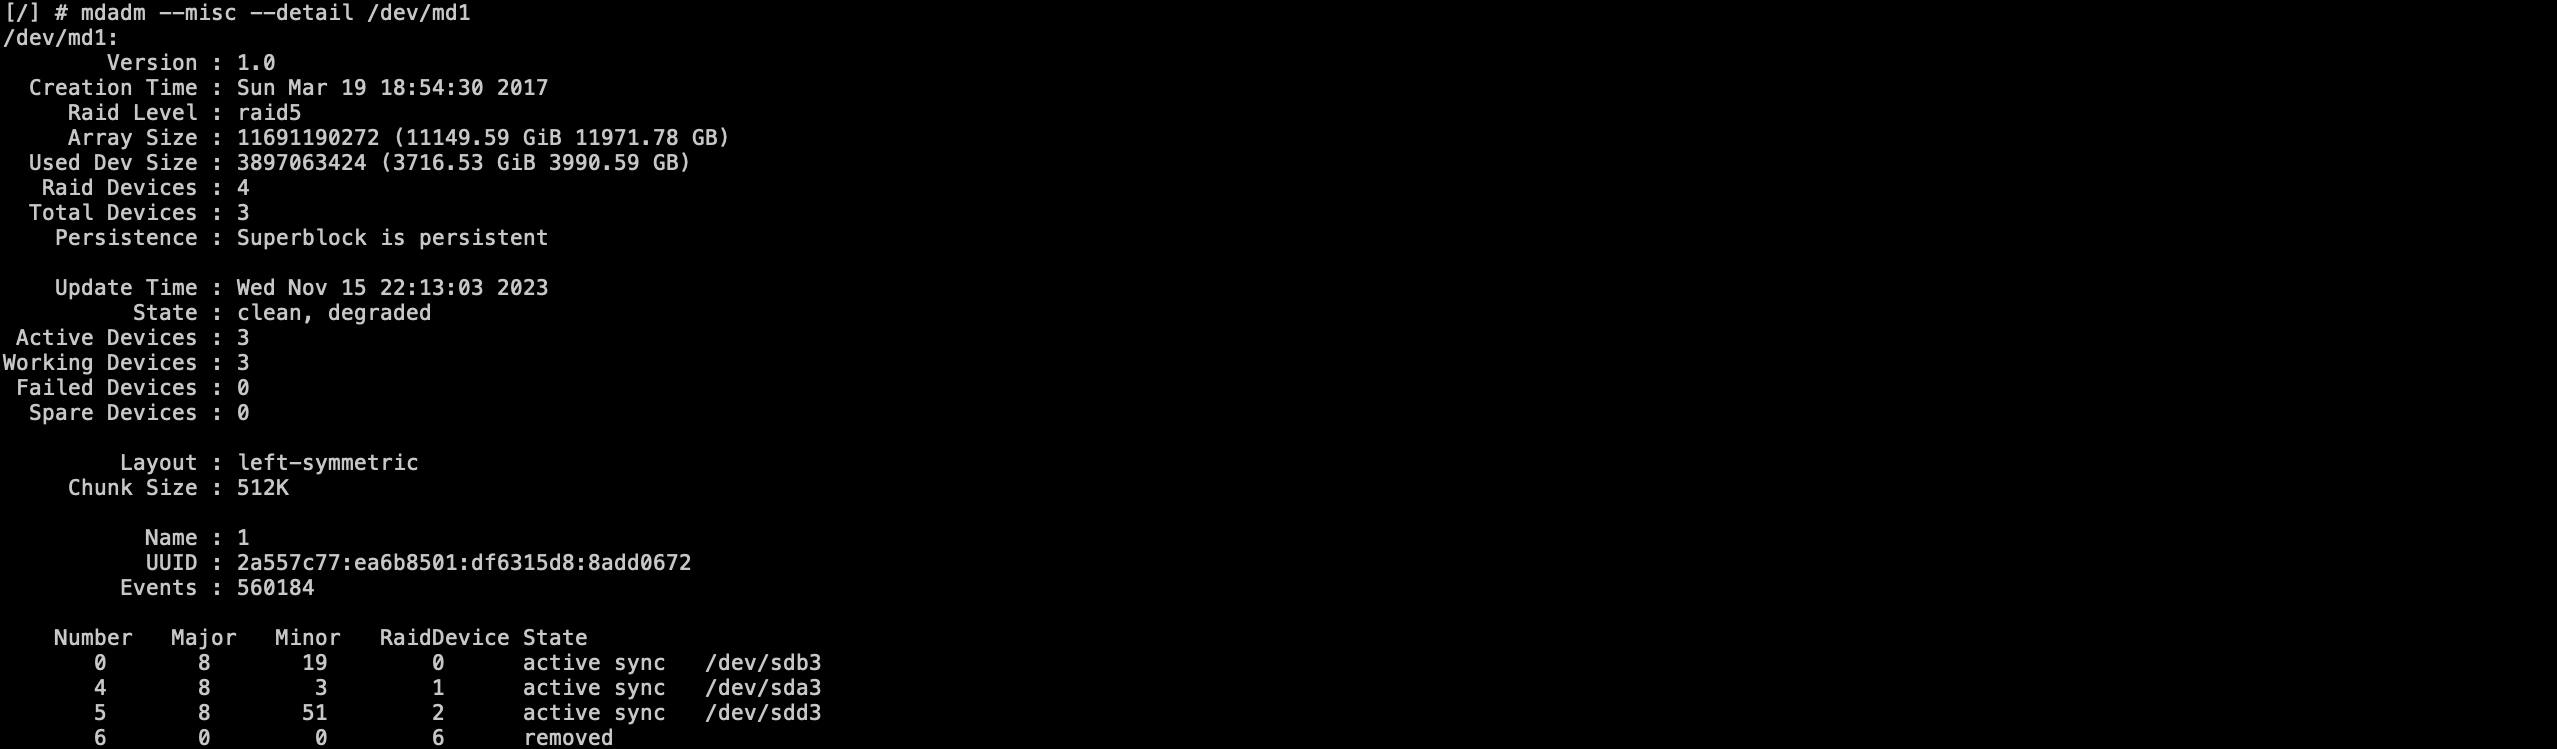
Add the missing Disk
Using
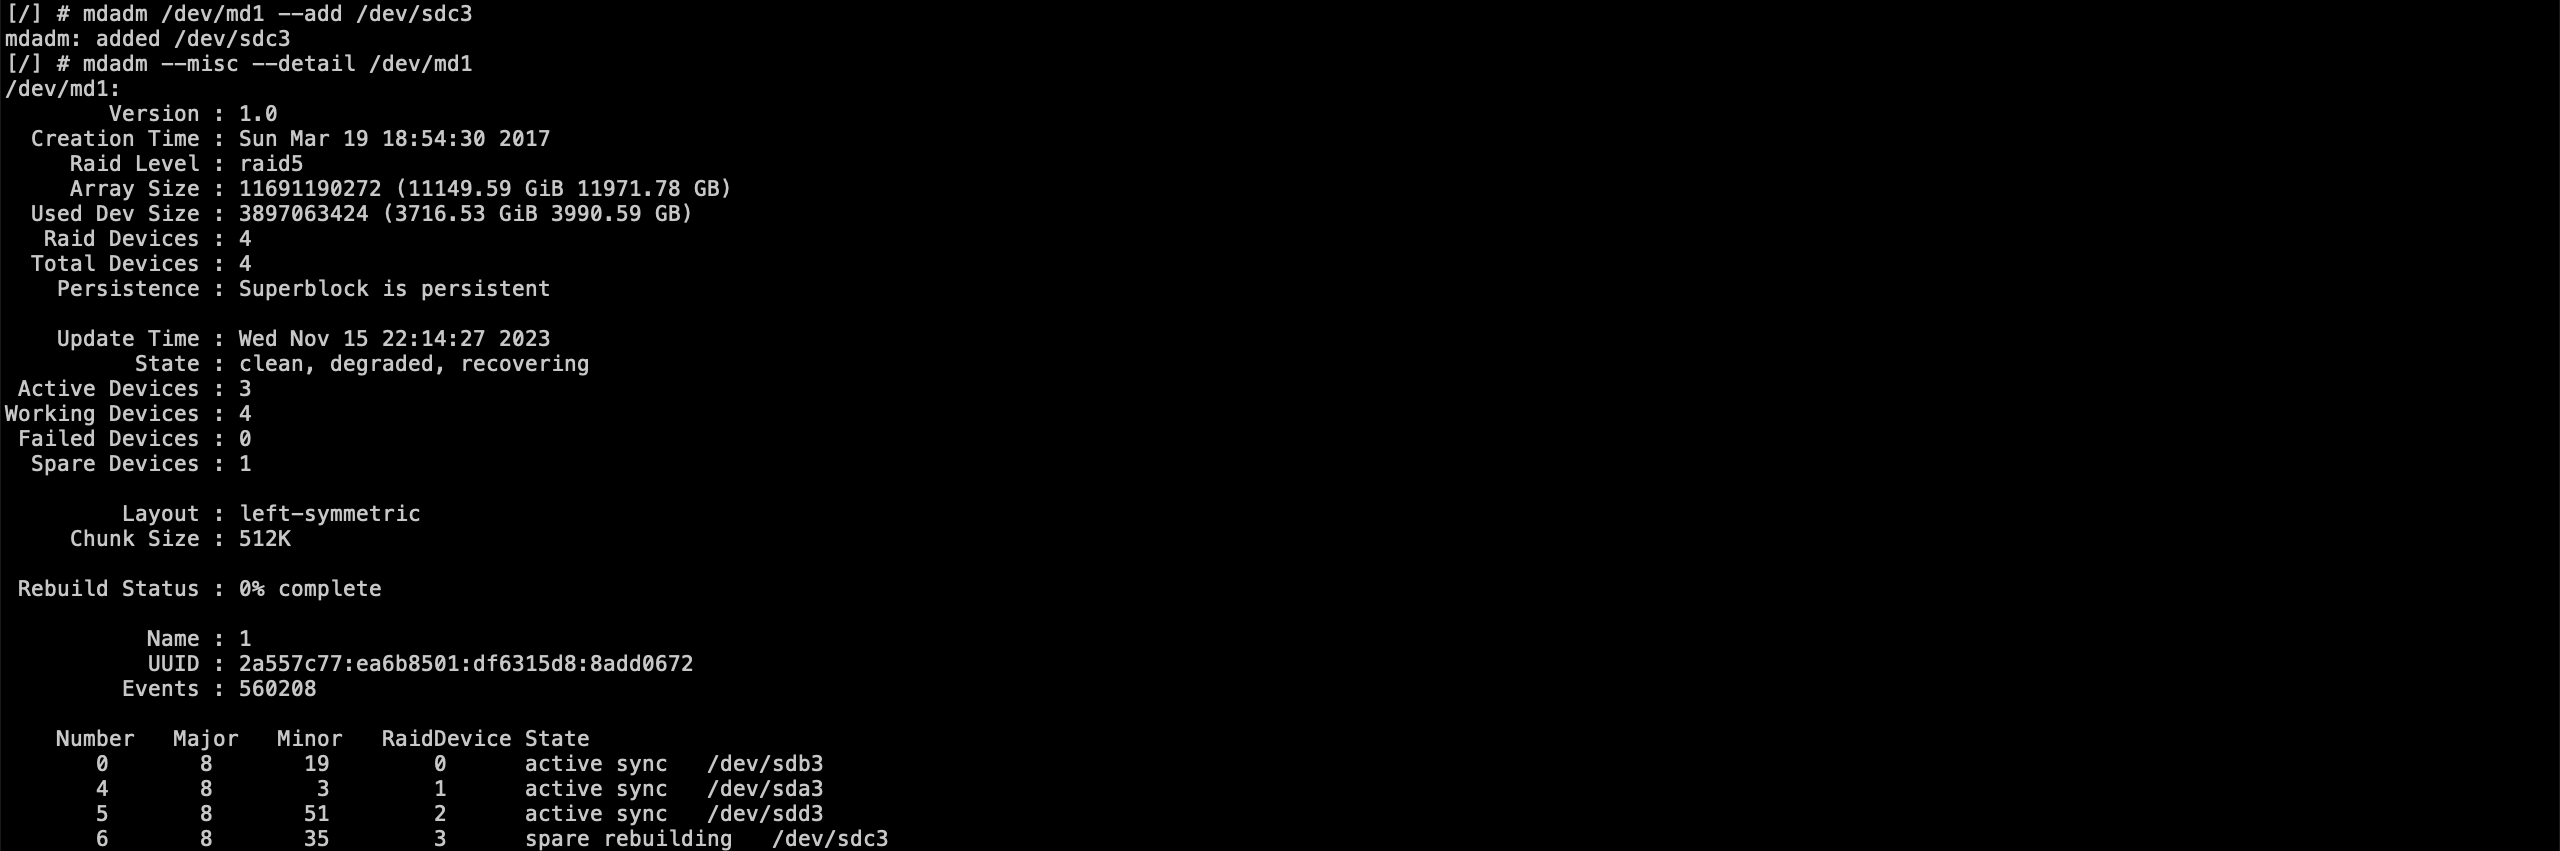
mdadm /dev/md1 --add /dev/sdc3we were able to add the disk, after which calling again
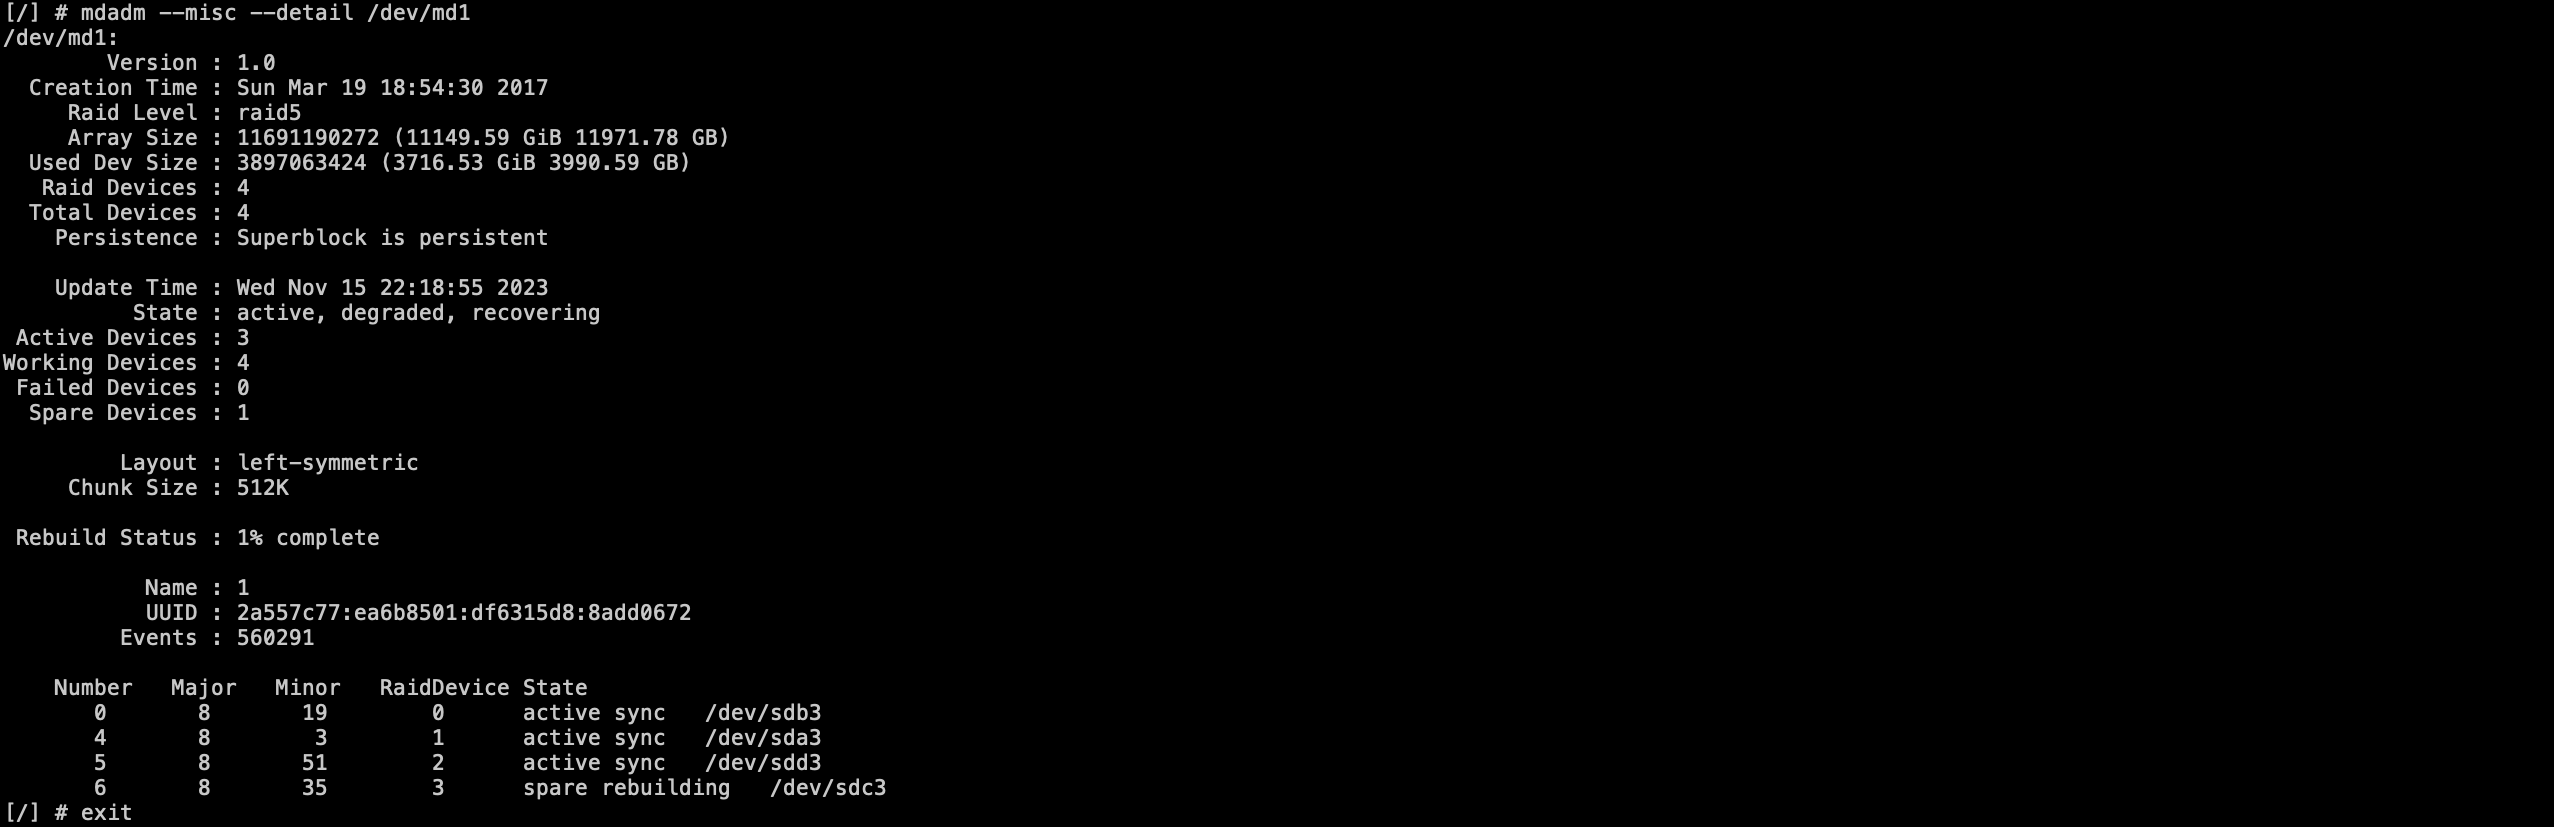
mdmadm --misc --detail /dev/md1confirmed that the disk had been added and the rebuild had been started automatically:
Verify the Rebuilding is in Process
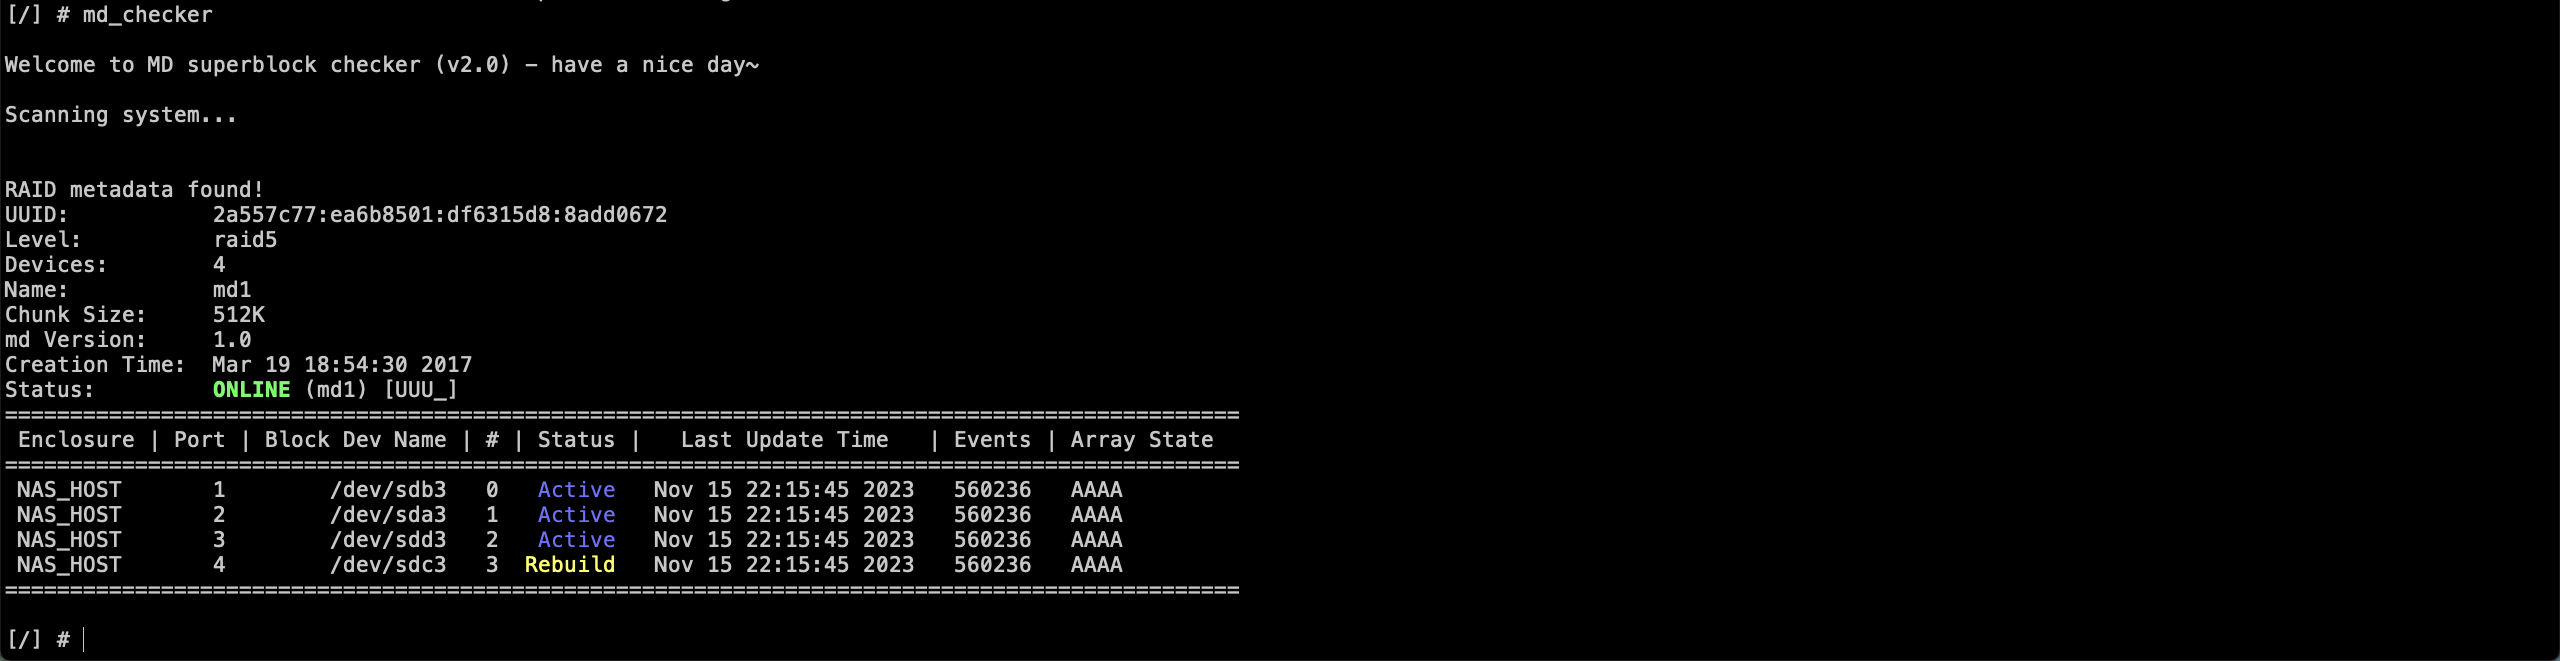
Using again
md_checkerwe could confirm the rebuild being in process:
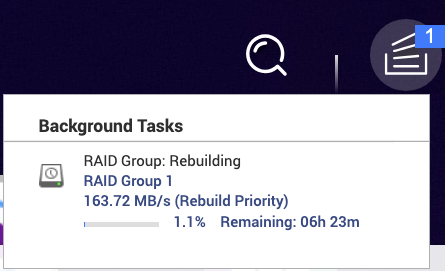
This was also visible in the front end:
And as soon as it was above 1%, we could see the process in the backend, using again mdadm:
Exit from the Backend
Just using exit, we left the backend and now just had to wait until the process completed.