
OK, so it appears that Apple this time really blew it with PDFKit. In Sierra, it appears to be seriously broken, and the most important outcome of that is that Skim no longer appears to work.
I mean you know you’ve fucked up seriously, if one of the most competent developers, Christiaan Hofman, who does the widely used Skim application, writes about it:
Yes, it does seem that PDFkit on Sierra is a completely different framework from earlier versions. And it is badly broken and badly lacking. I don’t see how a lot of features, in particular UI updating and UI is even possible in this framework as documented. Moreover, about most of the documentation does not seem to have written. This is truly amazingly bad behavior, this framework seems to be extremely bad designed, extremely buggy, so overall a long way away from release status. Whoever wrote that piece of crap, and whoever approved of releasing it should be fired right away, and Apple needs to release 10.12.1 with the old PDFKit immediately. Sorry for the rant, but Apple really lost it this time. And they already have a very bad history with PDFKit, but this takes the cake. They may have finally killed Skim this time.
Now, PDFKit has largely made problems basically since Yosemite. Not that Apple appears to care at all – just search for it, and you’ll find many complaints. Oh by the way, I very much like most of Apples products, but letting their community out there in the rain is something that seriously sucks.
So what can we do about it? I read this here. It basically says that to fix PDFKit, use an older version (specifically, that of Mavericks), by replacing
/System/Library/Frameworks/Quartz.framework/Versions/A/Frameworks
Now this leaves us with three issues:
- Where do we get the Mavericks version of PDFKit.framework
- How do we deploy it
- What are side-effects
Where do we get PDFKit.framework
From someone else who did it
Essentially, we don’t, anywhere. We have to build it ourselves. I’ll describe below the process of getting to it, but if you want to cut down on that time significantly (it took me about 2 hours to do so), you can also download the resulting file from here:
http://www.filedropper.com/pdfkitframeworkmavericksenc
This is an encrypted version of the PDFKit.framework that we are going to replace. The encryption password is, at the same time, the md5 hash of the contained ZIP that is inside the file. So we can expand it like this:
Last login: Fri Oct 28 16:40:26 on ttys004
mnott:~ mnott$ cd Downloads/
mnott:Downloads mnott$ ls -la
total 113920
drwx------   18 mnott  staff       612 28 Okt 16:44 ./
drwxr-xr-x@ 176 mnott  staff      5984 28 Okt 16:40 ../
-rw-r--r--@   1 mnott  staff   7009067 28 Okt 16:44 PDFKit.framework.mavericks.enc.zip
mnott:Downloads mnott$ mkdir bla
mnott:Downloads mnott$ cd bla
mnott:bla mnott$ unzip ../PDFKit.framework.mavericks.enc.zip
Archive:  ../PDFKit.framework.mavericks.enc.zip
[../PDFKit.framework.mavericks.enc.zip] PDFKit.framework.mavericks.zip password:
extracting: PDFKit.framework.mavericks.zip
mnott:bla mnott$ md5sum PDFKit.framework.mavericks.zip
34e7580bc22b0cf0c7952daad019a6d8  PDFKit.framework.mavericks.zip
The password for the decryption is exactly the 34....d8 String that came out of the md5sum command of the decrypted file; in other words, if the above mentioned password does not work for the decryption, then you won’t be able to unzip that file, which is fine, as it will likely have been tampered with.
By doing an Installation of Mavericks in a Virtual Machine
So let’s assume you don’t want to use that file, but you want to generate it yourself. The first thing you’ll need is the installation file of Mavericks. I had set aside a copy of the Install OS X Mavericks.app, which I’ve put into a location /Volumes/Installation/operations/macos.
So let’s assume I’m working off an external disk, in my case, /Volumes/LaCie, and the only reason for doing so is that I need some space for doing the following process. The first thing we do is to make some space:
mnott:~ mnott$ cd /Volumes/Lacie
mnott:Lacie mnott$ mkdir Mavericks
mnott:LaCie mnott$ cd Mavericks
Now what we need to do is to copy the file InstallESD.dmg out of that Install OS X Mavericks.app over here, and to mount InstallESD.dmg:
mnott:Mavericks mnott$ cp /Volumes/Installation/operatingsystems/macos/Install\ OS\ X\ Mavericks.app/Contents/SharedSupport/InstallESD.dmg .
mnott:Mavericks mnott$ hdiutil attach InstallESD.dmg
Prüfsumme für Driver Descriptor Map (DDM : 0) berechnen …
     Driver Descriptor Map (DDM : 0): Die überprüfte CRC32-Prüfsumme ist $84BDB567
Prüfsumme für  (Apple_Free : 1) berechnen …
                    (Apple_Free : 1): Die überprüfte CRC32-Prüfsumme ist $00000000
Prüfsumme für Apple (Apple_partition_map : 2) berechnen …
     Apple (Apple_partition_map : 2): Die überprüfte CRC32-Prüfsumme ist $B8F227AF
Prüfsumme für disk image (Apple_HFS : 3) berechnen …
...................................................................................................................
          disk image (Apple_HFS : 3): Die überprüfte CRC32-Prüfsumme ist $994EF25A
Prüfsumme für  (Apple_Free : 4) berechnen …
                    (Apple_Free : 4): Die überprüfte CRC32-Prüfsumme ist $00000000
Die überprüfte CRC32-Prüfsumme ist $E3E51727
/dev/disk7          	Apple_partition_scheme
/dev/disk7s1        	Apple_partition_map
/dev/disk7s2        	Apple_HFS                      	/Volumes/OS X Install ESD
mnott:Mavericks mnott$
The previous command opens also a Finder window, which we can close. Take note of the physical location that the file was mounted into, as shown in the highlighted line above, i.e., something like /dev/disk7. Next, we need to copy the actual BaseSystem.dmg in the mounted file to the local directory:
mnott:Mavericks mnott$ cp /Volumes/OS\ X\ Install\ ESD/BaseSystem.dmg .
mnott:Mavericks mnott$ chflags nohidden BaseSystem.dmg
mnott:Mavericks mnott$ ls -la
total 11272704
drwxr-xr-x   4 mnott  staff         136 Oct 28 19:10 .
drwxrwxr-x@ 19 mnott  staff         714 Oct 28 18:34 ..
-rw-r--r--@  1 mnott  staff   481067537 Oct 28 20:10 BaseSystem.dmg
-rw-r--r--@  1 mnott  staff  5290551900 Oct 28 19:06 InstallESD.dmg
mnott:Mavericks mnott$
Now, we want to convert and mount the file BaseSystem.dmg so that we can work with it:
mnott:Mavericks mnott$ hdiutil convert BaseSystem.dmg -format UDSP -o mavericks
Driver Descriptor Map (DDM : 0) lesen …
 (Apple_Free : 1) lesen …
Apple (Apple_partition_map : 2) lesen …
disk image (Apple_HFS : 3) lesen …
...........................................................................................................................................
 (Apple_Free : 4) lesen …
Dauer: 11.618s
Geschwindigkeit: 98.8M Byte/s
Ersparnis: 4.0 %
created: /Volumes/LaCie/Mavericks/mavericks.sparseimage
mnott:Mavericks mnott$
We have created a file mavericks.sparseimage, of which we need to adapt the size and then mount it:
mnott:Mavericks mnott$ hdiutil resize -size 5.6g mavericks.sparseimage
mnott:Mavericks mnott$ hdiutil attach mavericks.sparseimage
/dev/disk8          	Apple_partition_scheme
/dev/disk8s1        	Apple_partition_map
/dev/disk8s2        	Apple_HFS                      	/Volumes/OS X Base System
mnott:Mavericks mnott$
The mounted file will open in a Finder window, that we can then close. But, please take note of the line that reads /dev/disk8 marked above, as we’ll need this value later.
Not only will a Finder window open, which we can close, but we will have mounted the file to /Volumes/OS X Base System, as a sparse image that will grow with us, and which we’ll next work with. So let’s replace the Packages link which is in that file by actual content:
mnott:Mavericks mnott$ rm /Volumes/OS\ X\ Base\ System/System/Installation/Packages
mnott:Mavericks mnott$ cp -a /Volumes/OS\ X\ Install\ ESD/Packages /Volumes/OS\ X\ Base\ System/System/Installation/
That copy command takes some time as we’re copying 4.5 GB of data. Once finished, you need to detach the file. To do so, we use hdiutil again to detach both mounted files; you need to use the values you’ve remembered before:
mnott:Mavericks mnott$ hdiutil detach /dev/disk8
"disk8" unmounted.
"disk8" ejected.
mnott:Mavericks mnott$ hdiutil detach /dev/disk7
"disk7" unmounted.
"disk7" ejected.
mnott:Mavericks mnott$
We can now compact the file:
mnott:Mavericks mnott$ ls -la
total 22995504
drwxr-xr-x   5 mnott  staff         170 Oct 28 20:11 ./
drwxrwxr-x@ 19 mnott  staff         714 Oct 28 18:34 ../
-rw-r--r--@  1 mnott  staff   481067537 Oct 28 20:10 BaseSystem.dmg
-rw-r--r--@  1 mnott  staff  5290551900 Oct 28 19:06 InstallESD.dmg
-rw-r--r--   1 mnott  staff  6002073600 Oct 28 20:13 mavericks.sparseimage
mnott:Mavericks mnott$ hdiutil compact mavericks.sparseimage
Komprimierung beginnen …
Unbenötigte Bereiche freigeben …
...................................................................................................................
Komprimierung fertigstellen …
....................................................................................................................
0 bytes von 11.7 MB möglichen gewonnen.
mnott:Mavericks mnott$ ls -la
total 22995504
drwxr-xr-x   5 mnott  staff         170 Oct 28 20:11 ./
drwxrwxr-x@ 19 mnott  staff         714 Oct 28 18:34 ../
-rw-r--r--@  1 mnott  staff   481067537 Oct 28 20:10 BaseSystem.dmg
-rw-r--r--@  1 mnott  staff  5290551900 Oct 28 19:06 InstallESD.dmg
-rw-r--r--   1 mnott  staff  6002073600 Oct 28 20:13 mavericks.sparseimage
mnott:Mavericks mnott$
We now convert the sparse image into a CD ROM image:
mnott:Mavericks mnott$ hdiutil convert mavericks.sparseimage -format UDTO -o mavericks
Driver Descriptor Map (DDM : 0) lesen …
 (Apple_Free : 1) lesen …
Apple (Apple_partition_map : 2) lesen …
disk image (Apple_HFS : 3) lesen …
...................................................................................................................
Dauer: 22.004s
Geschwindigkeit: 260.6M Byte/s
Ersparnis: 0.0 %
created: /Volumes/LaCie/Mavericks/mavericks.cdr
mnott:Mavericks mnott$ ls -la
total 34739616
drwxr-xr-x   6 mnott  staff         204 Oct 28 20:15 .
drwxrwxr-x@ 19 mnott  staff         714 Oct 28 18:34 ..
-rw-r--r--@  1 mnott  staff   481067537 Oct 28 20:10 BaseSystem.dmg
-rw-r--r--@  1 mnott  staff  5290551900 Oct 28 19:06 InstallESD.dmg
-rw-r--r--   1 mnott  staff  6012985344 Oct 28 20:16 mavericks.cdr
-rw-r--r--   1 mnott  staff  6002073600 Oct 28 20:13 mavericks.sparseimage
mnott:Mavericks mnott$
We now have created the actual disk image which we’ll need to boot our virtual machine. Assuming you have installed VirtualBox, I’ll describe next, using a lot of screen shots, how you can install MacOS based on that mavericks.cdr we have just created.
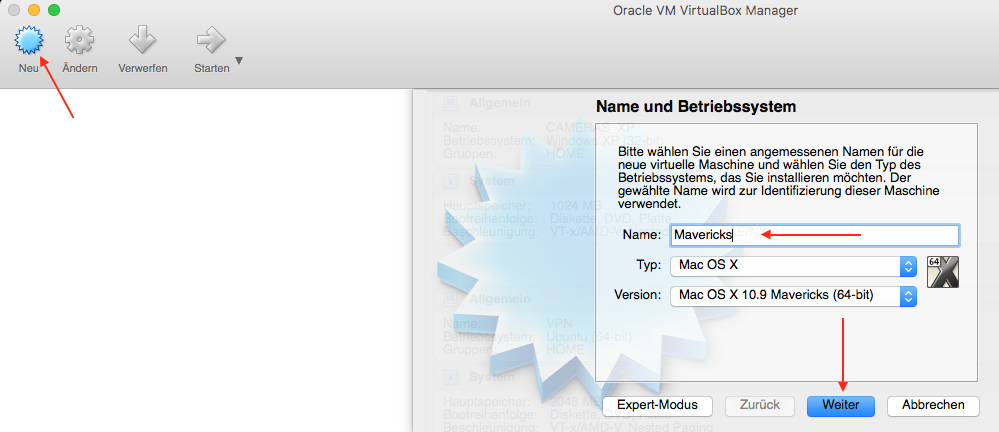
First of all, we start VirtualBox and say we want to create a new Virtual Machine. If we enter Mavericks as name, VirtualBox will guess that we are going to install Mavericks, so we just have to press continue:
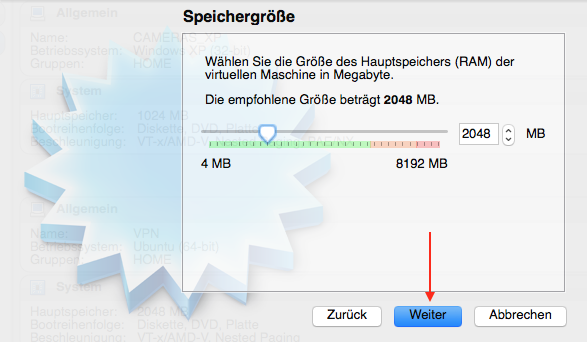
Next, confirm the 2048 MB of memory:
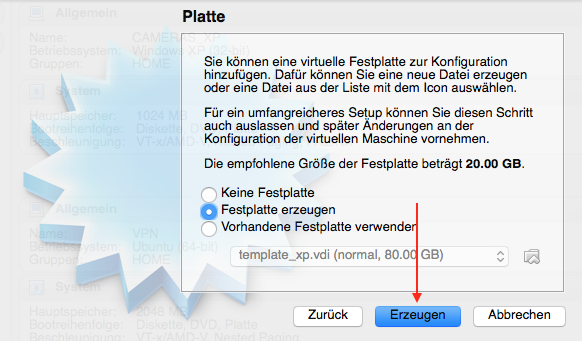
Hit create for the hard disk:
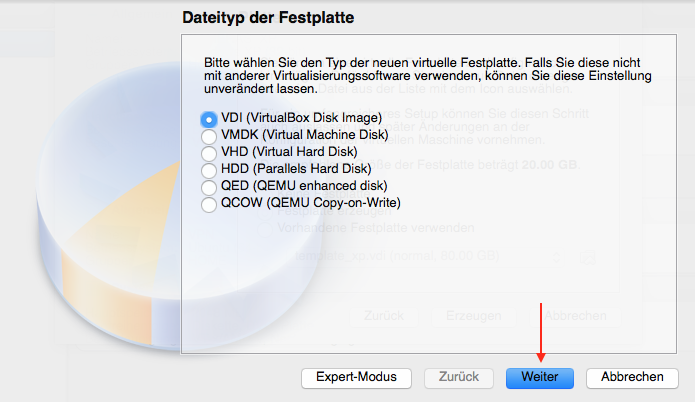
Hit continue to confirm the disk type of VDI:
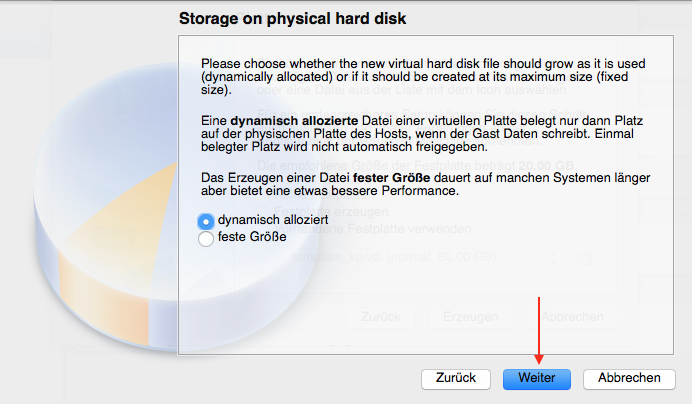
Hit continue to confirm the disk to be dynamically allocated:
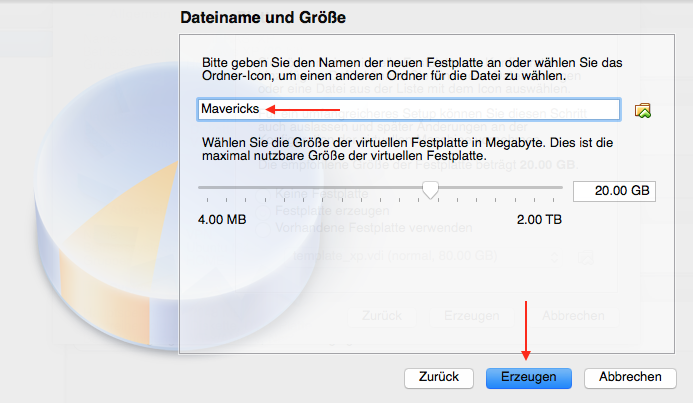
Enter Mavericks as disk file name and click on create:
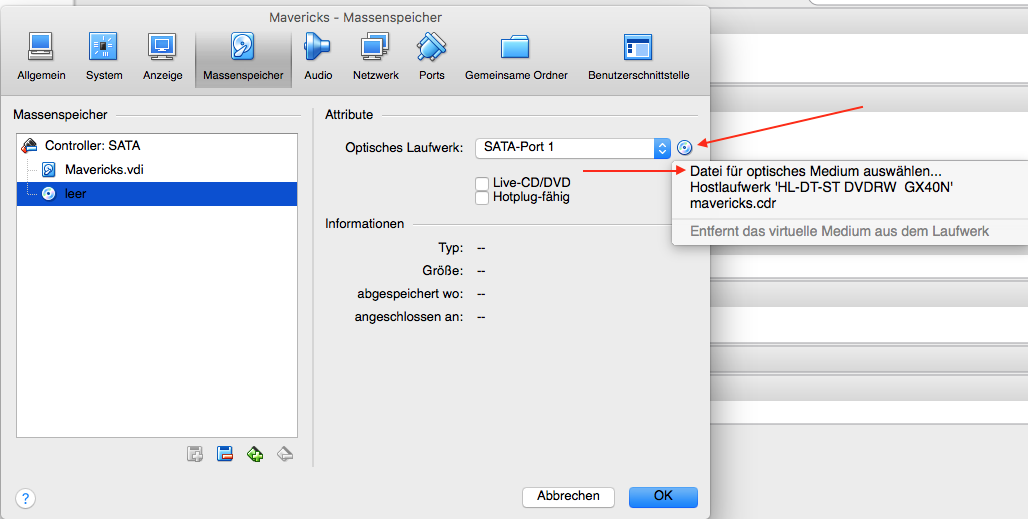
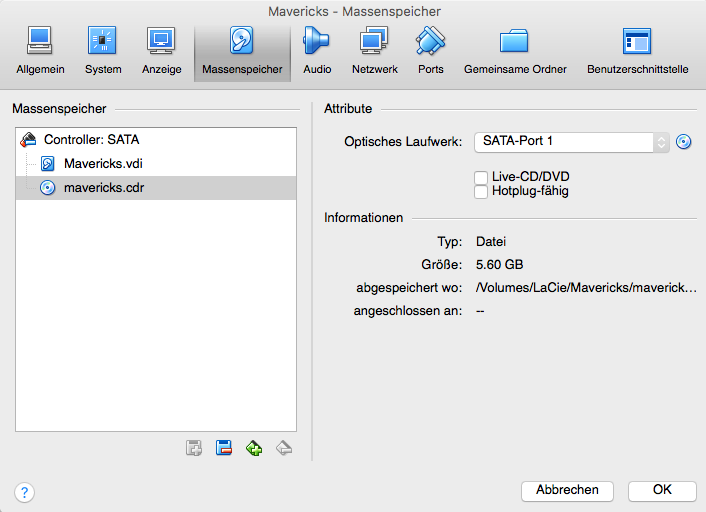
In the settings of the virtual machine, click on disk storage, select the (still empty) CD drive, click on the CD icon next to the name, and from the drop down menu, select the first option which allows you to select a file for the drive:
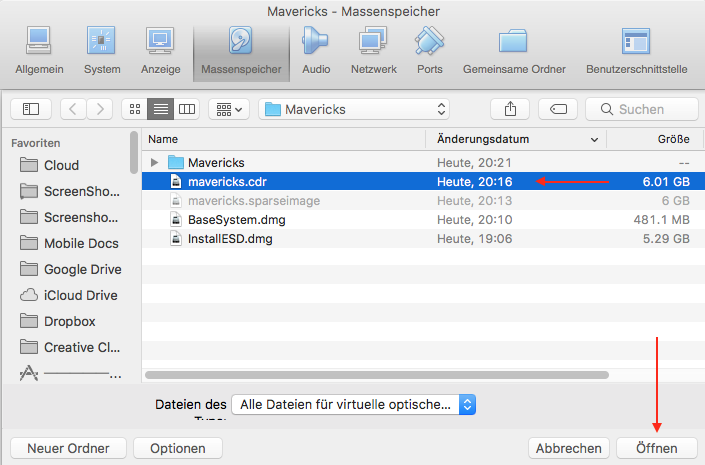
Select the file mavericks.cdr which you had just created before, and click on open:
You should now see that the CD drive refers to the file mavericks.cdr. Click on OK:
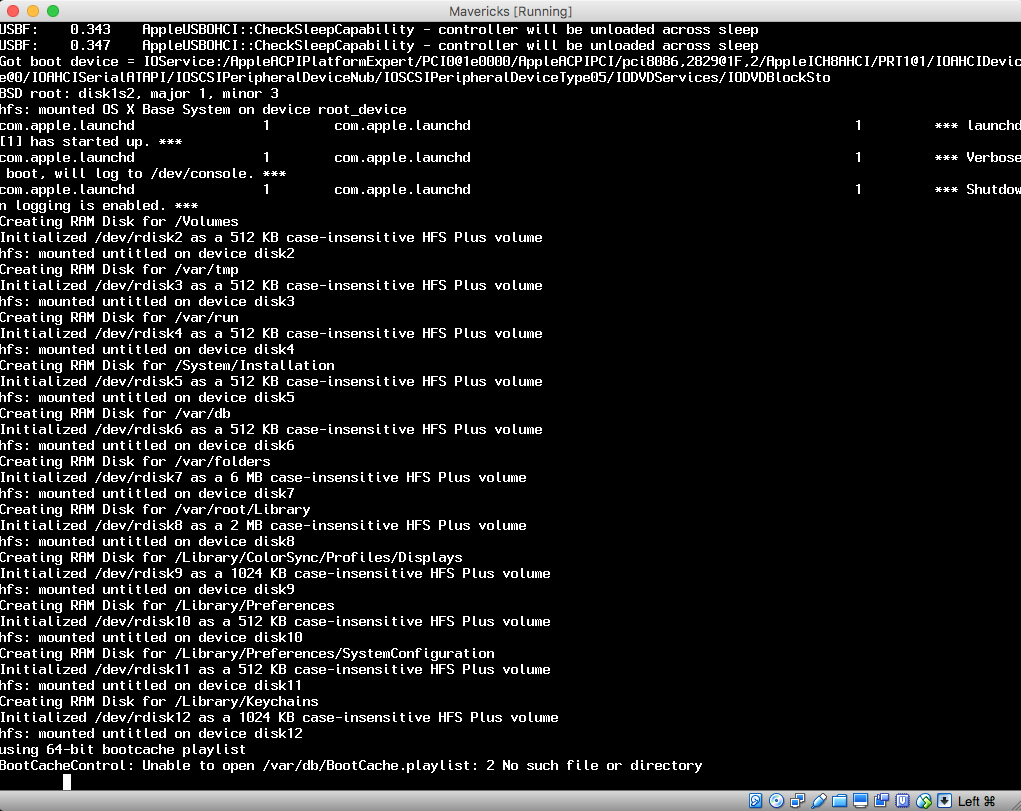
Click Start to launch the virtual machine:

Should you not see some text output after at maximum one minute, try to reset the machine. After a while, you should see that the virtual machine seems to stop for a moment:
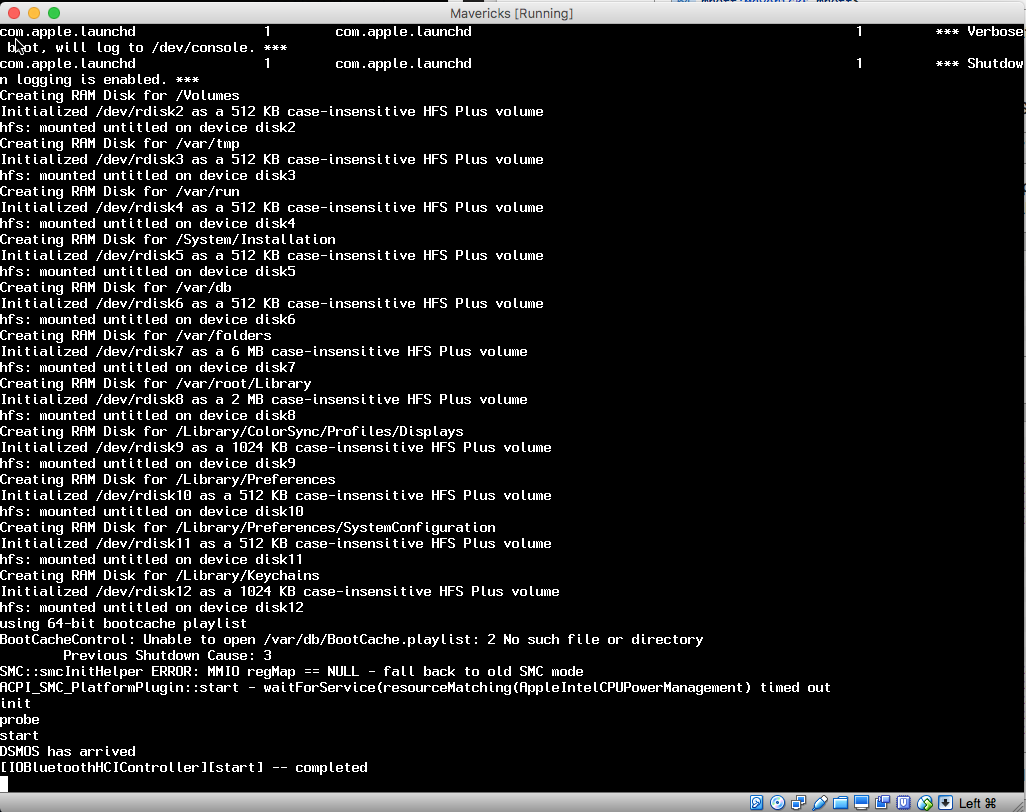
Finally, just before launching the graphical screen, you should see something like this:
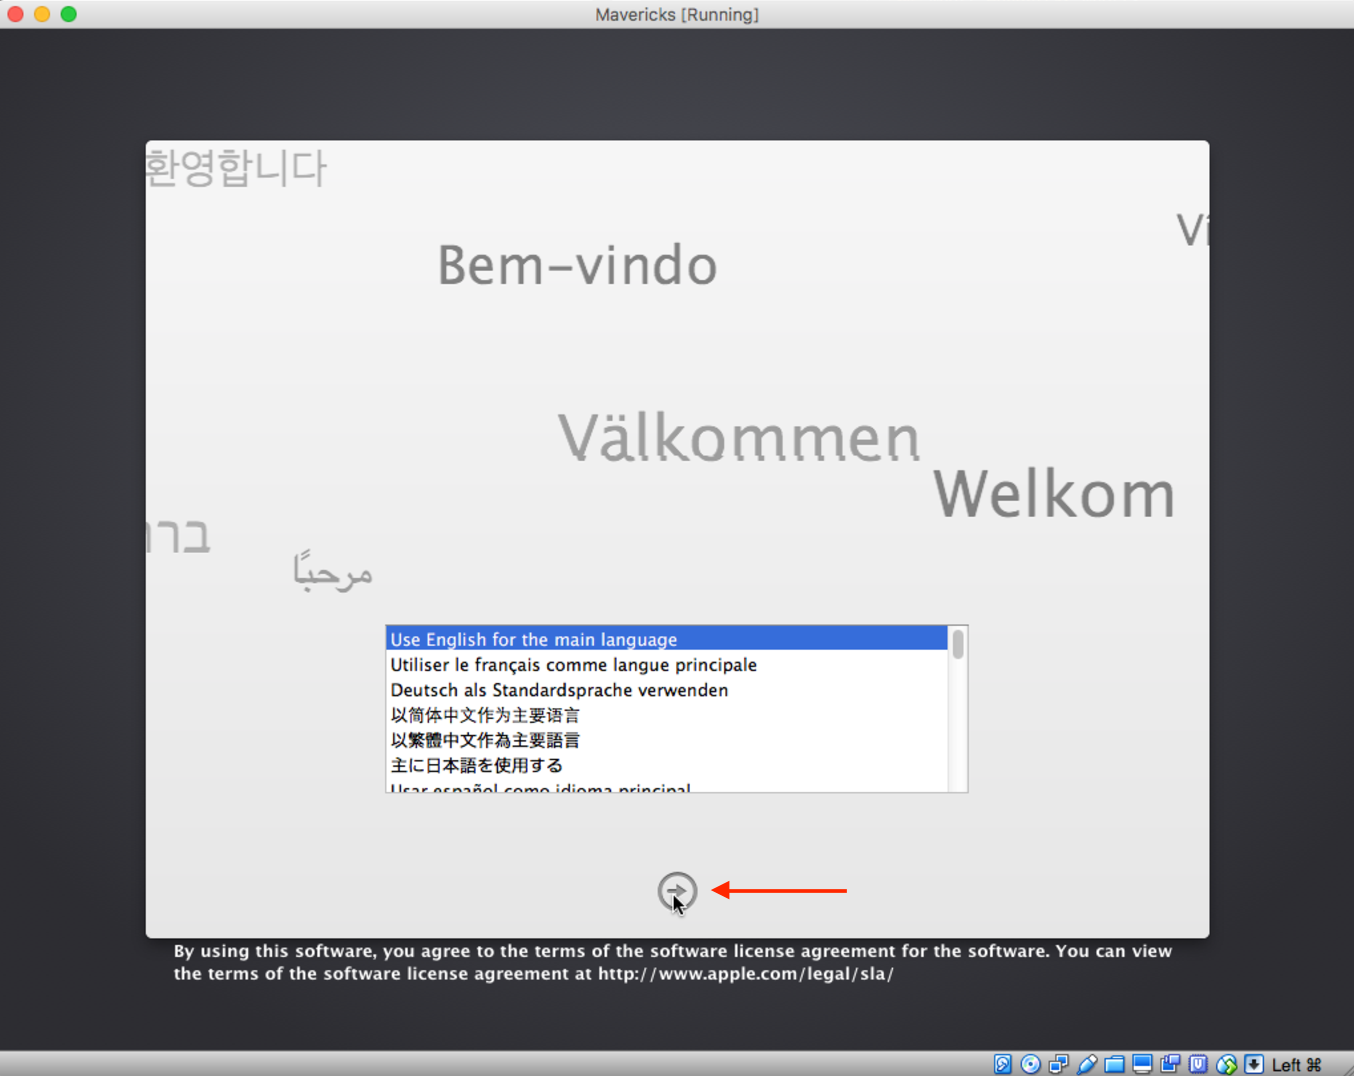
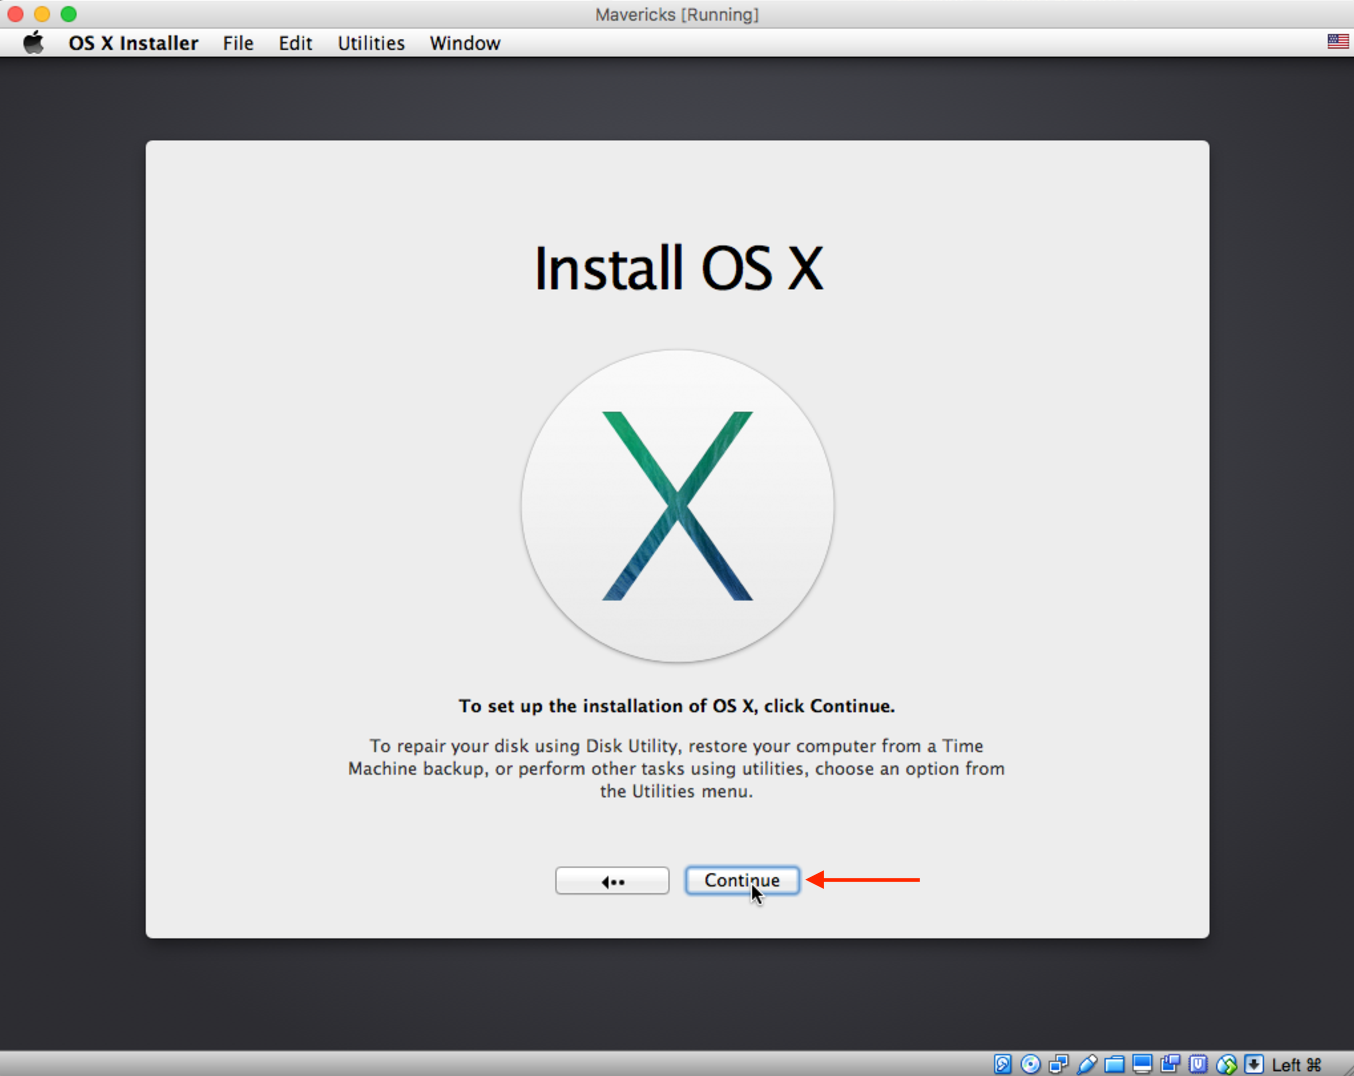
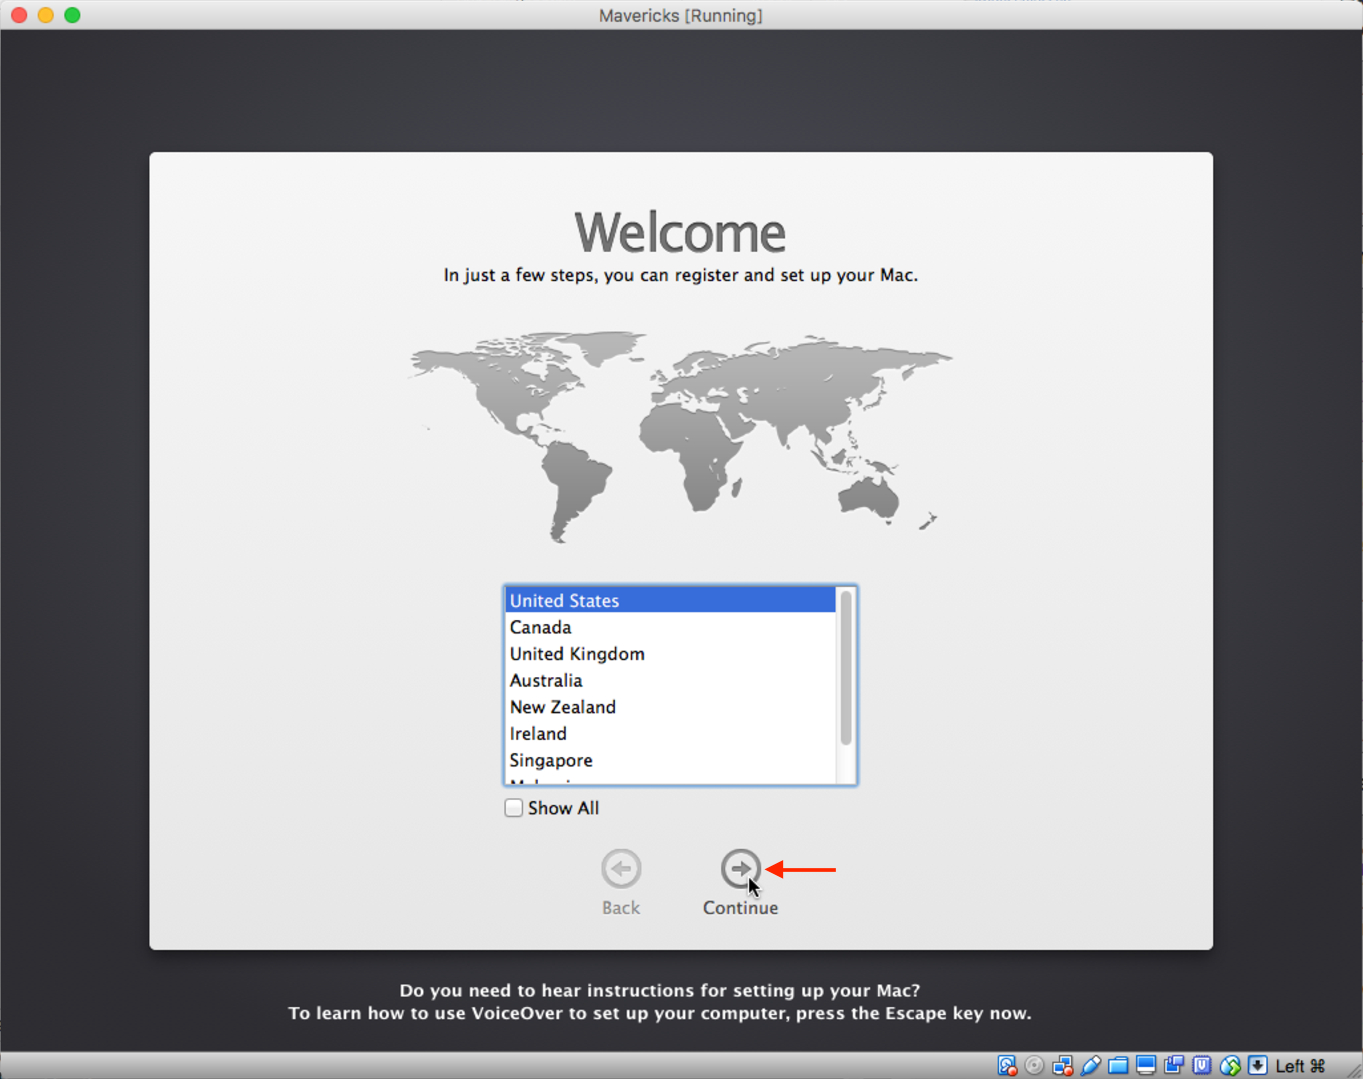
At the welcome screen, click the arrow to continue:
Click Continue:
Click Agree:

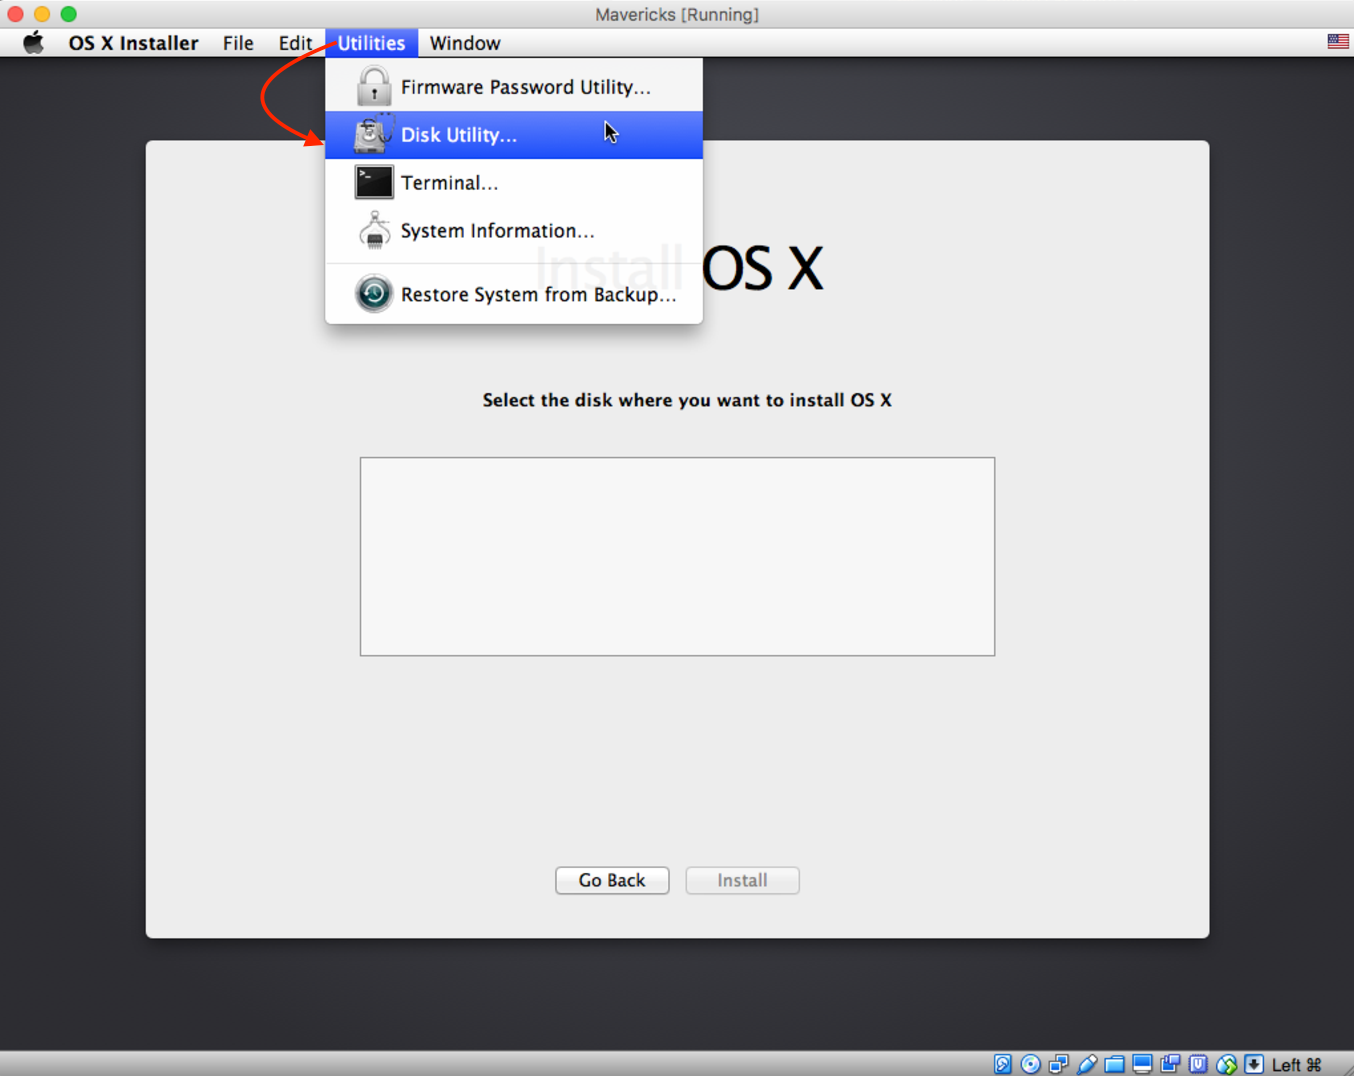
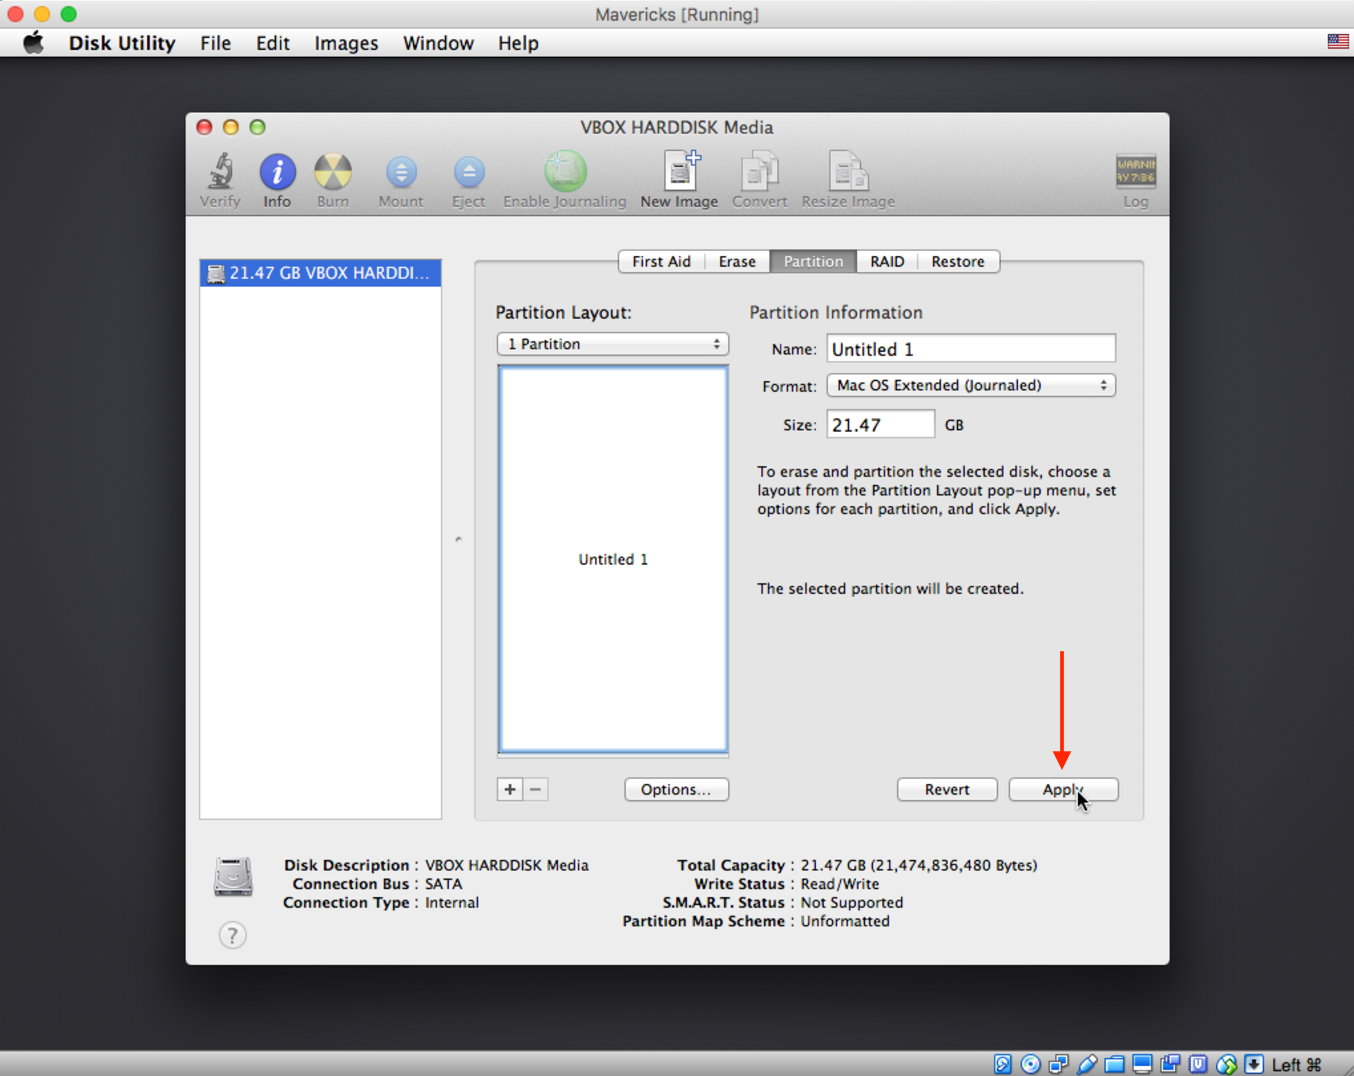
When you should be now in a place to select the disk to install MacOS to, you’ll see an empty list. Click on Utilities in the menu bar, and start Disk Utility:
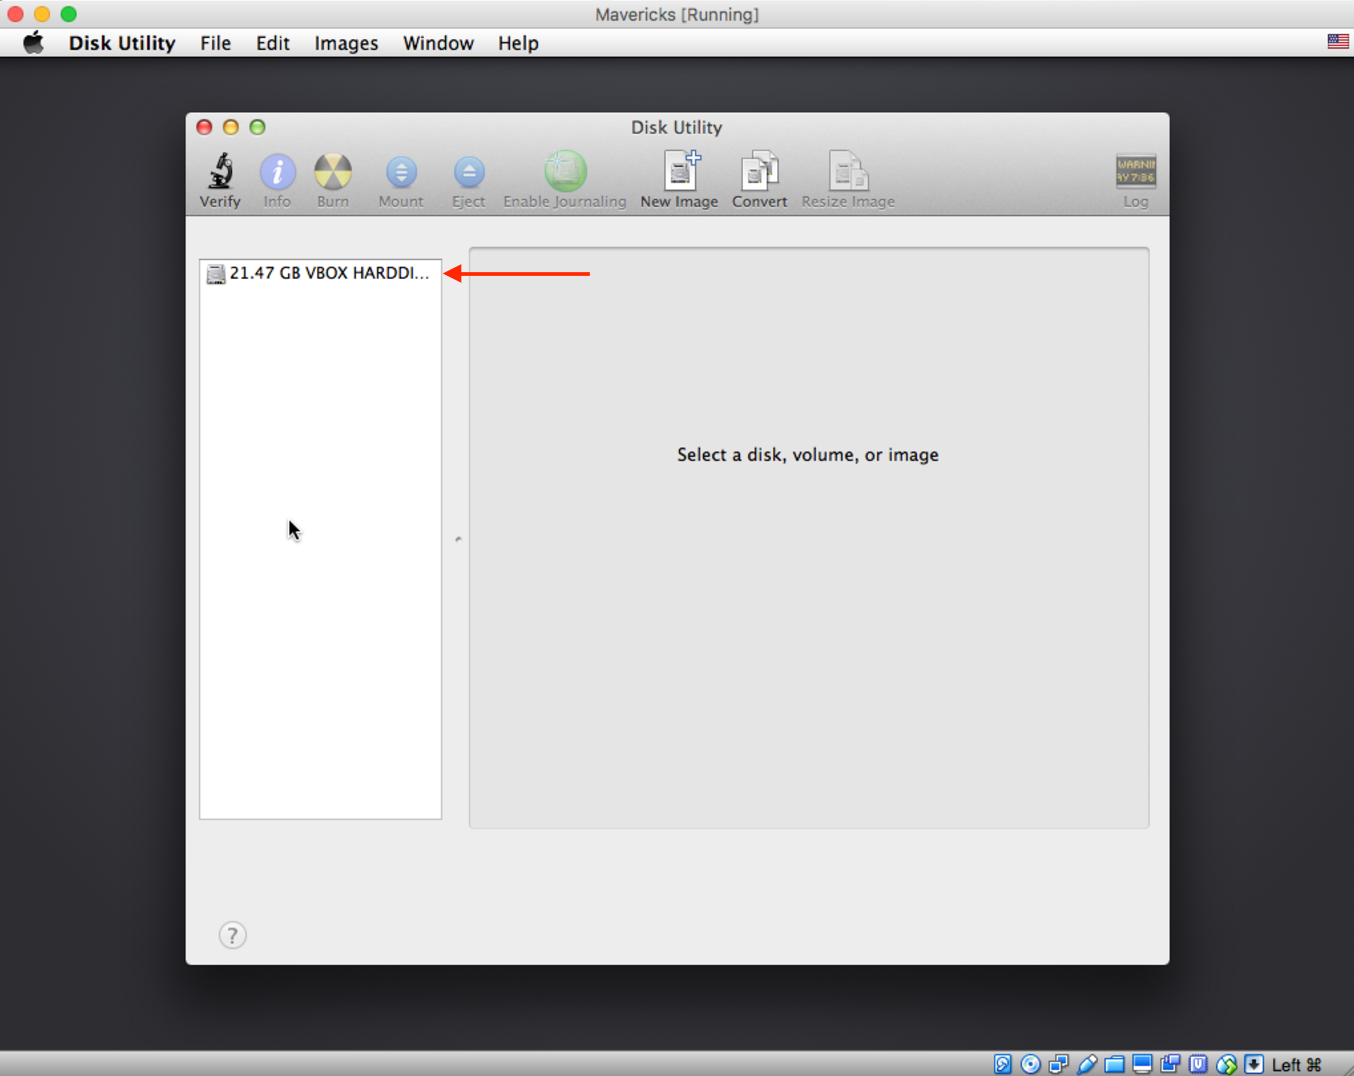
Click on the only available hard disk on the left side:
Click on Partition:
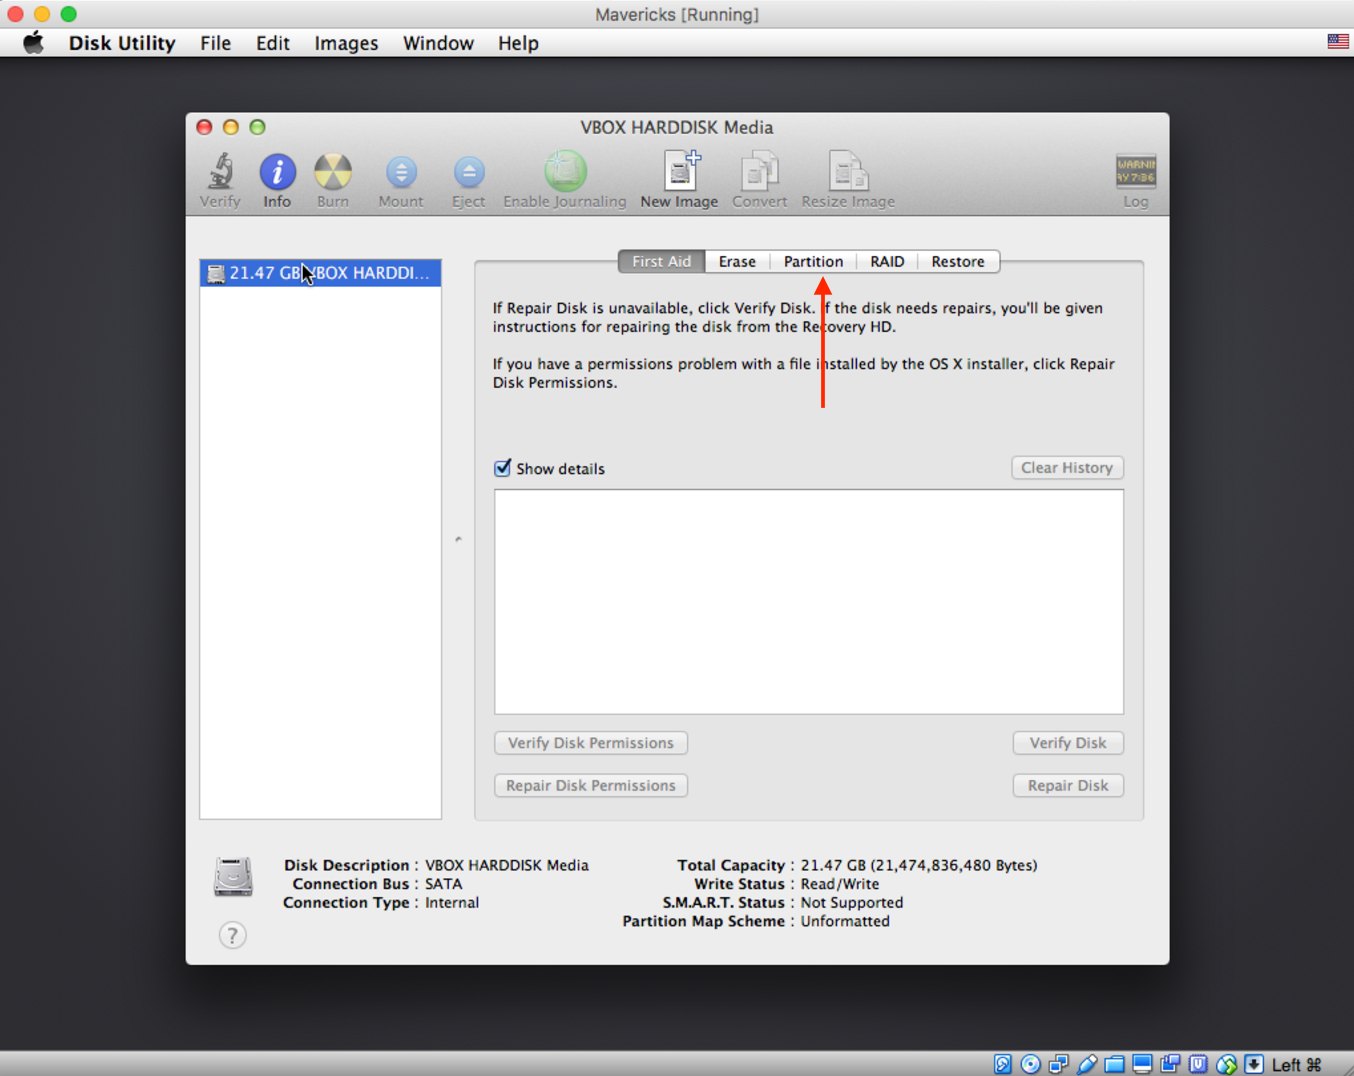
Click on the “+” button to add a partition:

Click on Apply:
Click on Partition:
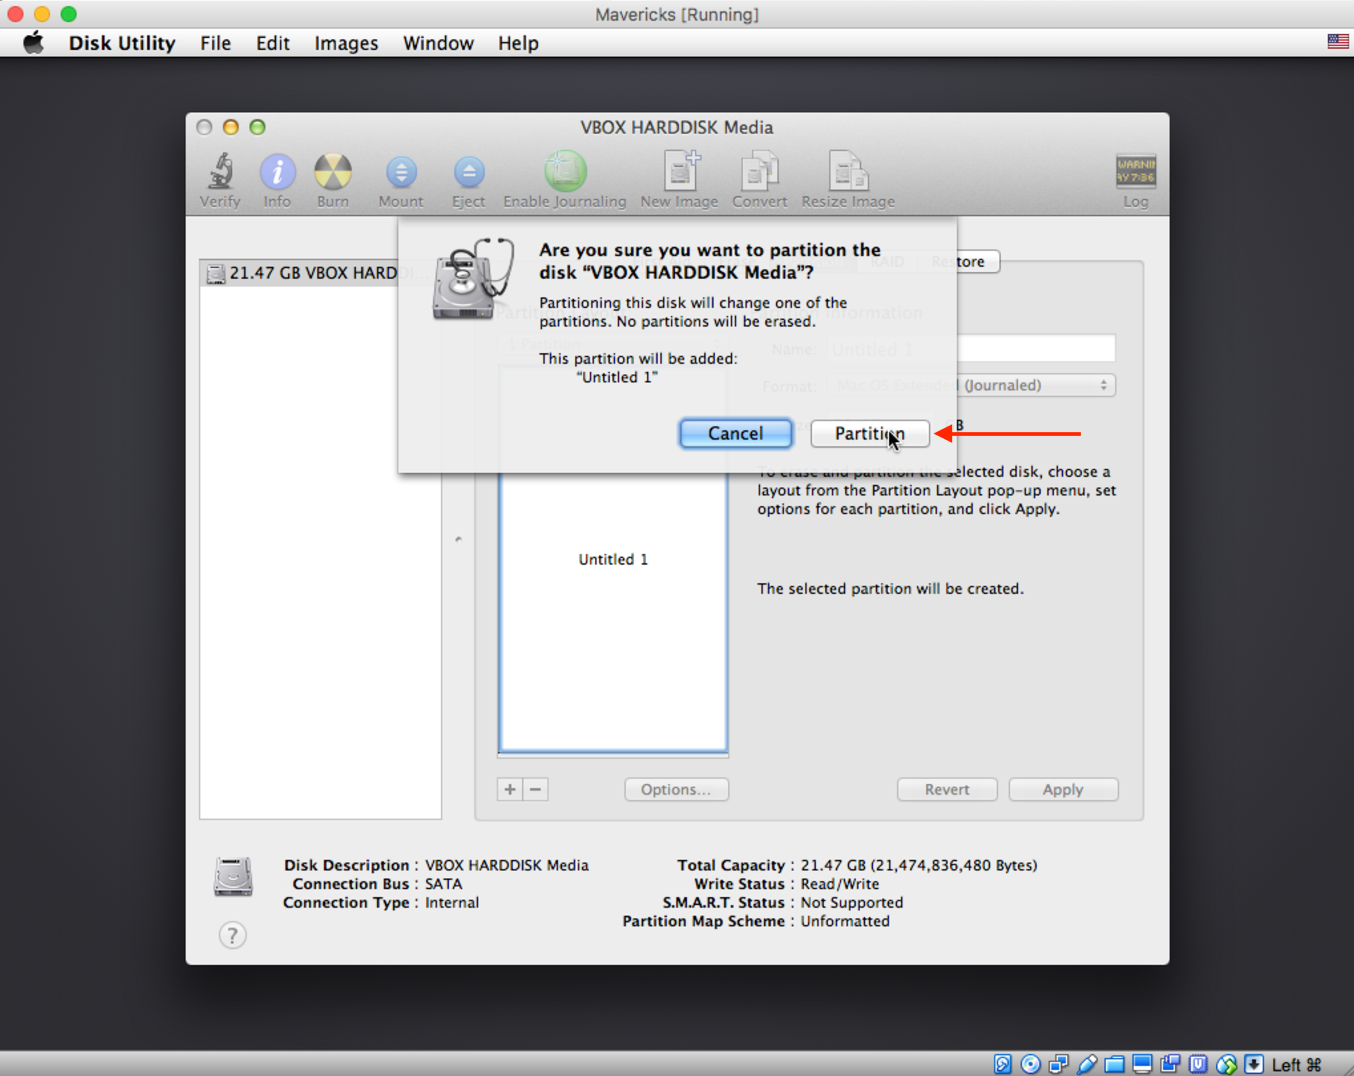
Close the Disk Utility:
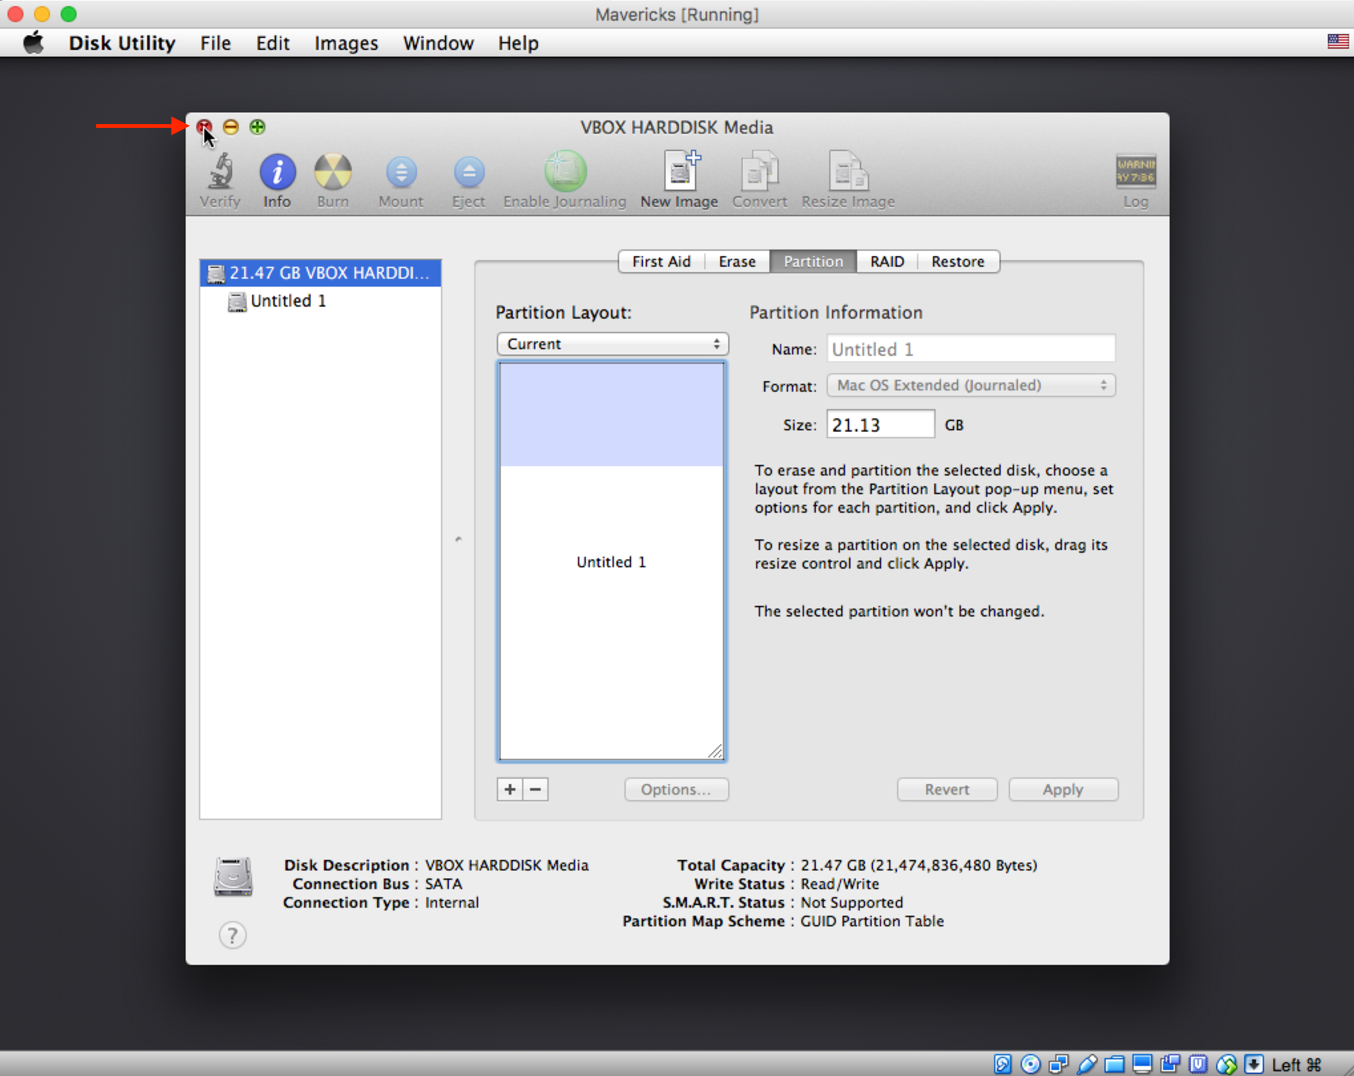
Select the now available hard disk for installation, and click on Install:
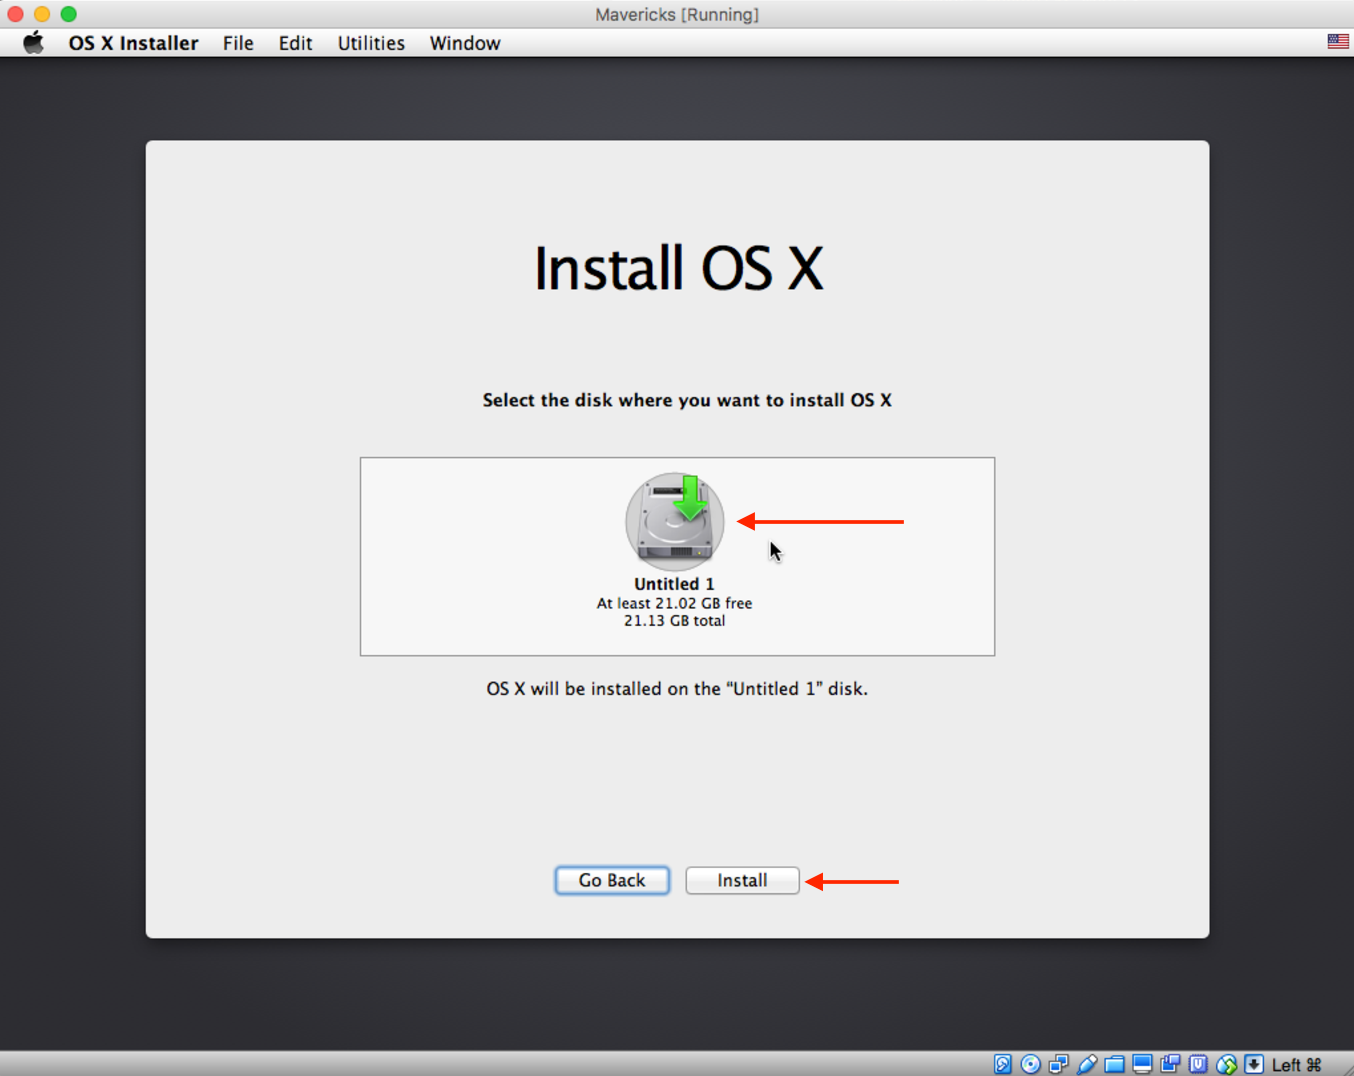
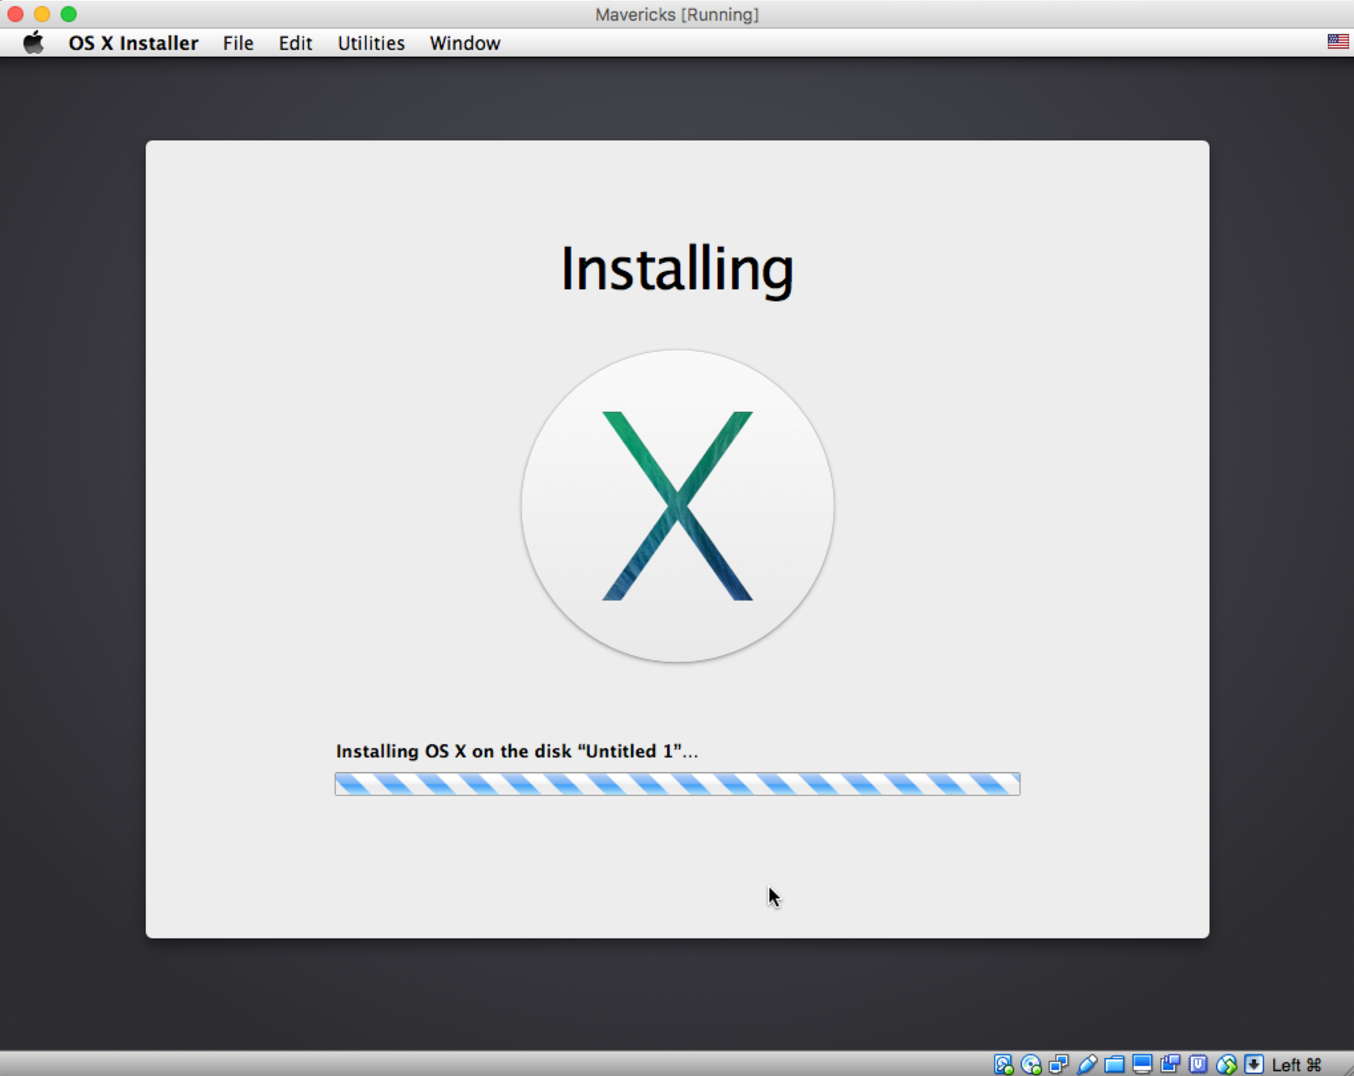
Wait for the installation to finish. In my case, on a 2013 MacBook Air, this took about 30 minutes:
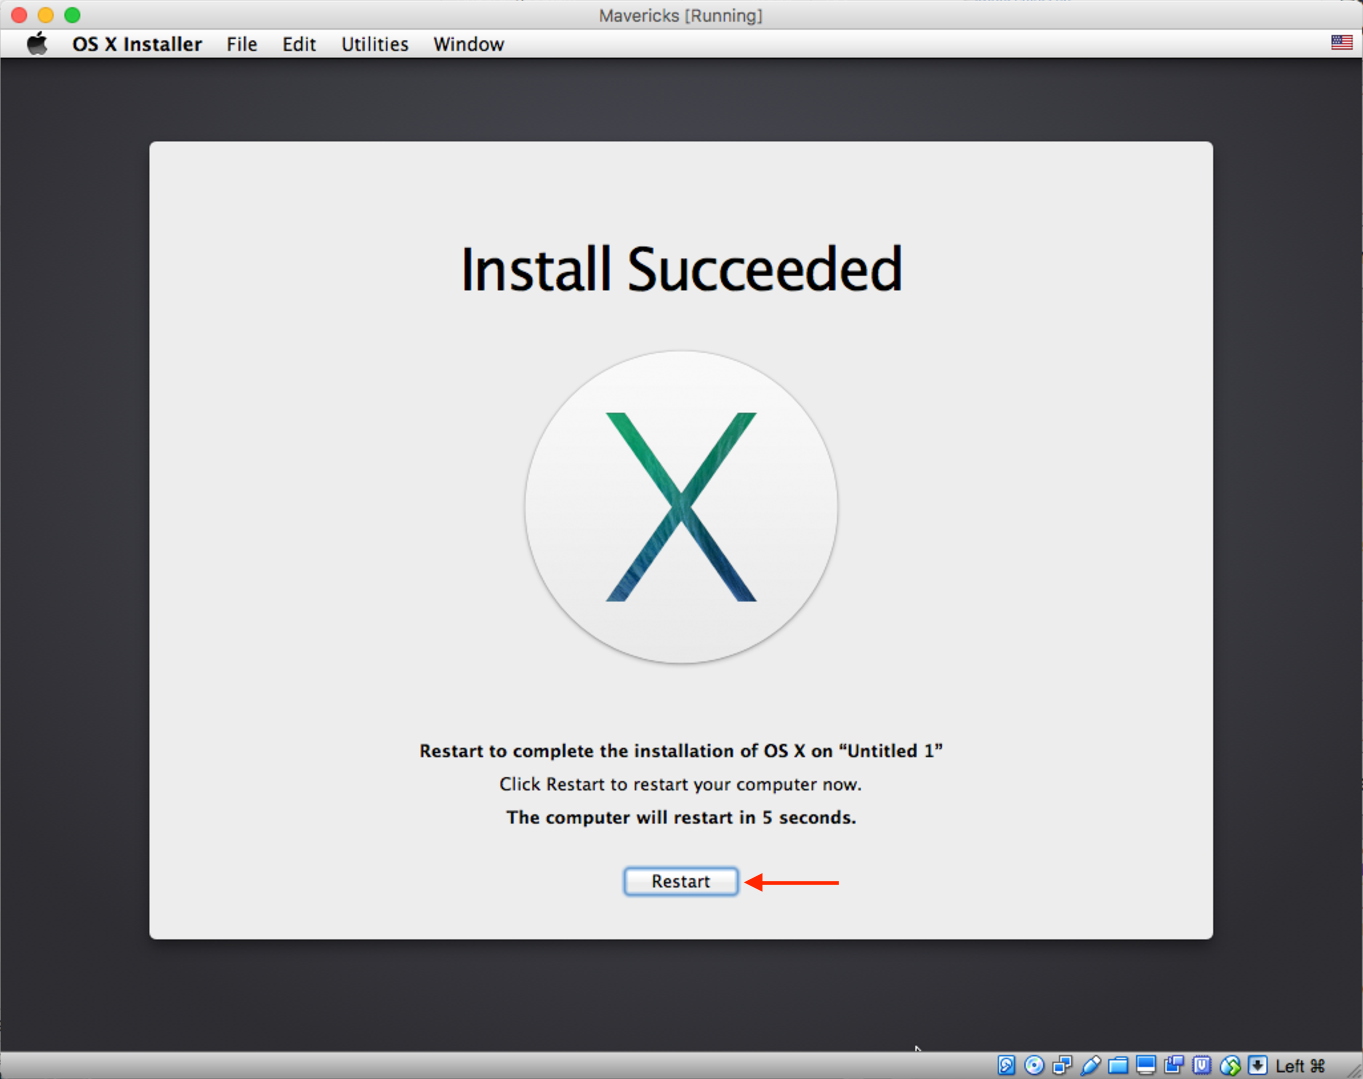
At the end of the installation, wait for a moment or click Restart:
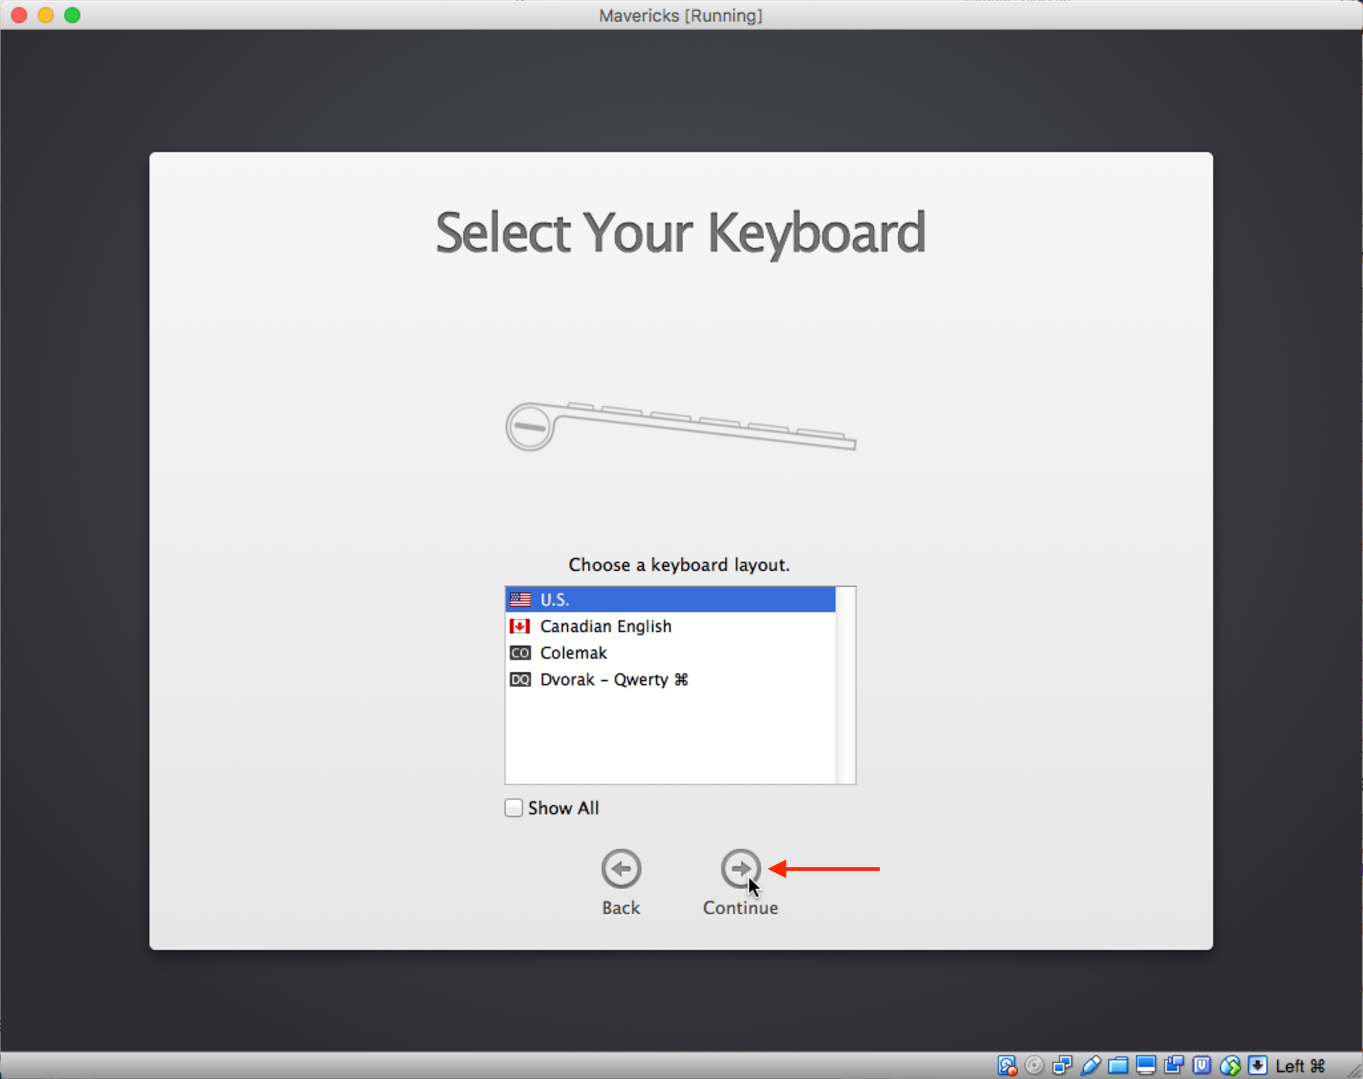
After the restart, select Continue:
And again Continue:
Select “Don’t transfer any information now” and click on Continue:

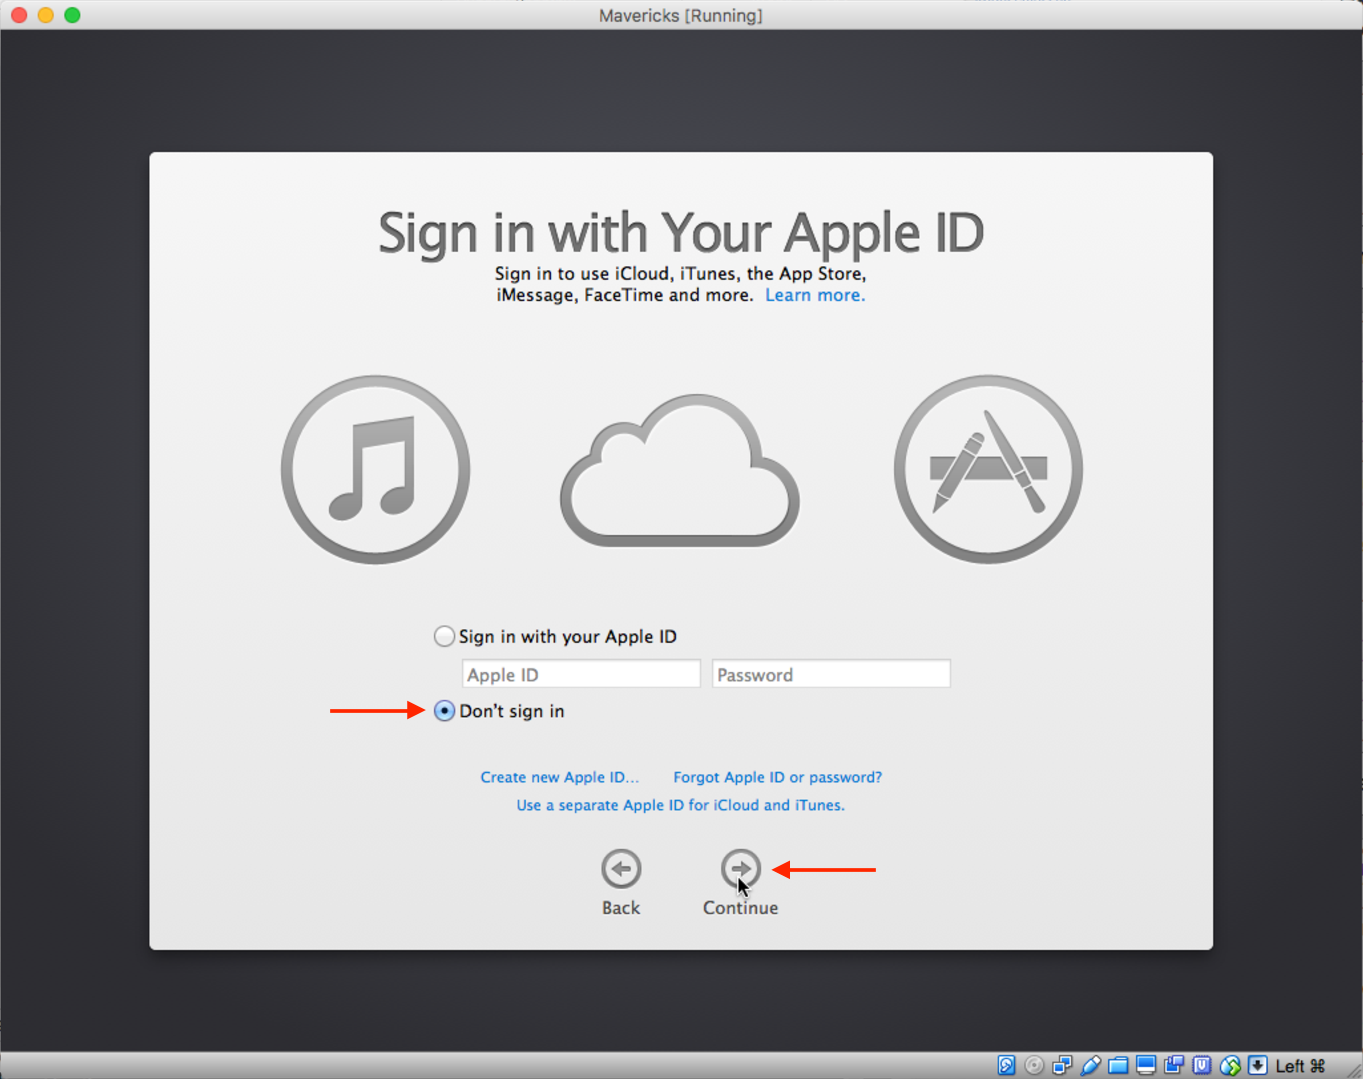
Choose “Don’t sign in” and click Continue:
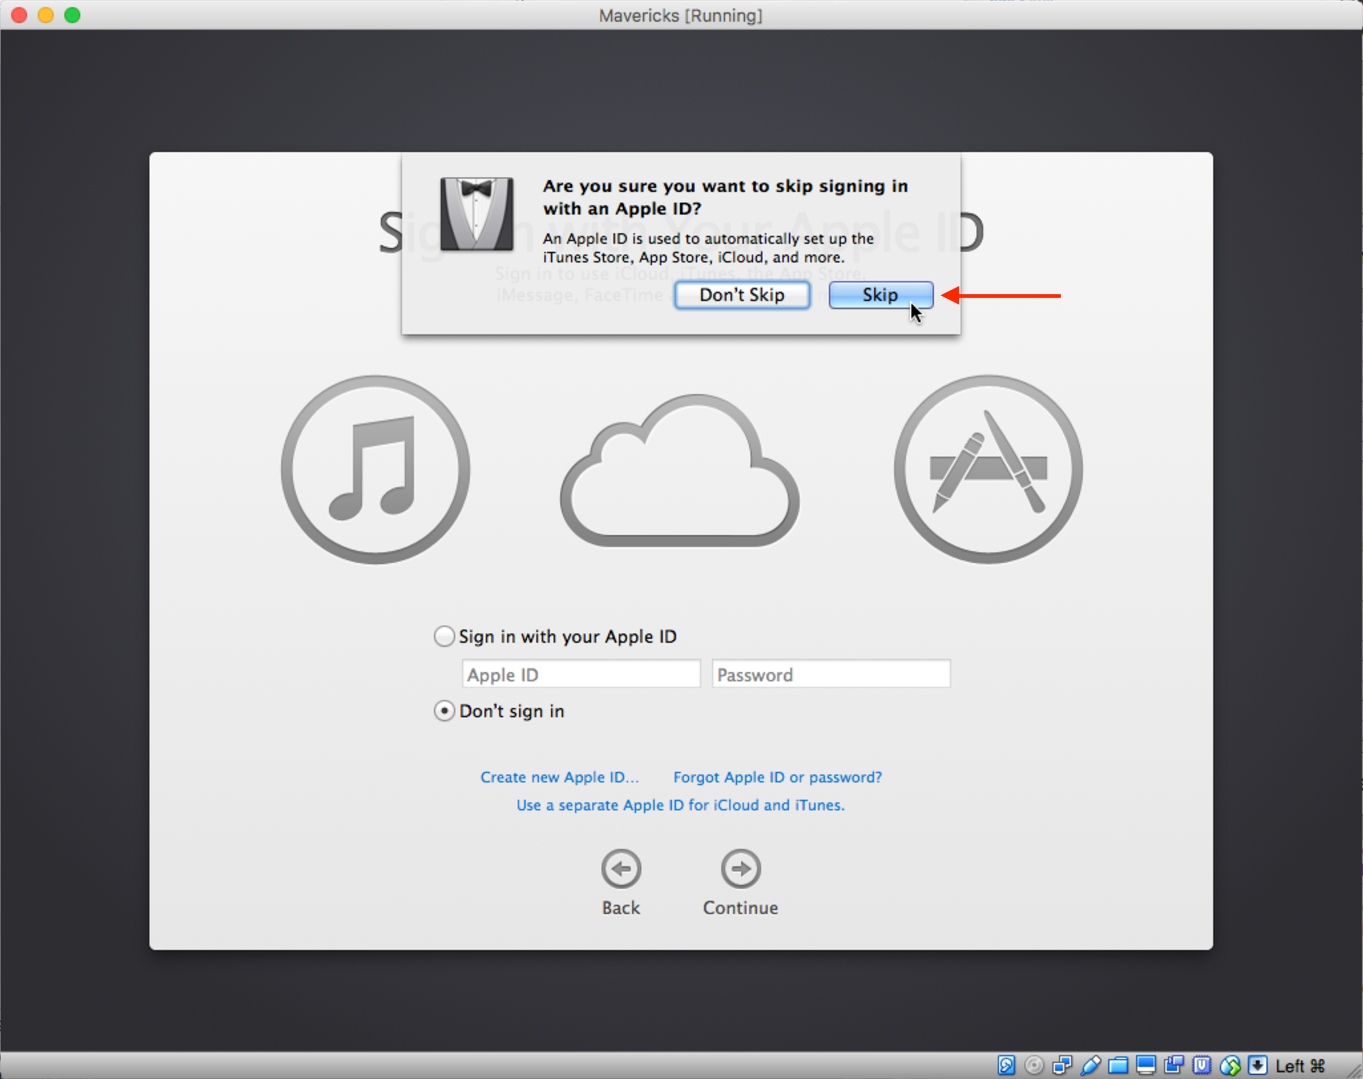
Skip the first of three annoying confirmations:
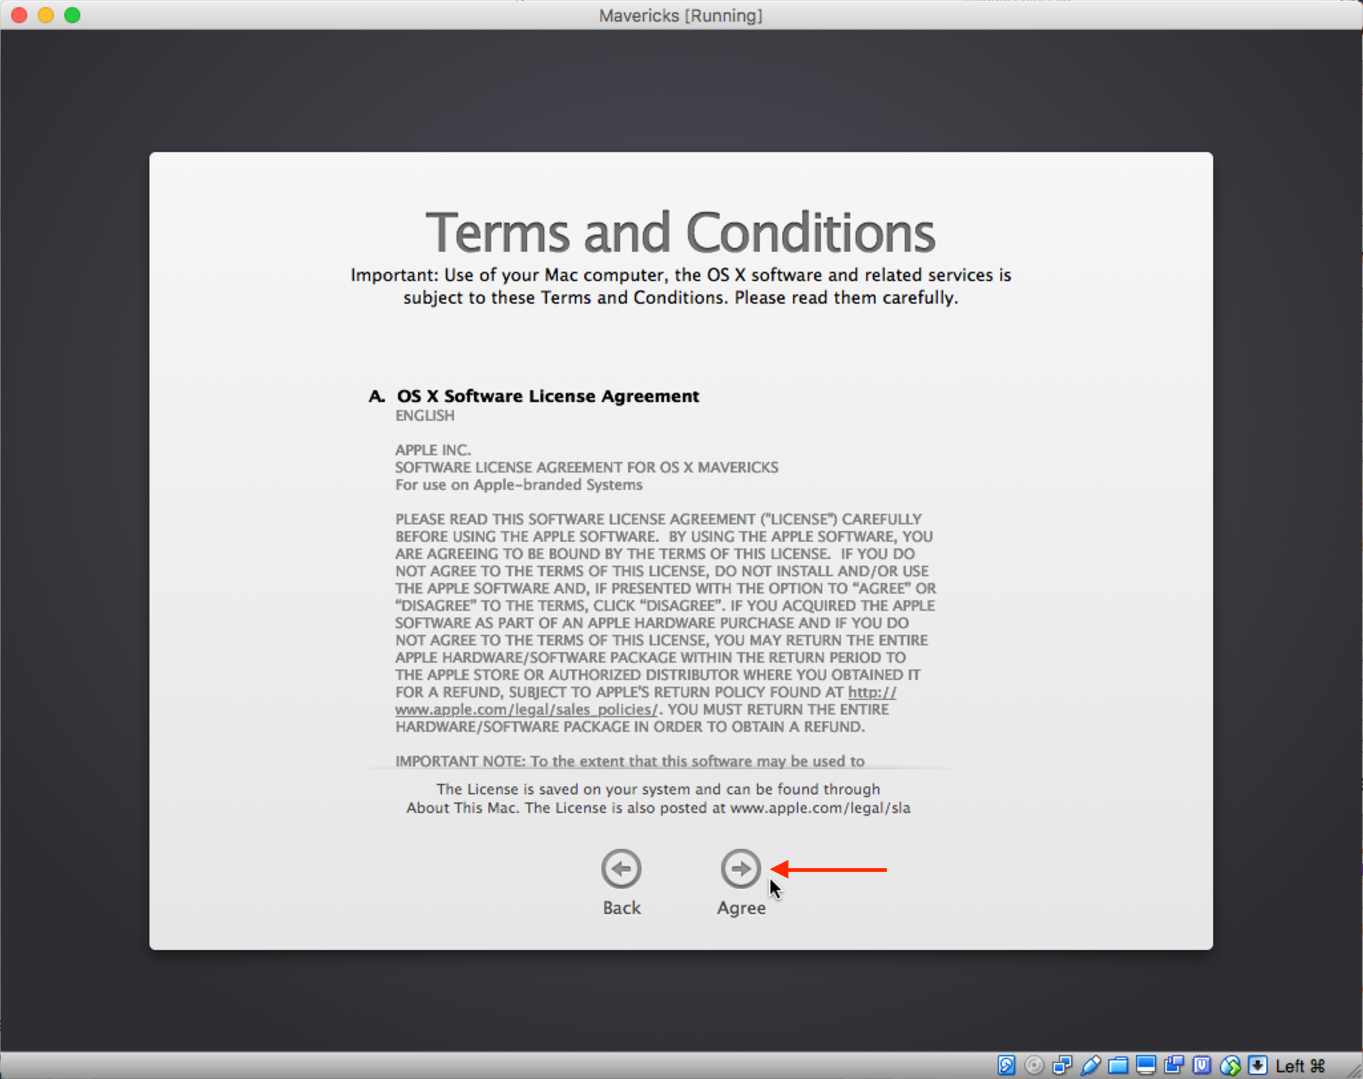
Click Agree:
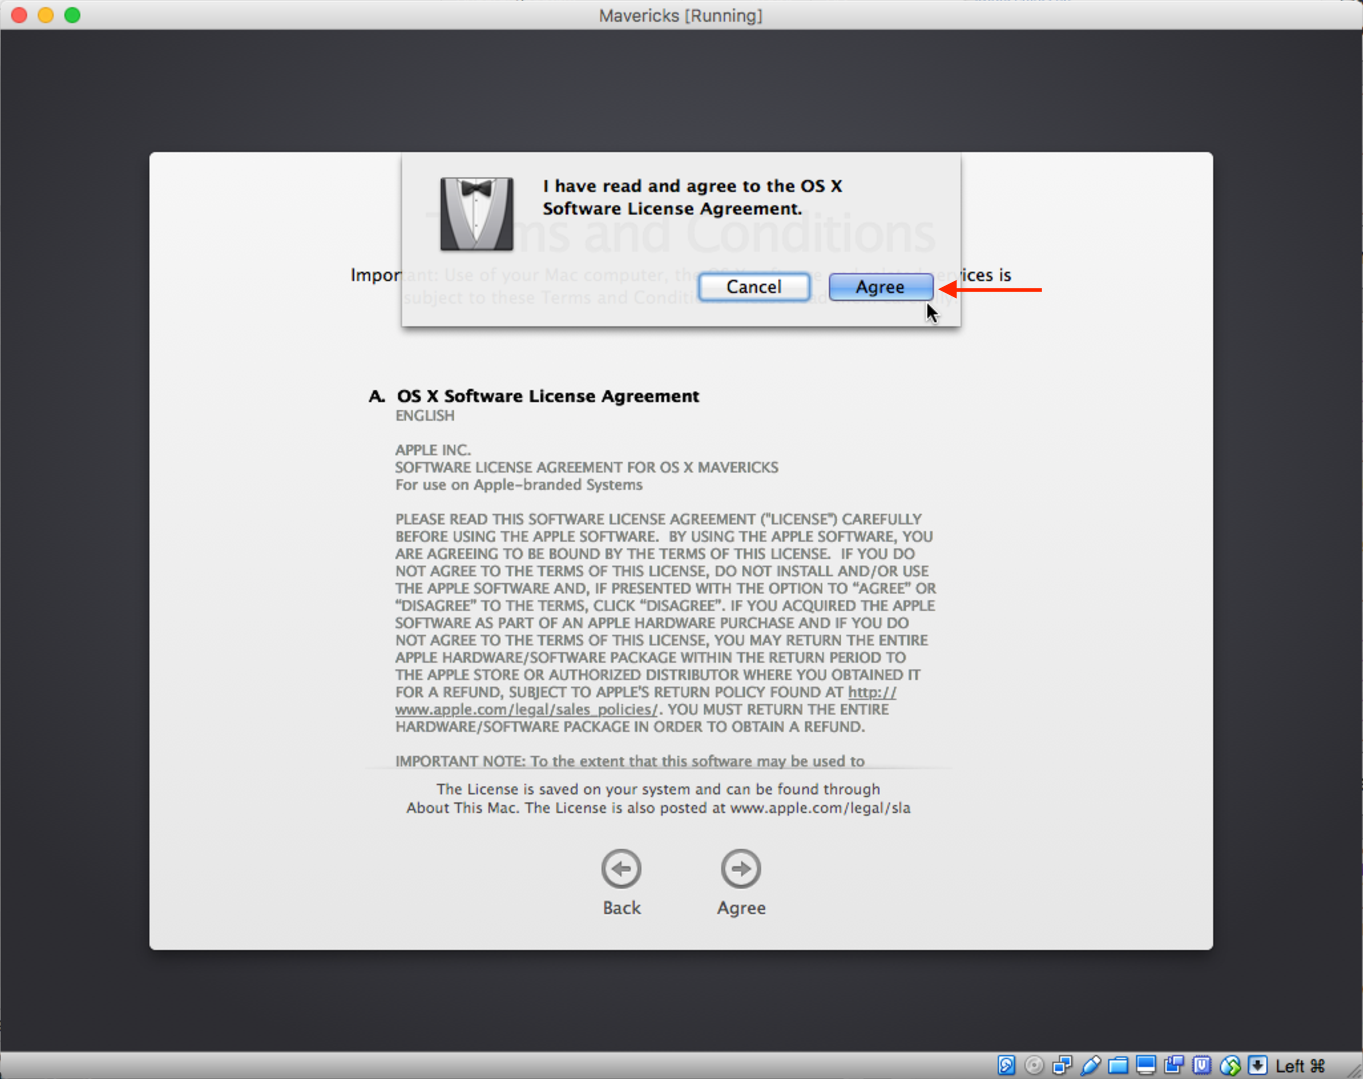
Agree to the second annoying confirmation:
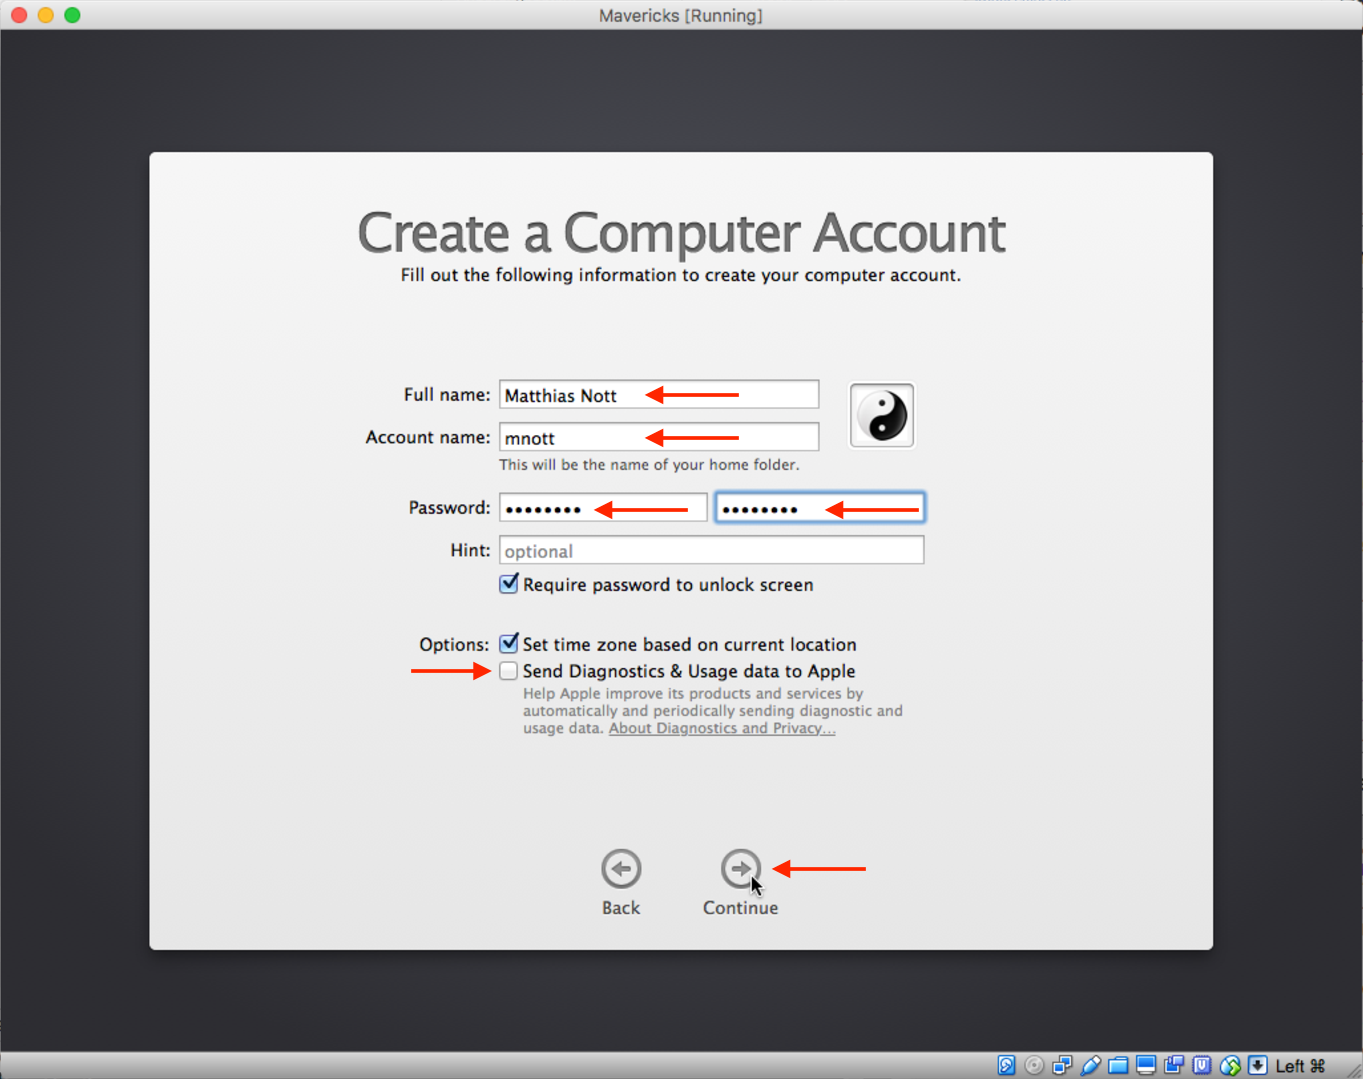
Enter a full name, an account name (you’ll need this one later, so be sure to remember what you do), a password, a confirmation for the password, deselect “Send Diagnostics & Usage data to Apple”, and click Continue:
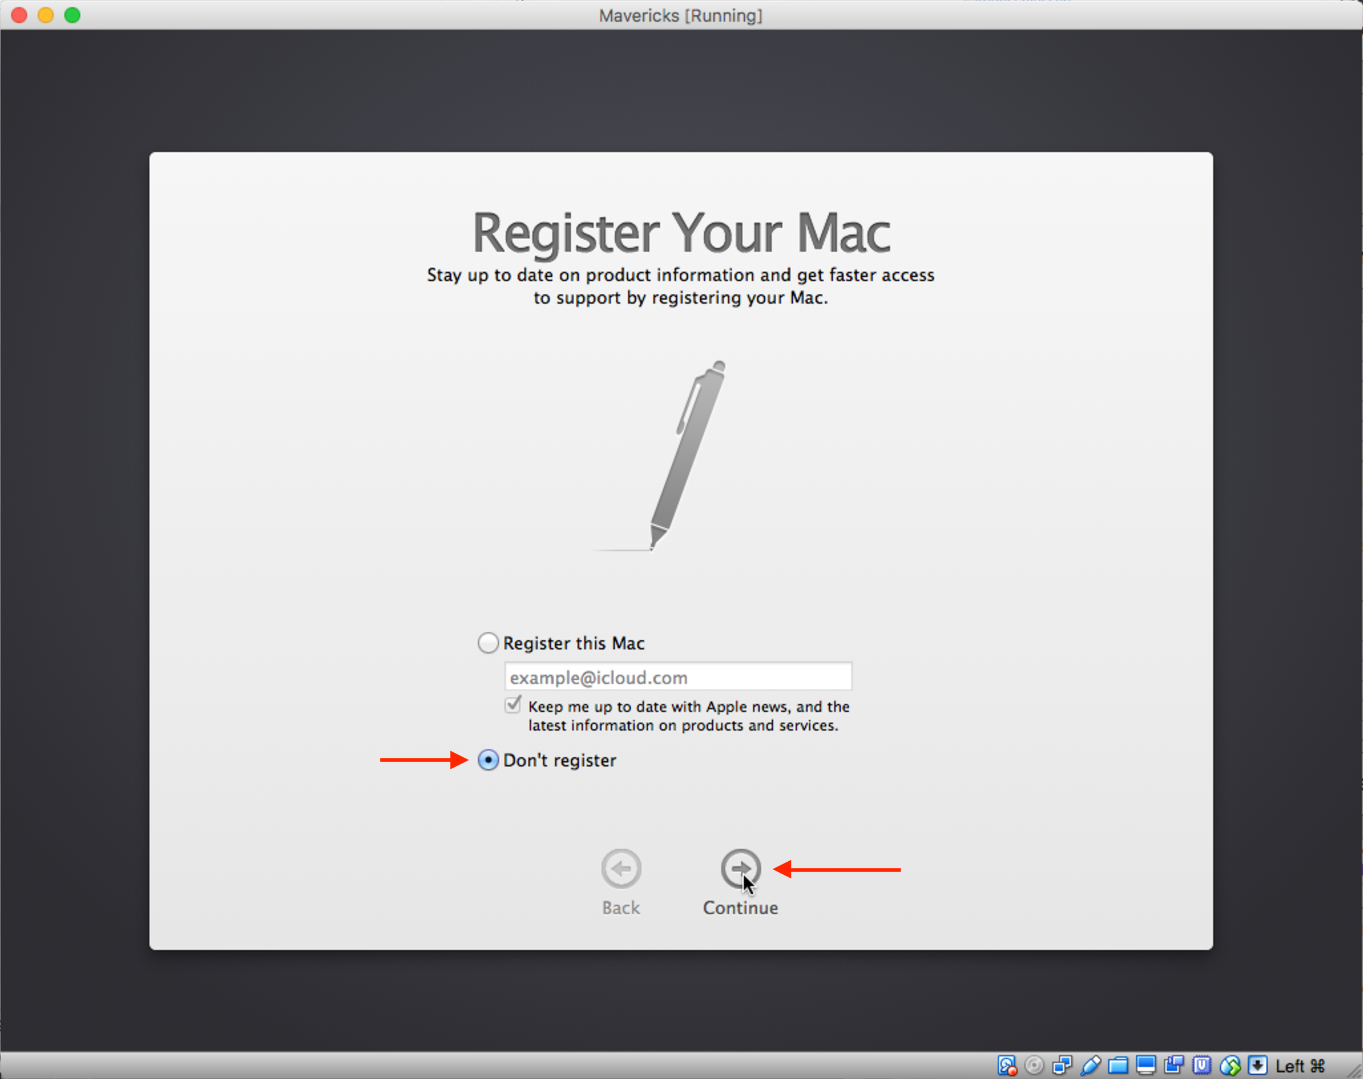
Choose not to register your Mac…
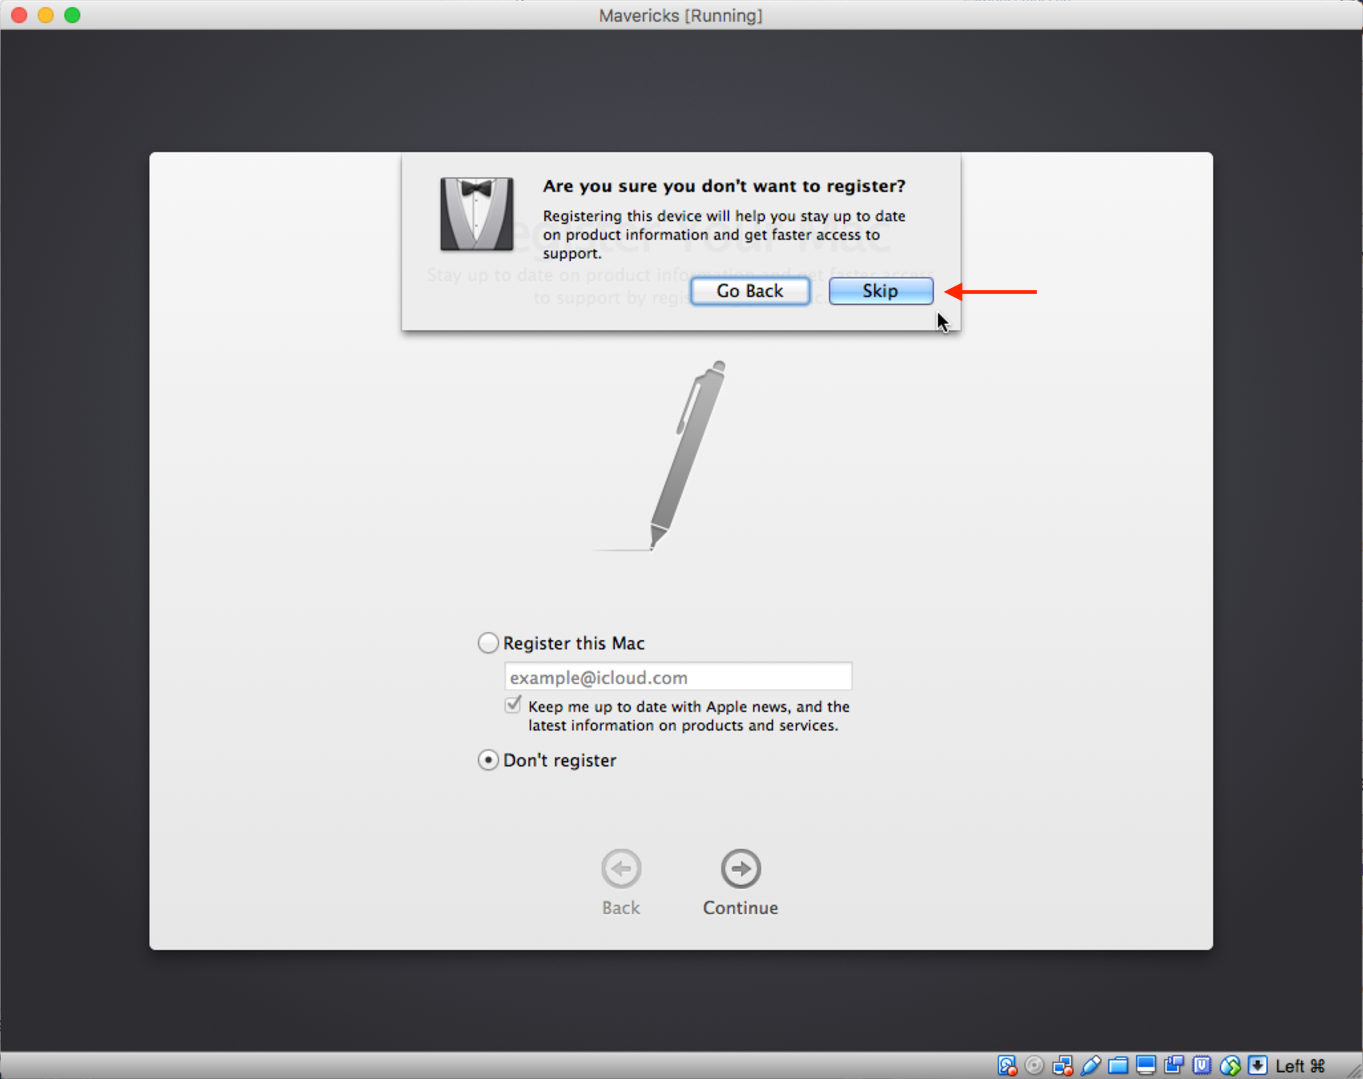
…and skip the third annoying message:
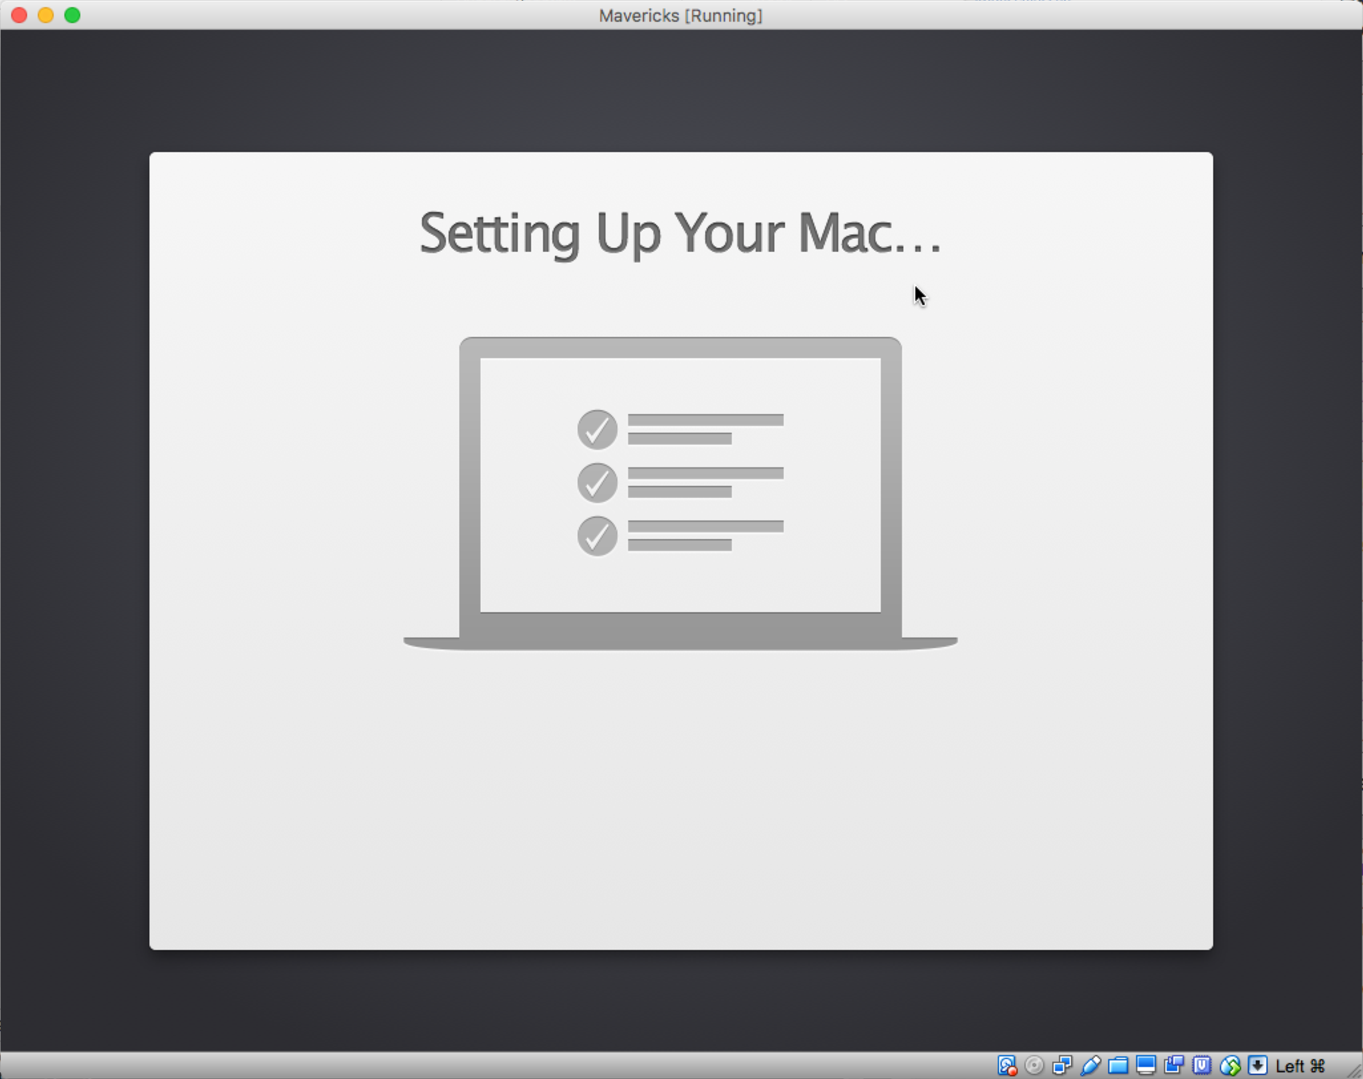
Wait in awe for your Mac to be set up:
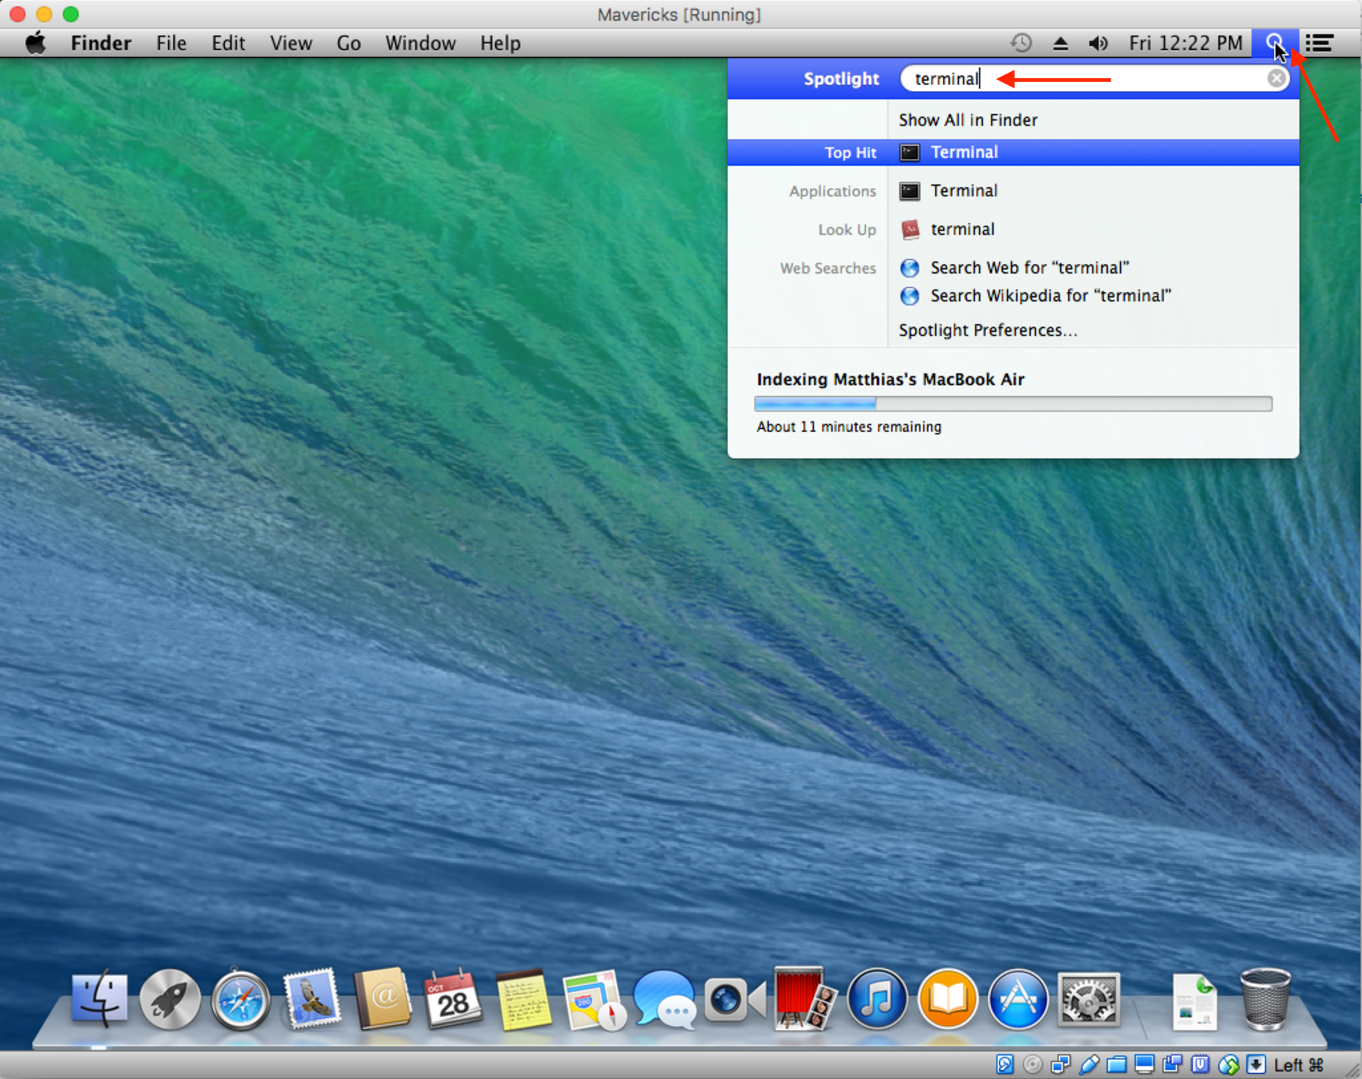
Once your Mac has started, click on the Search Loupe icon in the upper right corner, then type terminal; into the search field, and start Terminal:
I show in the screen shot below what I did finally to export the PDFKit.framework to the host system. To find out the IP Address of the host system, the easiest way is probably to Alt+Click on the network icon in the menu bar. My IP address being 192.168.1.223, I do this to export the PDFKit.framework:
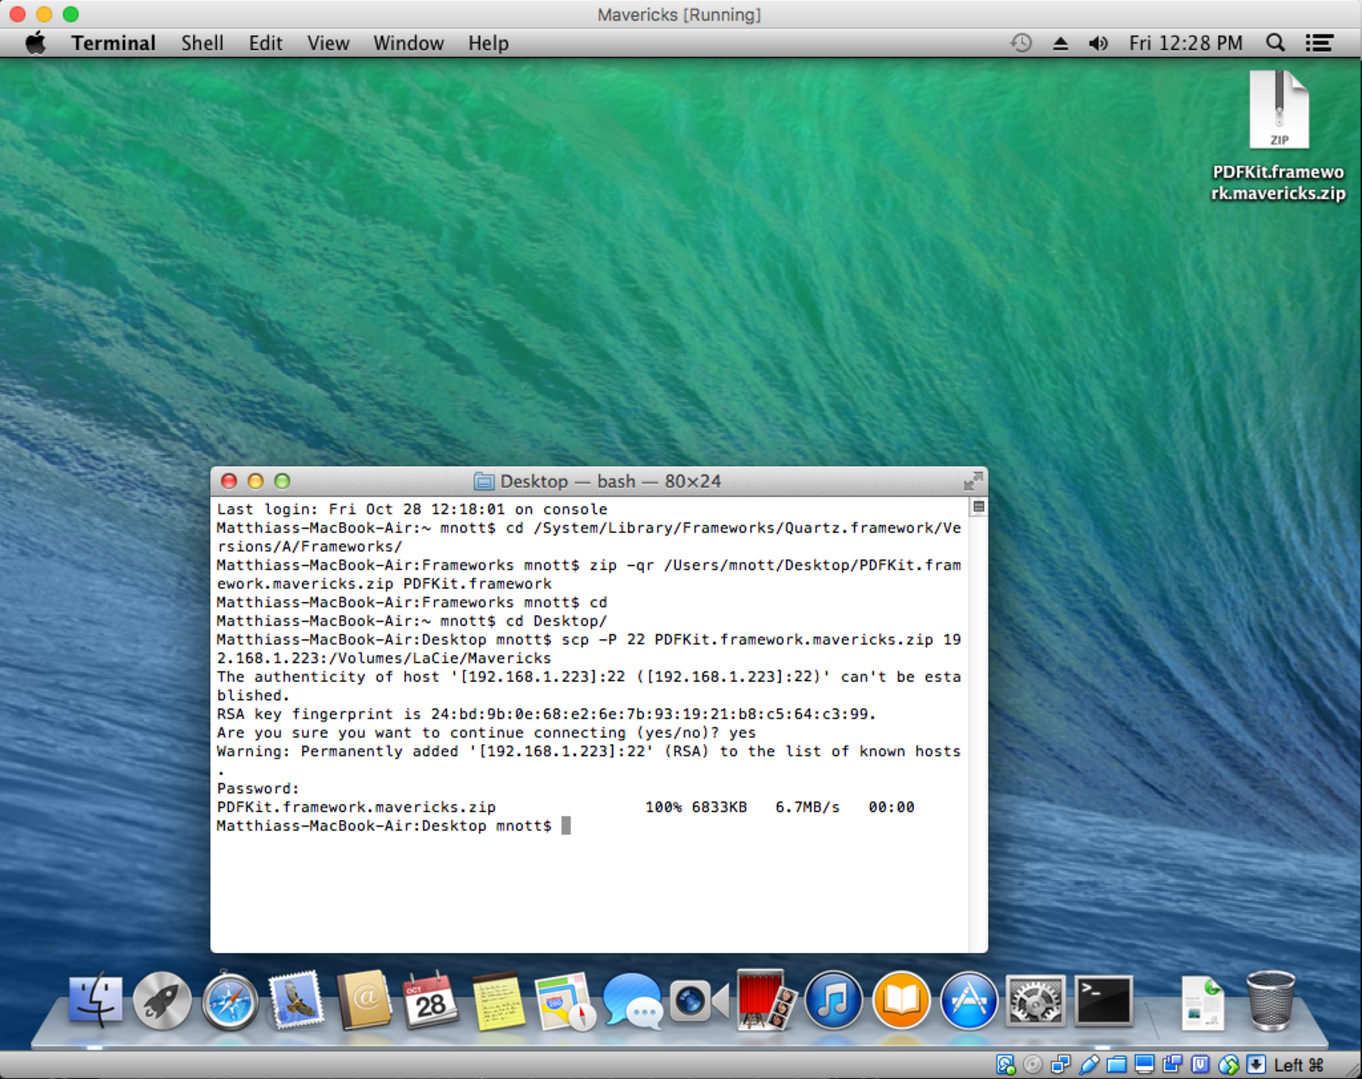
Now here is what I do in the console of the virtual machine. First I change to the directory where we find the PDFKit.framework. Then I zip it to the user’s Desktop (use a different user name than mnott if you chose to do so, before). Next, I change back to first my user’s directory, and then to the Desktop, and I finally use scp to copy the zip file over to the host machines:
Matthiass-MacBook-Air:~ mnott$ cd /System/Library/Frameworks/Quartz.framework/Versions/A/Frameworks/
Matthiass-MacBook-Air:Frameworks mnott$ zip -qr /Users/mnott/Desktop/PDFKit.framework.mavericks.zip PDFKit.framework
Matthiass-MacBook-Air:Frameworks mnott$ cd
Matthiass-MacBook-Air:~ mnott$ cd Desktop/
Matthiass-MacBook-Air:Desktop mnott$ scp -P 22 PDFKit.framework.mavericks.zip 192.168.1.223:/Volumes/LaCie/Mavericks
I then am asked for a confirmation (type yes, followed by Enter), and the user’s password on the host operating system. After this, the file will be copied to the directory where we had already been working. You can now stop the virtual machine and verify in the host computer whether the file is there:
mnott:Mavericks mnott$ ls -la
total 34753288
drwxr-xr-x   8 mnott  staff         272 28 Okt 21:28 .
drwxrwxr-x@ 19 mnott  staff         714 28 Okt 18:34 ..
-rw-r--r--@  1 mnott  staff   481067537 28 Okt 20:10 BaseSystem.dmg
-rw-r--r--@  1 mnott  staff  5290551900 28 Okt 19:06 InstallESD.dmg
drwxr-xr-x   7 mnott  staff         238 28 Okt 21:28 Mavericks
-rw-r--r--   1 mnott  staff     7009067 28 Okt 21:28 PDFKit.framework.mavericks.zip
-rw-r--r--   1 mnott  staff  6012985344 28 Okt 20:16 mavericks.cdr
-rw-r--r--   1 mnott  staff  6002073600 28 Okt 20:13 mavericks.sparseimage
mnott:Mavericks mnott$
As you can see in the highlighted line above, the whole action that we just did was only to get out those about 6 MB of PDFKit framework. Oh well. Now, let’s extract it:
mnott:Mavericks mnott$ unzip -q PDFKit.framework.mavericks.zip
mnott:Mavericks mnott$ ls -la
total 34753288
drwxr-xr-x   9 mnott  staff         306 28 Okt 21:29 .
drwxrwxr-x@ 19 mnott  staff         714 28 Okt 18:34 ..
-rw-r--r--@  1 mnott  staff   481067537 28 Okt 20:10 BaseSystem.dmg
-rw-r--r--@  1 mnott  staff  5290551900 28 Okt 19:06 InstallESD.dmg
drwxr-xr-x   7 mnott  staff         238 28 Okt 21:28 Mavericks
drwxr-xr-x   5 mnott  staff         170 28 Okt 20:35 PDFKit.framework
-rw-r--r--   1 mnott  staff     7009067 28 Okt 21:28 PDFKit.framework.mavericks.zip
-rw-r--r--   1 mnott  staff  6012985344 28 Okt 20:16 mavericks.cdr
-rw-r--r--   1 mnott  staff  6002073600 28 Okt 20:13 mavericks.sparseimage
mnott:Mavericks mnott$
Now, in the next section I’ll describe how to deploy the framework.
How do we deploy PDFKit.framework
The main problem deploying the framework, how ever you get it, is that typically your system will likely have System Integrity Protection activated. This will prevent you from overwriting the files. Here is how you check this:
mnott:Mavericks mnott$ csrutil status
System Integrity Protection status: enabled.
mnott:Mavericks mnott$
If you read disabled, you’re good to deploy the framework. If not, you need to do a detour. Let’s assume your System Integrity Protection is enabled. Here are the steps to do:
- Reboot the Mac and hold down Command + R keys simultaneously after you hear the startup chime, this will boot OS X into Recovery Mode
- When the “OS X Utilities” screen appears, pull down the ‘Utilities’ menu at the top of the screen instead, and choose “Terminal”
- Type the following command into the terminal then hit return:
csrutil disable; reboot - You’ll see a message saying that System Integrity Protection has been disabled and the Mac needs to restart for changes to take effect, and the Mac will then reboot itself automatically, just let it boot up as normal
Now, when you’re back in your normal operating system, go to the terminal and from there go over to the system directory which contains the existing PDFKit:
mnott:Mavericks mnott$ cd /System/Library/Frameworks/Quartz.framework/Versions/A/Frameworks/
mnott:Frameworks mnott$ ls -la
total 6
drwxr-xr-x  9 root   wheel  306 28 Okt 16:19 .
drwxr-xr-x  6 root   wheel  204 26 Okt 07:52 ..
drwxr-xr-x  6 root   wheel  204 26 Okt 07:52 ImageKit.framework
lrwxr-xr-x  1 root   wheel   26 28 Okt 16:19 PDFKit.framework
drwxr-xr-x  5 root   wheel  170 26 Okt 07:52 QuartzComposer.framework
drwxr-xr-x  5 root   wheel  170 26 Okt 07:52 QuartzFilters.framework
drwxr-xr-x  6 root   wheel  204 26 Okt 07:52 QuickLookUI.framework
mnott:Frameworks mnott$
Let’s move that PDFKit.framework to PDFKit.framework.sierra, move the previously extracted Mavericks version of the PDFKit.framework over here and name it PDFKit.framwork.mavericks, and then set a symbolic link so that PDFKit.framework points to PDFKit.framework.mavericks:
mnott:Frameworks mnott$ sudo mv PDFKit.framework PDFKit.framework.sierra
mnott:Frameworks mnott$ sudo mv /Volumes/LaCie/Mavericks/PDFKit.framework PDFKit.framework.mavericks
mnott:Frameworks mnott$ sudo ln -s PDFKit.framework.mavericks PDFKit.framework
mnott:Frameworks mnott$ ls -la
total 8
drwxr-xr-x  9 root   wheel  306 29 Okt 00:51 .
drwxr-xr-x  6 root   wheel  204 26 Okt 07:52 ..
drwxr-xr-x  6 root   wheel  204 26 Okt 07:52 ImageKit.framework
lrwxr-xr-x  1 root   wheel   26 29 Okt 00:51 PDFKit.framework -> PDFKit.framework.mavericks
drwxr-xr-x  5 mnott  staff  170 28 Okt 14:38 PDFKit.framework.mavericks
drwxr-xr-x  6 root   wheel  204 26 Okt 07:52 PDFKit.framework.sierra
drwxr-xr-x  5 root   wheel  170 26 Okt 07:52 QuartzComposer.framework
drwxr-xr-x  5 root   wheel  170 26 Okt 07:52 QuartzFilters.framework
drwxr-xr-x  6 root   wheel  204 26 Okt 07:52 QuickLookUI.framework
mnott:Frameworks mnott$
What are Side-Effects?
The first outcome of this was that Skim’s annotations are working again. So this is great. I’ve yet noticed that sometimes, QuickLook would not open or throw an error when opening. In this case, I’d switch back to the original version of PDFKit (the Sierra version), using this command script:
#!/bin/bash

scriptname=`basename $0`
dir=/System/Library/Frameworks/Quartz.framework/Versions/A/Frameworks

if [ $# -lt 1 ]; then
  echo "Usage: $scriptname "
  echo ""
  echo "For example: $scriptname sierra"
  echo ""
  echo The following PDFKit Frameworks are available:
  echo ""
  (
    cd $dir
    ls -lad PDF*
  )
  exit
fi

os=$1

if [ ! -L $dir/PDFKit.framework ]; then
  echo "$dir/PDFKit.framework is not a symbolic link. Moving it to become one..."
  (
    cd $dir
    if [ ! -d PDFKit.framework ]; then
      echo "Some error has occurred changing to $dir. Aborting."
      exit 1
    fi
    sudo mv PDFKit.framework PDFKit.framework.$os
    sudo ln -s PDFKit.framework.$os PDFKit.framework
  )
else
  (
    cd $dir
    if [ ! -L PDFKit.framework -o ! -d PDFKit.framework.$os ]; then
      echo "Some error has occurred changing to $dir. Aborting."
      exit 1
    fi
    sudo rm PDFKit.framework
    sudo ln -s PDFKit.framework.$os PDFKit.framework
  )
fi
Assume I’ve put this script as a file pdfkit into some directory that I have in my path. Like, /usr/local/bin. I’d then first of all make it executable:
mnott:~ mnott$ cd /usr/local/bin
mnott:bin mnott$ chmod 755 pdfkit
Now I can call the script with no arguments, and it will show me which variants of PDFKit I have available:
mnott:bin mnott$ pdfkit
Usage: pdfkit

For example: pdfkit sierra

The following PDFKit Frameworks are available:

lrwxr-xr-x  1 root   wheel   23 29 Okt 01:19 PDFKit.framework -> PDFKit.framework.sierra
drwxr-xr-x  5 mnott  staff  170 28 Okt 14:38 PDFKit.framework.mavericks
drwxr-xr-x  6 root   wheel  204 26 Okt 07:52 PDFKit.framework.sierra
mnott:bin mnott$
In the above example, I’ve both the Mavericks as well as the Sierra version available, and the Sierra version is currently selected. Let’s switch over to the Mavericks version, and afterwards verify whether it has happened by calling the program again, with no arguments (notice that depending on your setup, you may be asked to put in your password):
mnott:bin mnott$ pdfkit mavericks
mnott:bin mnott$ pdfkit
Usage: pdfkit

For example: pdfkit sierra

The following PDFKit Frameworks are available:

lrwxr-xr-x  1 root   wheel   26 29 Okt 01:26 PDFKit.framework -> PDFKit.framework.mavericks
drwxr-xr-x  5 mnott  staff  170 28 Okt 14:38 PDFKit.framework.mavericks
drwxr-xr-x  6 root   wheel  204 26 Okt 07:52 PDFKit.framework.sierra
mnott:bin mnott$
So as a summary, the most important side-effect probably is that in order for this continuous switching of PDFKit to work, we need to leave System Integrity Protection disabled. Also, it can come in inconveniently that we even have to do the switch. But at least, with the above solution, we can re-gain control over PDFKit – until Apple fixes it.

Thanks so much, Matt, you’re a life saver!
I teach an online physics course using Skim annotation over Collaborate in tutorials, and for the first classes after the Sierra update I had to write invisible writing then scroll out of the page to make it appear for every line of every calculation! Impossible.
This has fixed it, so my students and I are very, very grateful.
Hi David,
nice to see that I could help you and your students!
Now, here’s yet another update: Apple commented on my bug report and has said they have fixed it in 10.12.2 Beta (16C41b). You bet I’ve immediately upgraded (you need to have subscribed to receiving beta upgrades). This has indeed fixed the problem, and so I’d really suggest to go that route.
It has not fixed all the problems, because some things still persist, but mostly, I’ve got it running now. Some screen updates are lagging sometimes, but not that I would care.
Now every downside also has an upside. See here: http://www.mnott.de/update-for-the-pdfkit-problems-and-some-other-workflow/
Oh yes, and specifically for your workflow – annotating on a shared screen – it may be that the iPad option with the Pencil might be very interesting – you could use both Notability (it has a Mac app, too) as well as the workflow I’ve described with GoodReader, and those updates would appear immediately on screen. Notability would be even more convenient for that, as there you don’t have to switch to edit mode all the time.